
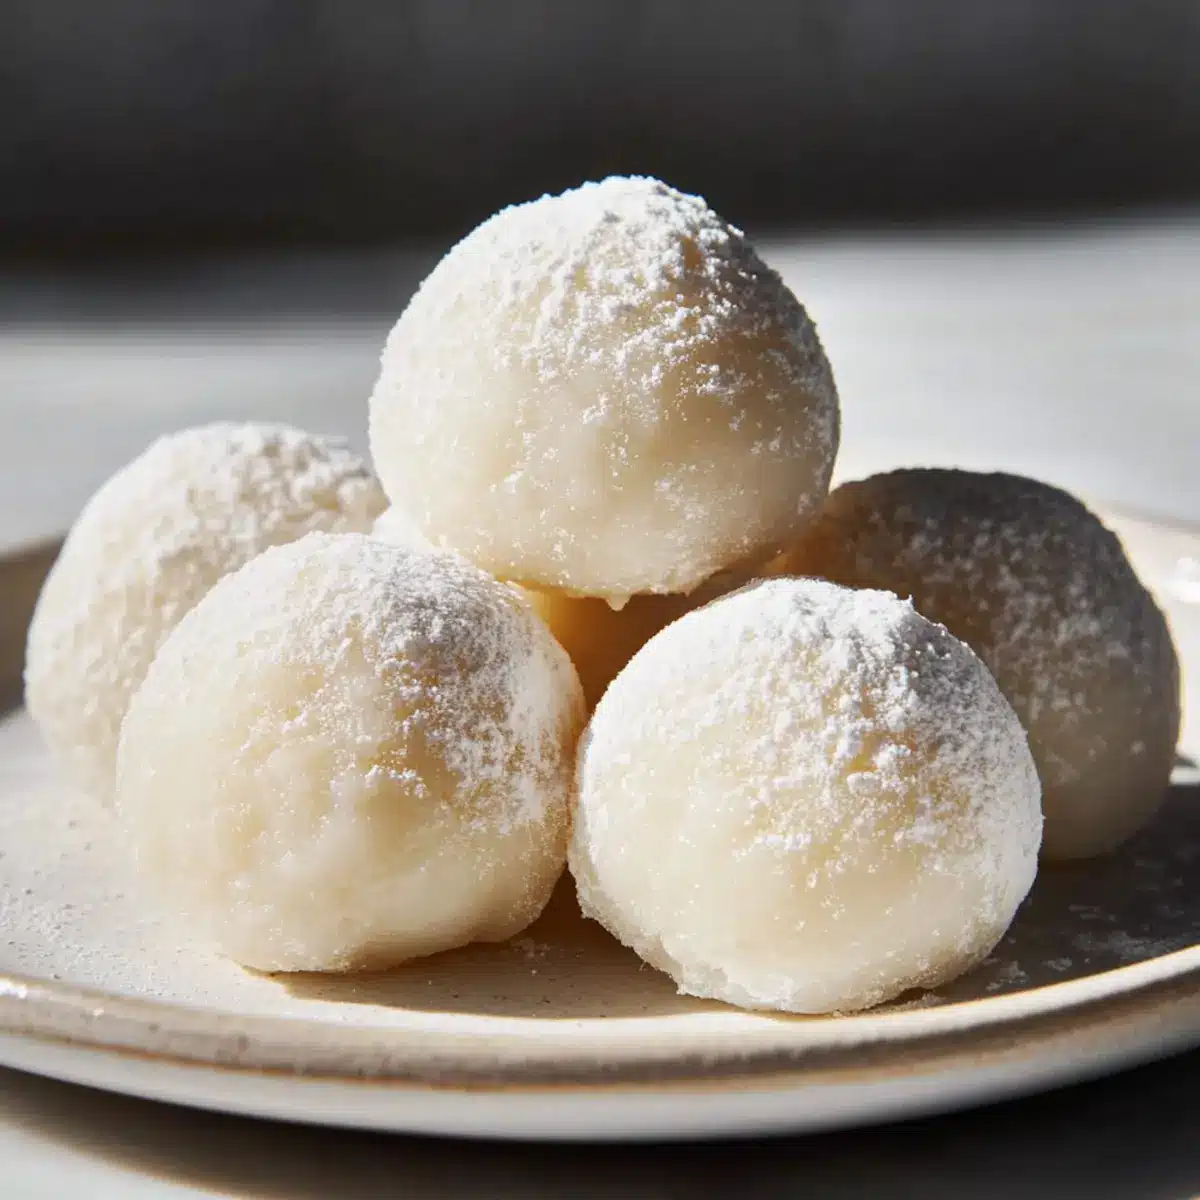
As I stood in my kitchen, the soft, sweet scent of cooked rice flour wafted through the air, transporting me to Japan with each inhale. I couldn’t resist the urge to whip up a batch of homemade milk mochi, a beloved treat that combines the perfect chewiness with a creamy texture. This milk mochi recipe is a true gem, relying on simple ingredients you likely have at home, allowing you to create an authentic Japanese dessert in just 30 minutes! Not only is it a delightful snack any time of the day, but it also serves as a playful topping for shaved ice or a lovely accompaniment to your favorite tea. Curious how you can achieve this pillowy delight yourself? Let’s dive in and make mochi magic happen!
Why is Milk Mochi a Must-Try?
Chewy Delight: This milk mochi recipe offers a uniquely chewy texture that melts in your mouth, creating a delightful snacking experience. Quick & Easy: With just 30 minutes of prep time, you can transform simple ingredients into a charming dessert. Versatile Treat: Whether enjoyed plain, dusted with powdered sugar, or drizzled with condensed milk, these mochi are perfect for any occasion. Cultural Experience: Savor a taste of Japan from the comfort of your home! For a twist, check out our Turkey Chili Comforting or explore delightful pairings like the Chick Fil Copycat for a full meal experience.
Milk Mochi Ingredients
For the Mochi Base
- Glutinous Rice Flour – This is essential for that characteristic chewy texture; if you don’t have it, sweet rice flour can work too.
- Whole Milk – It adds the delicious creaminess; feel free to swap with non-dairy milk for a lactose-free alternative, though the texture might slightly differ.
- Granulated Sugar – Adjust the sweetness to your taste; reduce it if you prefer a less sweet treat.
- Cornstarch – Helps to stabilize the texture; for coating, potato starch can be used as a substitution.
- Water – Necessary to adjust the batter consistency; add as needed to achieve a smooth and creamy batter.
- Salt – Enhances the overall flavor of the mochi.
For Dusting and Coating
- Potato Starch or Cornstarch – This prevents sticking and gives the mochi a nice finish; it’s essential to dust each piece well to avoid stickiness.
Optional Add-ins
- Sweetened Condensed Milk – Drizzle this for an extra touch of richness and sweetness that takes your milk mochi to the next level.
Dive into this milk mochi recipe and enjoy creating these chewy, creamy delights at home!
Step‑by‑Step Instructions for Milk Mochi Recipe
Step 1: Mix Ingredients
In a large microwave-safe bowl, combine 1 cup of glutinous rice flour, 2 tablespoons of granulated sugar, 1 tablespoon of cornstarch, and a pinch of salt. Gradually add 1 cup of whole milk and 1/4 cup of water, whisking until the mixture is smooth and free of lumps. Ensure the batter is well-blended and has a pourable consistency.
Step 2: Microwave the Mixture
Cover the bowl with vented plastic wrap, allowing steam to escape. Place the bowl in the microwave and cook for 1 minute on high. After the first minute, stir the mixture thoroughly, then continue microwaving in 1-minute intervals for a total of 3 minutes, or until the dough becomes translucent and stretchy.
Step 3: Cool the Dough
Once the mixture is cooked, carefully remove it from the microwave, as it will be hot. Let the dough rest for 2-3 minutes to cool slightly, which helps with handling it later. The resting time ensures the perfect texture for your homemade milk mochi.
Step 4: Shape the Mochi
Prepare a clean work surface by dusting it generously with potato starch. Transfer the mochi dough onto the surface and divide it into 8-10 equal pieces. Lightly coat your hands with starch to prevent sticking, then roll each piece into smooth balls, ensuring they retain their shape.
Step 5: Finish the Mochi
Allow the shaped mochi balls to cool for about 15 minutes, allowing them to firm up slightly. After cooling, brush off any excess potato starch gently. For an extra indulgent touch, drizzle with sweetened condensed milk or dust with powdered sugar before serving your delightful milk mochi.
Expert Tips for Making Milk Mochi
-
Perfect Consistency: Use room temperature milk to achieve a smoother batter; cold milk can lead to lumps in your mixture.
-
Microwave Timing: Be attentive during microwave intervals to prevent overcooking, which may result in a tough texture instead of the desired chewy feel.
-
Cool Handling: Remember to let the dough cool for a few minutes before handling; this will prevent burns and make shaping more manageable.
-
Starch Coating: Dust each mochi generously with potato starch to avoid stickiness and ensure a lovely finish; omitting this step can ruin the texture.
-
Flavor Adjustments: Don’t hesitate to play with flavors; try using flavored milks or drizzling with matcha or condensed milk to elevate this milk mochi recipe!
What to Serve with Homemade Milk Mochi
Indulging in soft, chewy milk mochi opens up a world of delightful pairings that enhance its charm and flavors.
- Green Tea: Its earthy notes provide a calming contrast, making the mochi’s sweetness even more enjoyable during afternoon tea.
- Fresh Berries: Juicy strawberries or blueberries add a refreshing burst of flavor, balancing the creamy texture of the mochi beautifully.
- Matcha Latte: The rich, slightly bitter taste of matcha complements the sweet mochi, creating an elevated dessert experience.
- Shaved Ice: Top your mochi over a mound of fluffy shaved ice for a fun twist—perfect for a hot day!
- Powdered Sugar: A light dusting adds a touch of sweetness and a tempting visual appeal to each adorable mochi ball.
- Condensed Milk Drizzle: Elevate your treat by drizzling with sweetened condensed milk; its creaminess complements the mochi’s texture.
- Coconut Milk: A drizzle or dip of coconut milk brings a tropical flair that melds wonderfully with the chewy delight of the mochi.
- Coffee: Pairing a steaming cup with mochi brings warmth and harmony to your snack, enhancing those cozy kitchen vibes.
- Chocolate Sauce: Drizzled chocolate sauce introduces a decadent richness that’s simply irresistible—perfect for the chocoholics!
- Mochi Ice Cream: For an exciting dessert adventure, roll milk mochi around your favorite flavors of ice cream, merging textures and tastes!
Milk Mochi Recipe Variations & Substitutions
Feel free to let your creativity shine as you customize your milk mochi experience with these delicious twists!
- Dairy-Free: Swap whole milk for almond or coconut milk to create a creamy, lactose-free delight.
- Sweetened Matcha Mochi: Add a teaspoon of matcha powder to the dough for a beautiful green color and earthy flavor that elevates the classic taste.
- Boba Milk Mochi: Incorporate sweetened boba pearls into the mochi filling, or wrap chewy mochi around the boba for a fun, textural surprise.
- Fruit-Flavored Mochi: Blend pureed strawberries, mango, or other fruit into the batter for a fruity twist—perfect for summer treats!
- Chocolate Mochi: Stir in cocoa powder for a rich, chocolatey flavor; you can also coat the finished mochi in chocolate for an indulgent touch.
- Nut Butter Surprise: Inject a dollop of peanut or almond butter into each mochi ball before sealing for a creamy, nutty burst in every bite.
- Coconut Flakes: Roll the mochi balls in shredded coconut for a tropical flavor and a delightful exterior texture.
- Spicy Sweet: Drizzle with a mix of honey and chili powder to add a spicy-sweet kick to your mochi; this combination surprises the palate in the best way!
As you explore these variations, don’t forget the delightful pairings, like enjoying your milk mochi with a warm cup of green tea or a cooling scoop of ice cream. Check out our Chili Every Week for a comforting meal suggestion that goes well with your dessert!
Make Ahead Options
These delicious milk mochi are perfect for meal prep lovers! You can prepare the mochi dough up to 24 hours in advance; just mix the ingredients and microwave as directed, then allow the dough to cool. After shaping the mochi into balls, store them in an airtight container at room temperature to maintain their delightful chewiness. Remember, avoid refrigerating them, as that can lead to hardness; they are best enjoyed fresh! When you’re ready to serve, simply brush off any excess starch, and for a gourmet touch, drizzle with sweetened condensed milk or dust with powdered sugar—enjoy this homemade treat with minimal effort!
How to Store and Freeze Milk Mochi
Room Temperature: Store milk mochi in an airtight container at room temperature for up to 3 days. This helps maintain its chewy texture and prevents drying out.
Fridge: If you need to keep it longer, you can refrigerate the mochi for up to a week. Note that refrigeration may cause the texture to become firmer; allow it to come to room temperature before serving.
Freezer: For extended storage, freeze the mochi in a single layer, then transfer to an airtight container for up to 1 month. To enjoy, thaw at room temperature or microwave briefly for a fresh, chewy texture.
Reheating: To reheat, simply place the mochi in the microwave for about 10-15 seconds. This will revive the softness and chewiness, making it enjoyable again!
Milk Mochi Recipe FAQs
What type of rice flour should I use for milk mochi?
You should use glutinous rice flour, which provides the signature chewy texture of mochi. If that’s not available, sweet rice flour can be a great substitute!
How should I store milk mochi?
Store your milk mochi in an airtight container at room temperature for up to 3 days for the best texture. If you prefer to store it longer, refrigerating it is an option for up to a week, but be aware that it may harden slightly. Always bring it back to room temperature before serving to enjoy its delightful chewiness.
Can I freeze milk mochi?
Absolutely! To freeze, arrange the mochi in a single layer on a baking sheet and place it in the freezer until firm. Then, transfer the mochi to an airtight container or freezer bag, where it can last for up to 1 month. To enjoy, simply let it thaw at room temperature or give it a quick pop in the microwave for around 10-15 seconds.
What if my mochi dough turns out too sticky?
If your dough is too sticky, don’t worry! This can happen if it wasn’t cooked long enough or if too much moisture was added. Try microwaving in additional 30-second intervals until it reaches a translucent and stretchy consistency. Always remember to dust your hands and the surface with potato or cornstarch to help shape it without sticking.
Are there any dietary considerations for milk mochi?
Yes! If you or someone you’re serving has dietary restrictions, you can use non-dairy milk as a lactose-free alternative. Just be aware that this might slightly alter the texture. Additionally, ensure that any additional toppings, like sweetened condensed milk, are safe for any allergies you may need to consider. Always check ingredient labels to be safe.
How long does it take to make milk mochi from start to finish?
This lovely treat can be made in approximately 30 minutes! With just a little bit of prep and microwaving, you’ll have delicious milk mochi ready to enjoy. Perfect for a last-minute dessert or a cozy snack!
Delicious Milk Mochi Recipe: Chewy Japanese Treats Made Easy
Ingredients
Equipment
Method
- In a large microwave-safe bowl, combine 1 cup of glutinous rice flour, 2 tablespoons of granulated sugar, 1 tablespoon of cornstarch, and a pinch of salt. Gradually add 1 cup of whole milk and 1/4 cup of water, whisking until the mixture is smooth and free of lumps.
- Cover the bowl with vented plastic wrap, allowing steam to escape. Microwave on high for 1 minute, then stir and continue in 1-minute intervals for a total of 3 minutes until the dough is translucent.
- Remove the bowl from the microwave and let the dough cool for 2-3 minutes.
- Dust a clean surface generously with potato starch. Divide the dough into 8-10 equal pieces and roll into smooth balls.
- Let the mochi balls cool for about 15 minutes, then dust off excess starch and drizzle with sweetened condensed milk or powdered sugar.
Leave a Reply