
The sun beats down as I stand impatiently in my kitchen, eagerly awaiting that first sizzling sound of chicken frying. There’s something magical about the aroma that wafts through the air, hinting at the Crispy Dill Chicken Sandwich I’m about to create: a flavor explosion awaits! This delightful sandwich not only serves up juicy, perfectly cooked chicken but also offers a quick and customizable lunch solution that can elevate your meal prep game. With its crunchy panko coating and zesty dill mayo, it’s like bringing a slice of gourmet goodness to the comfort of your own home. Whether you’re in a hurry or looking to impress, this recipe strikes the perfect balance between ease and deliciousness. What delightful twists will you add to make it your own?
What Makes This Sandwich Irresistible?
Crispy Texture: The panko breadcrumbs deliver an unmatched crunch that keeps each bite exciting and satisfying.
Flavorful Customization: Switch up your ingredients! Try chicken thighs for extra juiciness or whole wheat flour for a healthier twist.
Quick Prep: This recipe comes together in under an hour, making it perfect for busy days when you crave something special.
Meal Prep Friendly: Make a batch for a week’s worth of delicious lunches; just reheat in the oven for that fresh-out-of-the-fryer taste!
Crowd-Pleaser: With zesty dill mayo and fresh toppings, it’s sure to impress family and friends—especially when paired with sweet potato fries or a refreshing coleslaw!
Crispy Dill Chicken Sandwich Ingredients
For the Chicken
• Chicken Breasts – Tender and juicy, these are the star of your sandwich; or swap for chicken thighs for richer flavor.
• All-Purpose Flour – Creates that crunchy coating; consider whole wheat flour for added nutrition.
• Salt – Essential for enhancing the chicken’s natural flavors; never skip it!
• Black Pepper – Adds depth and mild spice—adjust to your liking.
For the Coating
• Garlic Powder – Infuses an aromatic garlic flavor into the breading.
• Onion Powder – Offers subtle sweetness and savory notes to kick things up a notch.
• Dried Dill – Brings that fresh, herby essence; you can mix with other herbs for variety.
• Eggs – Binds the coating to the chicken for a satisfying crunch.
• Milk – Lightens the egg wash, ensuring a smooth and even coating.
• Panko Breadcrumbs – Provides an irresistible crunch that outlasts standard breadcrumbs.
For the Dill Mayo
• Mayonnaise – A rich base to mix with dill, adding creaminess and flavor.
• Fresh Dill – Brightens the mayo, complementing the dried dill used in coating.
• Lemon Juice – Balances the richness with a delightful tanginess.
For the Sandwich Assembly
• Brioche Buns – Soft and flavorful; toast lightly to keep them from becoming soggy.
• Shredded Lettuce – Adds freshness and crunchy texture to each bite.
• Dill Pickle Slices – Introduce briny acidity to amplify the flavor profile.
This Crispy Dill Chicken Sandwich is your gateway to a homemade flavor explosion!
Step‑by‑Step Instructions for Crispy Dill Chicken Sandwich: A Flavor Explosion Awaits
Step 1: Prepare the Chicken
Begin by slicing the chicken breasts into even fillets, aiming for about 1/2 inch thickness for uniform cooking. This step ensures your Crispy Dill Chicken Sandwich has tender, juicy chicken throughout. Once sliced, gently pound the chicken even further using a meat mallet if needed, to avoid uneven cooking.
Step 2: Mix Coating
In a shallow dish, combine all-purpose flour, salt, black pepper, garlic powder, onion powder, and dried dill. This flavor-packed mixture will form the base coating for your chicken. Stir well to evenly distribute the spices, ensuring each piece of chicken gets that delightful crunch and flavor.
Step 3: Whisk Egg Wash
In a separate bowl, whisk together eggs and milk until fully blended to create a smooth egg wash. This mixture is crucial for adhering the panko breadcrumbs to the chicken. The egg wash adds richness and helps achieve that golden crust that will make your crispy dill chicken sandwich truly irresistible.
Step 4: Set Up Breadcrumbs
Place panko breadcrumbs in another shallow dish, arranging your workstation with the flour mixture, egg wash, and breadcrumbs in a line. This efficient setup will help you easily coat the chicken, allowing you to create that crunchy exterior everyone loves.
Step 5: Coat Chicken
Take a chicken fillet and first dip it in the flour mixture, ensuring it’s fully coated on both sides, and shake off excess flour. Next, immerse the fillet in the egg wash, letting any extra drip off before finally coating it with the panko breadcrumbs, patting gently to ensure an even layer for extra crunch.
Step 6: Fry Chicken
Heat vegetable oil in a skillet over medium-high heat until shimmering, approximately 350°F. Carefully add the coated chicken fillets, frying them for about 4-5 minutes on each side, or until they become golden brown and crispy. Make sure not to overcrowd the skillet, as this will lower the oil temperature and affect crispiness.
Step 7: Prepare Dill Mayo
While the chicken is frying, mix mayonnaise, fresh dill, and lemon juice in a small bowl until smooth and well-combined. This zesty dill mayo will add a refreshing zing to your crispy dill chicken sandwich, enhancing the overall flavor profile delightful in every bite.
Step 8: Toast Buns
In the same skillet used for frying, lightly toast the brioche buns over medium heat until golden. This will provide a perfect base for your sandwich while preventing sogginess from the dill mayo. Keeping an eye on the buns will ensure they crisp without burning, enhancing the eating experience.
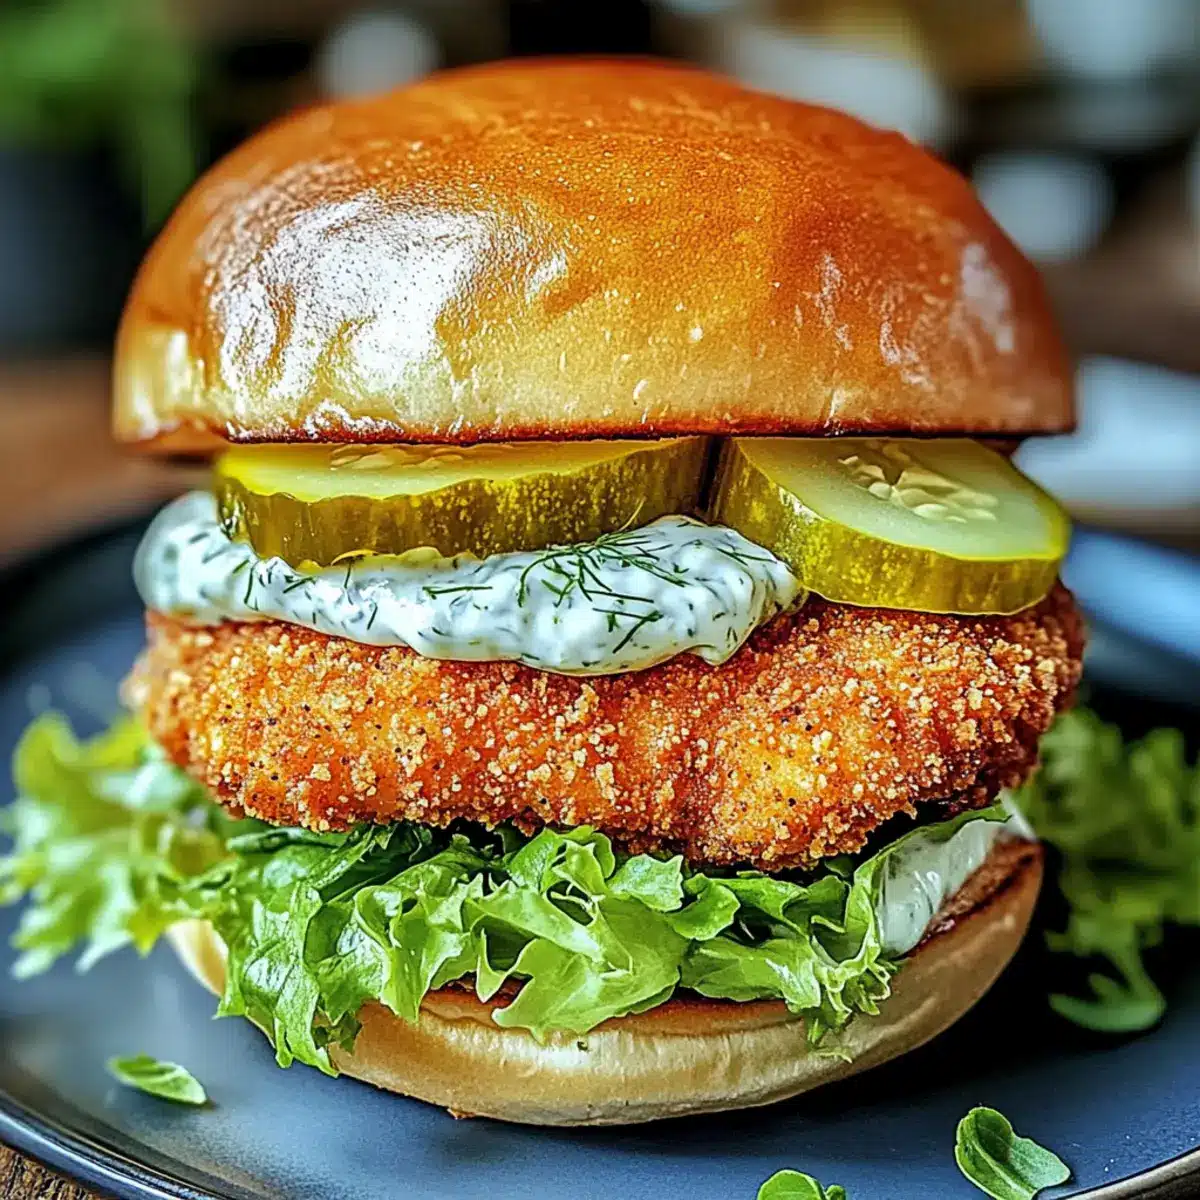
Step 9: Assemble Sandwich
Spread a generous layer of dill mayo on the bottom half of the toasted brioche buns. Top with shredded lettuce, followed by a crispy chicken fillet and dill pickle slices. Crown with the top half of the bun, pressing down gently to secure all those flavors together in your Crispy Dill Chicken Sandwich, ready to enjoy!
How to Store and Freeze Crispy Dill Chicken Sandwich
Fridge: Store leftover chicken and sandwich components in airtight containers for up to 3 days. Reheat in the oven to maintain crispiness before serving.
Freezer: For longer storage, freeze the cooked chicken for up to 3 months. Wrap each piece in plastic wrap and place in a freezer bag, removing excess air.
Reheating: To reheat the frozen chicken, bake in the oven at 375°F (190°C) for about 20-25 minutes or until heated through. Avoid using the microwave for better texture.
Assembly Tips: Keep buns and fresh toppings separate until you’re ready to enjoy your Crispy Dill Chicken Sandwich to ensure optimal freshness and crunchiness!
What to Serve with Crispy Dill Chicken Sandwich
Bringing together a delightful meal is all about balance; let’s enhance your culinary experience!
-
Sweet Potato Fries: These add a subtle sweetness and crispy texture that perfectly complements the savory crunch of the sandwich.
-
Fresh Coleslaw: A crisp and tangy slaw adds a refreshing crunch to contrast the warm, crunchy sandwich. The coolness of coleslaw makes each bite feel revitalizing.
-
Crispy Onion Rings: Their rich flavor and satisfying crunch create a playful combination with the sandwich, adding layers of texture and delight.
-
Garden Salad: A light garden salad tossed with a zesty vinaigrette provides a fresh and vibrant counterpart that balances the indulgence of the chicken sandwich.
-
Lemonade: A refreshing glass of lemonade enhances the flavors of the sandwich, cutting through the richness with its zesty brightness.
-
Iced Tea: A chilled glass of unsweetened iced tea offers a soothing and slightly bitter note, making it a perfect sipping companion with your meal.
For an unforgettable lunch, these sides create the perfect harmony with your Crispy Dill Chicken Sandwich, turning any occasion into a delicious feast!
Expert Tips for the Crispy Dill Chicken Sandwich
- Temperature Check: Ensure your oil is hot enough by dropping in a small piece of bread. If it sizzles immediately, you’re ready to fry for that perfect crispy texture.
- Avoid Overcrowding: Fry chicken in batches to maintain the oil’s temperature, preventing sogginess and ensuring each piece cooks evenly for the best crispy dill chicken sandwich experience.
- Flavor Boost: For an extra zing, consider marinating your chicken in pickle juice for a few hours before coating to infuse more flavor throughout.
- Perfectly Crispy Leftovers: To keep leftover chicken crispy, reheat it in the oven or air fryer instead of the microwave, which can make it soggy.
- Customizable Coating: Don’t hesitate to substitute ingredients in the coating, like swapping plain flour for whole wheat or seasoning the breadcrumbs with spices for a personal touch.
Make Ahead Options
These Crispy Dill Chicken Sandwiches are perfect for busy weeknights when you want a hearty meal without spending all day in the kitchen! You can prepare the chicken fillets up to 24 hours in advance by following the coating steps, then store them in the refrigerator in an airtight container. Additionally, the dill mayo can be made ahead and refrigerated for up to 3 days, ensuring its flavors meld beautifully. When you’re ready to serve, simply fry the chicken and toast the buns. This preparation not only saves you crucial time but also keeps your dinner deliciously fresh and flavorful—just like when you first made it!
Crispy Dill Chicken Sandwich Variations
Feel free to add your personal touch to this delightful recipe and make it uniquely yours!
-
Thigh Swap: Substitute breasts with boneless, skinless chicken thighs for juicier results that pack a savory punch. Your taste buds will thank you for the added richness!
-
Whole Wheat Flour: Swap all-purpose flour for whole wheat flour to bring in a nutty flavor and a nutritional boost. It’s a simple change that elevates your sandwich while staying wholesome.
-
Greek Yogurt Mayo: For a lighter alternative, replace mayonnaise with Greek yogurt. This swap not only cuts calories but also offers a delightful creaminess that complements the crispy chicken beautifully.
-
Herb Blend: Experiment with fresh herbs like tarragon or parsley instead of dill for a flavor twist. Each bite becomes an aromatic adventure, offering new, exciting notes.
-
Spicy Kick: Add a dash of cayenne pepper to the breading or mix hot sauce into the dill mayo for a fiery kick. Spice lovers will adore this flavorful upgrade!
-
Vegetable Layers: Load your sandwich with additional veggies like sliced tomatoes or avocado for a fresh and colorful bite. These additions not only enhance the taste but make your sandwich feel heartier and vibrant.
-
Pickle Brined Chicken: For an extra flavor depth, marinate your chicken in pickle juice before coating it. The pickle juice infuses the meat with a tangy punch that pairs wonderfully with the dill flavors.
These variations showcase how you can adapt the Crispy Dill Chicken Sandwich to suit your taste cravings—just like the flavors you love in other recipes like Honey Chicken Sweet or Crockpot Chicken Fajitas. Let your imagination run wild!
Crispy Dill Chicken Sandwich Recipe FAQs
What type of chicken should I use for this sandwich?
Absolutely! While the recipe calls for chicken breasts, you can substitute with boneless, skinless chicken thighs for a richer flavor and juicier texture.
How should I store leftover Crispy Dill Chicken Sandwich components?
Store leftover chicken and sandwich components separately in airtight containers. Fried chicken can be kept in the fridge for up to 3 days; just make sure to reheat it in the oven to enjoy that crispy goodness again!
Can I freeze cooked chicken from the Crispy Dill Chicken Sandwich?
Very! To freeze the cooked chicken, wrap each piece tightly in plastic wrap and place them in a freezer bag. Make sure to remove as much air as possible. It’s best used within 3 months for optimal flavor and texture.
What should I do if my chicken coating isn’t crispy?
If your coating isn’t crispy, it might be due to overcrowding the pan while frying; this can lower the oil temperature. Always fry in batches, and make sure the oil is hot before adding chicken. If needed, also check that the chicken pieces are adequately coated in the flour, egg wash, and breadcrumbs for the best crunch.
Are there any dietary considerations for pets or allergies with this sandwich?
Indeed! If you have pets, be cautious; while cooked chicken is generally safe for dogs, avoid giving them anything seasoned, especially with ingredients like garlic powder, which can be harmful. For allergies, be sure to check for any specific sensitivities with the ingredients like gluten in breadcrumbs or egg, and consider substitutions as needed.
Can I customize the recipe for different dietary needs?
Absolutely! You can easily make this Crispy Dill Chicken Sandwich more nutritious by swapping all-purpose flour for whole wheat flour. Additionally, consider using Greek yogurt instead of mayonnaise for a lighter option. The recipe is designed for customization, so feel free to add your favorite herbs or veggies!
Crispy Dill Chicken Sandwich: A Flavor Explosion Awaits You
Ingredients
Equipment
Method
- Prepare the Chicken: Slice the chicken breasts into even fillets, aiming for about 1/2 inch thickness. Optionally pound the chicken for uniform cooking.
- Mix Coating: In a shallow dish, combine all-purpose flour, salt, black pepper, garlic powder, onion powder, and dried dill.
- Whisk Egg Wash: In a separate bowl, whisk together eggs and milk until fully blended.
- Set Up Breadcrumbs: Place panko breadcrumbs in another shallow dish.
- Coat Chicken: Dip chicken fillets in the flour mixture, then in the egg wash, followed by the panko breadcrumbs.
- Fry Chicken: Heat vegetable oil in a skillet until shimmering. Fry chicken fillets for 4-5 minutes on each side until golden brown.
- Prepare Dill Mayo: Mix mayonnaise, fresh dill, and lemon juice in a small bowl until smooth.
- Toast Buns: Lightly toast the brioche buns in the skillet used for frying.
- Assemble Sandwich: Spread dill mayo on the bottom half of the toasted brioche buns. Top with shredded lettuce, a crispy chicken fillet, and dill pickle slices.
Leave a Reply