
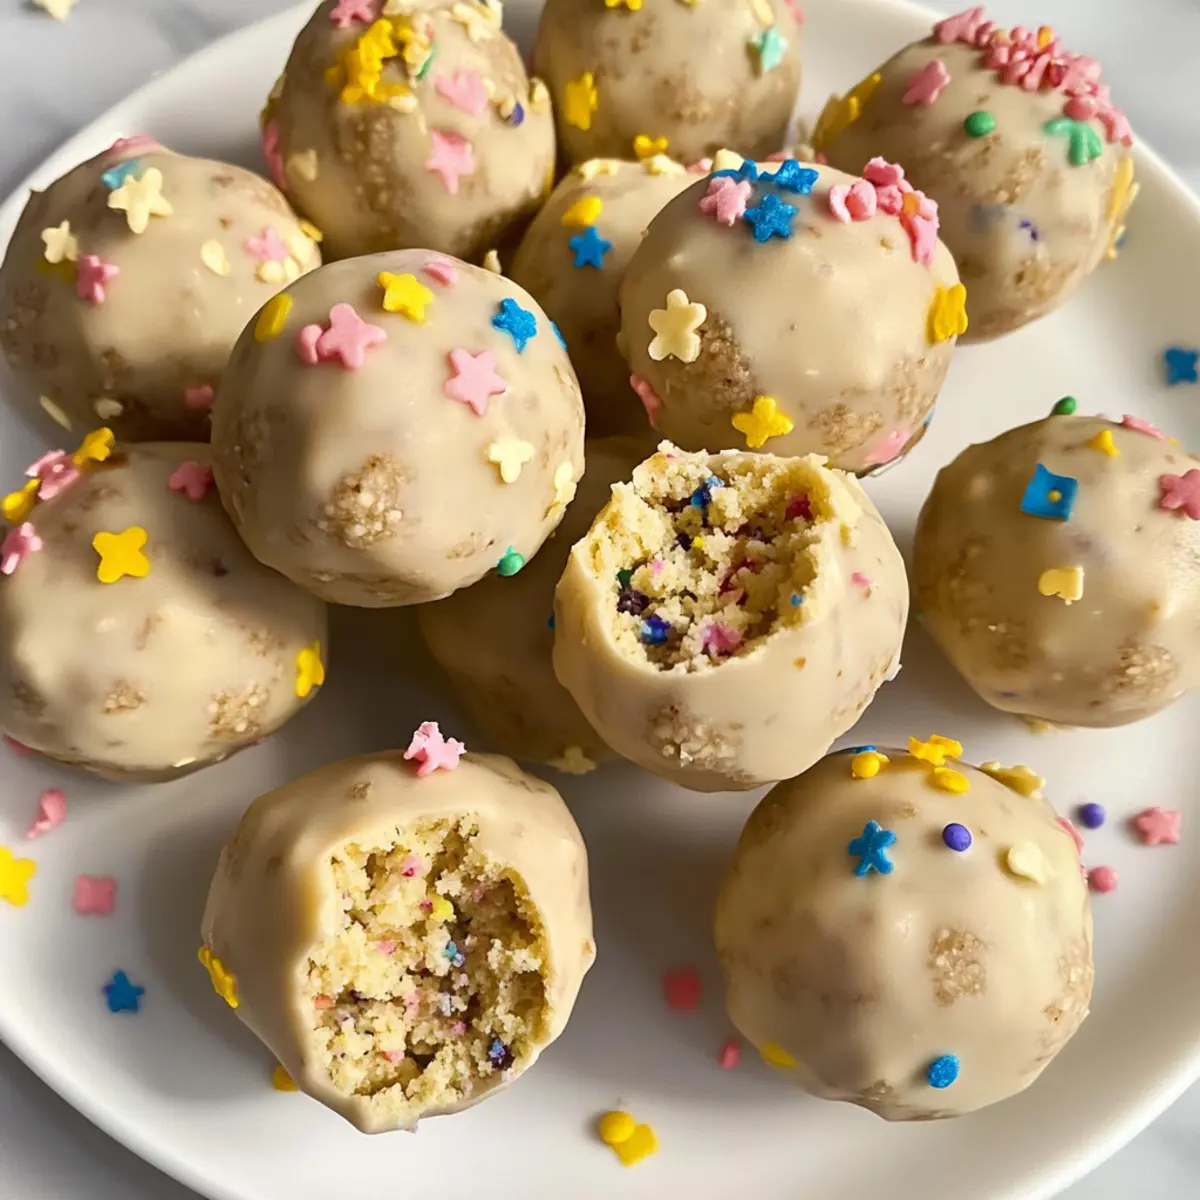
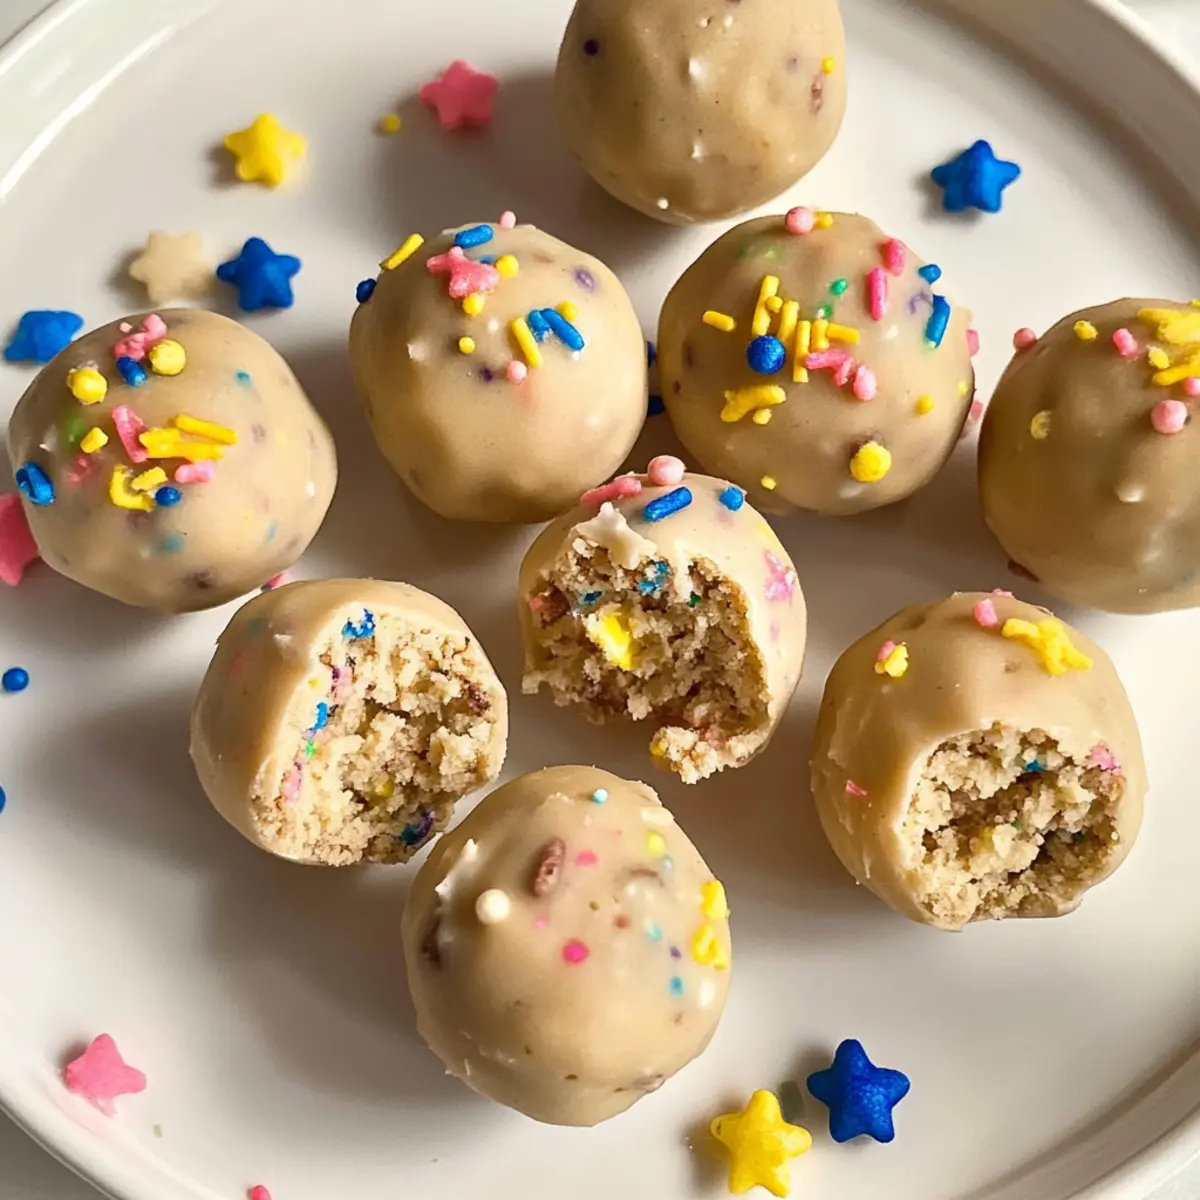
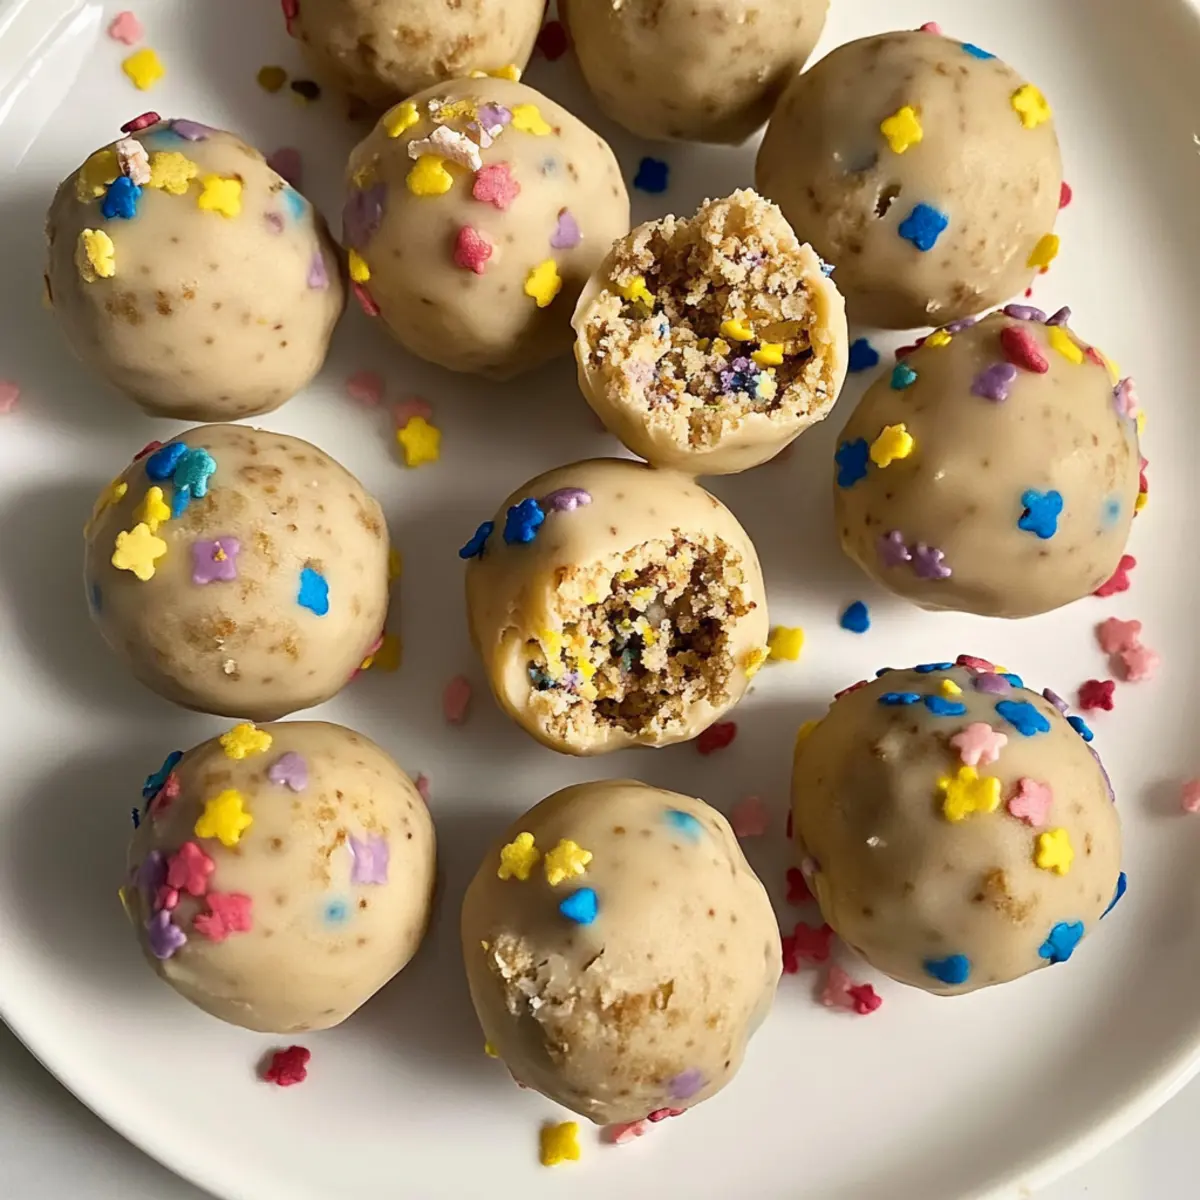
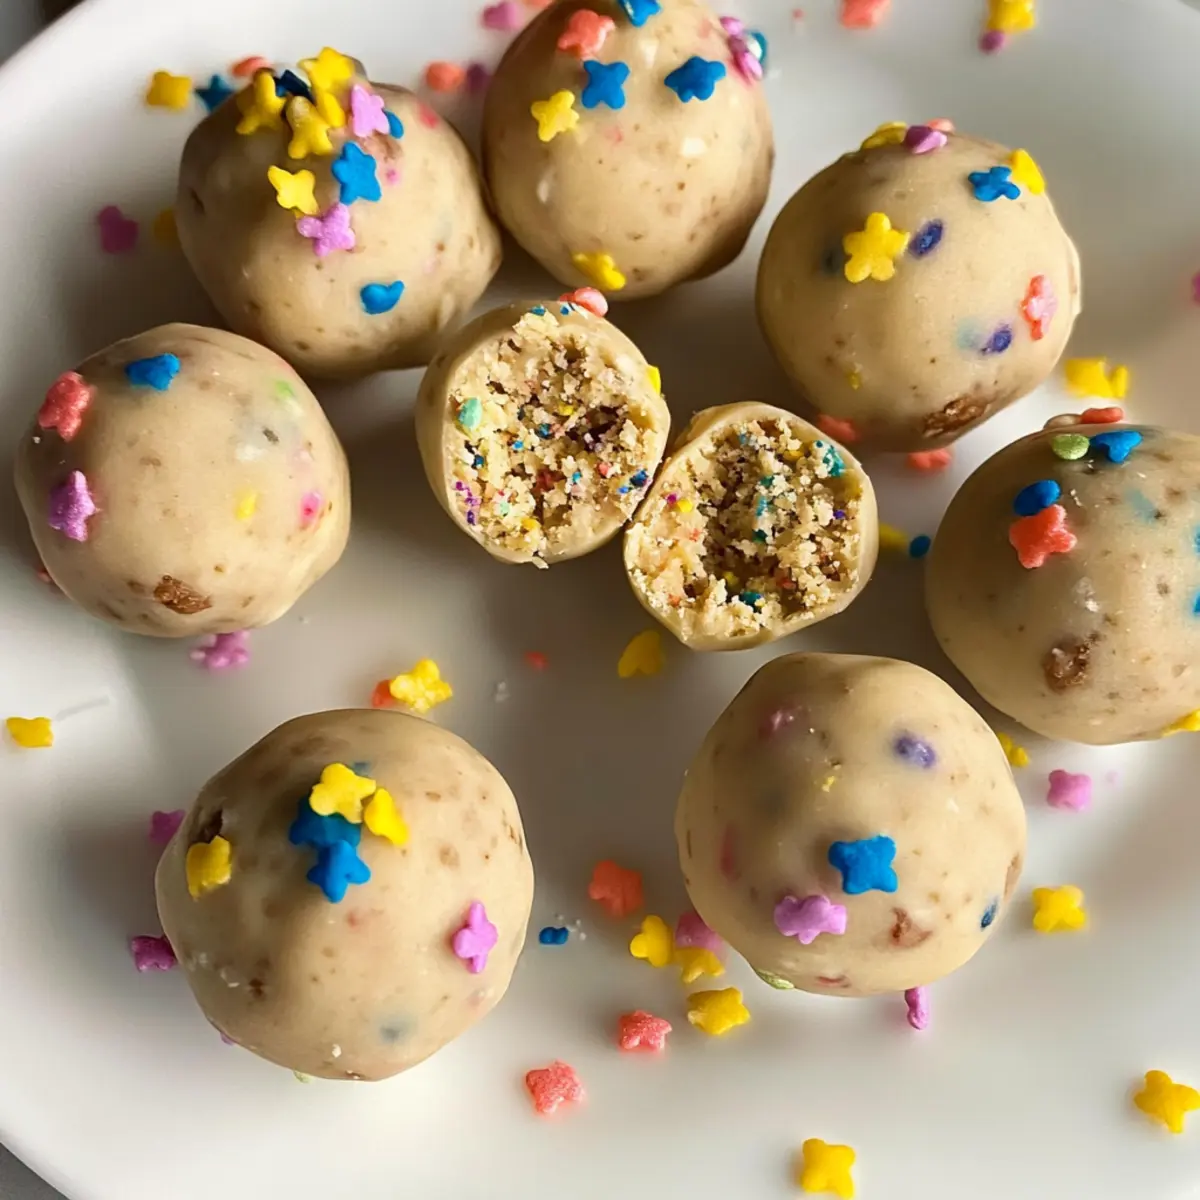
As I was whisking together the last batch of my favorite protein treats, an idea struck me: what if I could capture the joy of a birthday celebration in a healthy snack? Enter the Birthday Cake Protein Balls (No Bake, Paleo). These delightful, bite-sized morsels bring together the nostalgic sweetness of vanilla cake batter with the nutritional power of high protein ingredients. With no baking required and made to fit gluten-free, nut-free, and dairy-free diets, they’re the perfect guilt-free indulgence for anyone tired of fast food. Whether you’re fueling up post-workout or craving a sweet pick-me-up, these protein balls are quick to make and oh-so-satisfying. Curious about how to transform your next snack time into a celebration? Let’s dive into the recipe!
Why You’ll Love Birthday Cake Protein Balls
Simplicity at Its Finest: Whipping up these birthday cake protein balls requires minimal effort—just mix, roll, and chill for a delightful snack!
Nostalgic Flavor: With the taste of vanilla cake batter, each bite brings the joy of birthdays—perfect for when you’re craving that scrumptious sweetness without the guilt.
Health-Conscious Treat: Packed with protein and made from wholesome ingredients, they fit perfectly in gluten-free, nut-free, and dairy-free diets—ideal for anyone aiming for healthier snacking.
Versatility: Feel free to customize with your favorite mix-ins! Try adding colorful sprinkles for a celebratory feel or chia seeds for an extra crunch.
Convenience: Made with no baking required, they’re perfect for a quick snack. These bites can be stored in the fridge for easy access and make for a great post-workout refuel!
Transform your snack time into a celebration with these Birthday Cake Protein Balls! If you’re on a protein kick, don’t forget to check out my High Protein Cajun or Breakfast Protein Biscuits for more delicious ideas!
Birthday Cake Protein Balls Ingredients
For the Protein Balls
• Coconut Butter – Adds richness and helps bind the protein balls; you can substitute with almond or cashew butter for a different flavor.
• Pea Protein Powder – This is your protein boost; feel free to use other plant-based protein powders, adjusting the measurement as needed.
• Honey – A natural sweetener that enhances flavor and moisture; for a vegan option, try maple syrup instead.
• Water – Adjust to achieve the dough consistency; more may be necessary if the mixture is too dry.
Optional Coating (if desired)
• Cacao Butter – This adds a delicious chocolatey coating; melting it slightly makes coating easier for a special touch.
Get ready to enjoy these irresistible Birthday Cake Protein Balls (No Bake, Paleo)! Your snack time just got a whole lot sweeter!
Step‑by‑Step Instructions for Birthday Cake Protein Balls (No Bake, Paleo)
Step 1: Combine Ingredients
In a large mixing bowl, add coconut butter, pea protein powder, honey, and a small amount of water. Use a spatula or your hands to mix these ingredients together until you achieve a smooth, cohesive dough that holds its shape. This should take about 2-3 minutes of mixing, ensuring that there are no dry clumps remaining.
Step 2: Adjust Dough Consistency
If your dough appears too dry and crumbly, add a teaspoon of water at a time, mixing well after each addition until the desired consistency is reached. Conversely, if your mixture feels too wet, sprinkle in additional pea protein powder until the dough firms up. The goal is to create a dough that can easily be rolled into balls without sticking excessively.
Step 3: Roll into Balls
Once your dough is the right consistency, take a tablespoon-sized portion and roll it into a smooth ball between your palms. Repeat this process until you’ve formed all the dough into balls. Each should be about the size of a standard tablespoon, creating around 12-15 balls in total, depending on the exact size you choose.
Step 4: Chill for Firmness
Place the protein balls on a baking sheet lined with parchment paper or a plate. For a firmer texture, cover and refrigerate the balls for at least 30 minutes. This chilling time will help set the shape and enhance the flavors, making it easier to enjoy your Birthday Cake Protein Balls chilled.
Step 5: Optional Coating
If you want to elevate the treats further, melt some cacao butter in a small bowl until it’s liquid. Dip each chilled protein ball into the melted cacao butter, allowing excess to drip off before placing them back on the parchment paper. This adds a delightful chocolatey finish to your no-bake treats, giving them a celebratory touch.
Step 6: Store Your Treats
Once your birthday cake protein balls are ready, transfer them to an airtight container. They can be stored in the refrigerator for up to two weeks, making them an ideal snack on hand. For longer storage, freeze the balls for up to two months, ensuring you always have a healthy, sweet treat available anytime you crave a bite.
Expert Tips for Birthday Cake Protein Balls
-
Mix by Hand: Mixing the dough with your hands ensures better consistency and that all ingredients are fully integrated. This commitment helps in achieving the perfect Birthday Cake Protein Balls.
-
Moisture Matters: Be cautious with the water; too much can lead to overly sticky dough. Always start with a small amount and adjust as needed to avoid a gooey mix.
-
Chilling Helps: Refrigerating the balls not only enhances their flavor but also helps them hold their shape. Don’t skip this step for the best texture!
-
Customize Wisely: While add-ins like sprinkles or chia seeds can enhance flavor and crunch, be mindful of the overall consistency. Ensure to adjust the primary mixture if adding extra ingredients.
-
Storage Solutions: Store your protein balls in an airtight container to keep them fresh. They can last up to 2 weeks in the fridge but can be frozen for up to 2 months for longer enjoyment.
Birthday Cake Protein Balls Variations
Feel free to get creative with these birthday cake protein balls and explore flavor and texture combinations that will delight your taste buds!
-
Nut-Free: Swap coconut butter for sunflower seed butter to keep it nut-free while adding a subtle nutty taste.
-
Vegan Delight: Use maple syrup instead of honey for a completely vegan option, making your treat accessible to all.
-
Flavor Explosion: Mix in a teaspoon of vanilla extract for an extra boost of that delightful vanilla cake batter flavor.
-
Extra Crunch: Toss in a handful of chia seeds for added texture and a nutritious boost, enhancing both heartiness and health benefits.
-
Celebrate Colors: Add colorful sprinkles to the mixture for a festive look and delightful crunch that makes these bites perfect for celebrations.
-
Chocolate Lovers: Roll the balls in cocoa powder or dip them in melted dark chocolate for a rich chocolatey finish and indulgent treat.
-
Zesty Twist: Stir in some lemon or orange zest for a refreshing twist, brightening the flavor profile while keeping it guilt-free.
-
Protein Punch: Experiment with flavored protein powders, such as vanilla or chocolate, to match your palate and elevate the protein content even more.
Now, let your creativity shine! Whether you’re after a classic treat or an adventurous twist, there’s a variation waiting to be discovered. Speaking of sweet indulgences, don’t forget to explore my Coconut Poke Cake and Thanksgiving Stuffing Balls for more delicious ideas that celebrate flavor!
Make Ahead Options
These Birthday Cake Protein Balls are perfect for busy home cooks looking to save time during the week! You can prepare the dough up to 24 hours in advance and store it in the refrigerator. Simply mix the ingredients as usual, roll the mixture into balls, and refrigerate them or freeze them for longer storage (up to 2 months). If freezing, just remember to thaw them in the fridge overnight before serving to maintain their delightful texture. When you’re ready to enjoy, pop them straight from the fridge or serve them chilled for the best flavor. With these make-ahead options, you’ll always have a healthy, sweet treat on hand!
What to Serve with Birthday Cake Protein Balls
Elevate your snack time by pairing these delightful bites with complementary flavors and textures for a full experience.
- Fresh Fruit Medley: Juicy berries and sweet mangoes provide a refreshing contrast and balance the creamy texture of the protein balls. The vibrant colors also add to the festive feel!
- Coconut Yogurt: Creamy and tangy, this yogurt not only complements the protein balls’ sweetness but also adds a luscious element. Perfect for a cooling treat!
- Nutty Granola: The crunchy texture of granola offers a beautiful contrast to the soft protein balls. Choose a nut-free variety to match the recipe’s dietary needs.
- Iced Matcha Latte: This earthy drink pairs wonderfully, providing a vibrant counterbalance to the sweetness of the protein balls. It’s energizing yet full of antioxidants!
- Chocolate-Dipped Strawberries: The rich chocolatey notes resonate beautifully with the vanilla cake flavor, creating a dessert platter that’s simply indulgent.
- Almond Milkshake: Creamy and satisfying, a protein-packed milkshake complements the protein balls well, making for a wholesome post-workout snack.
- Peanut Butter Banana Toast: A comforting and satisfying addition, the sweet and savory elements harmonize with the birthday cake flavor. Perfect for a midday pick-me-up!
- Chia Pudding: Add a light and fruity chia pudding topped with mango or berries for a healthful side. Its smooth texture complements the protein balls delightfully.
Explore these pairings to truly make your Birthday Cake Protein Balls shine at your next gathering or snack time!
How to Store and Freeze Birthday Cake Protein Balls
Fridge: Keep the protein balls in an airtight container in the fridge for up to 2 weeks to maintain freshness and flavor.
Freezer: For longer storage, freeze the balls in a single layer on a baking sheet before transferring to an airtight container. They can be kept for up to 2 months.
Reheating: There’s no need to reheat these treats! Simply enjoy them straight from the fridge or freezer for a quick, high-protein snack.
Thawing: If frozen, let the birthday cake protein balls thaw in the fridge for a few hours before enjoying, so they maintain their delightful texture.
Birthday Cake Protein Balls Recipe FAQs
How should I select my ingredients for the Birthday Cake Protein Balls?
Absolutely! When choosing your coconut butter, look for a creamy and smooth texture without any separation. For the pea protein powder, pick a brand that’s minimal on fillers and sugars to keep your protein balls as pure as possible. If substituting with almond or cashew butter, ensure they’re fresh for the best flavor. Also, always check for honey that’s raw and local if possible—this offers the best taste and benefits!
What are the best storage methods for the Birthday Cake Protein Balls?
Very! These protein balls can be stored in an airtight container in the fridge for up to 2 weeks. Just make sure they’re fully cooled after any optional coating. For longer storage, keep them in the freezer, laid out in a single layer on a baking sheet until firm. Then transfer to a container or freezer bag, where they can last up to 2 months without losing taste!
Can I freeze the Birthday Cake Protein Balls?
Of course! Freezing is a fantastic option. Simply follow these steps: First, prepare the balls according to the recipe and place them on a baking sheet in a single layer. Freeze for about an hour until they’re firm, then transfer them to an airtight container or a freezer bag. This method prevents them from sticking together. When you’re ready to enjoy a snack, just thaw in the fridge for a few hours or enjoy them straight from the freezer for a cool treat!
What should I do if my dough for the Birthday Cake Protein Balls is too dry?
If your dough does seem a bit crumbly, don’t fret! Start by adding water one teaspoon at a time, mixing well after each addition until you reach the desired consistency. If it’s too dry, it may be due to too much protein powder or not enough moisture. The goal is to achieve a mixture that holds together nicely without being sticky.
Are the Birthday Cake Protein Balls suitable for people with allergies?
Absolutely! These protein balls are gluten-free, nut-free, and dairy-free, perfect for many dietary restrictions. However, always check ingredient labels for potential cross-contamination if you’re serving someone with allergies. If using almond or cashew butter as a substitute, ensure those are also safe for anyone with nut allergies in mind. Enjoy these treats worry-free for all health-conscious friends!
Birthday Cake Protein Balls No Bake Treats for Health Nuts
Ingredients
Equipment
Method
- In a large mixing bowl, add coconut butter, pea protein powder, honey, and a small amount of water. Mix until smooth for about 2-3 minutes.
- Adjust the dough by adding water if too dry or pea protein powder if too wet until a rollable consistency is achieved.
- Take tablespoon-sized portions and roll them into smooth balls, forming about 12-15 balls total.
- Place balls on a lined baking sheet or plate and refrigerate for at least 30 minutes.
- For an optional chocolate coating, melt cacao butter and dip each ball, allowing excess to drip off before placing them back.
- Transfer to an airtight container and store in the fridge for up to 2 weeks or freeze for up to 2 months.
Leave a Reply