
As I was flipping through my favorite food magazine, a stunning photo of Crispy Rice Sushi caught my eye, instantly whisking me away to a world of crunchy delights and vibrant flavors. This innovative twist on traditional sushi brings a satisfying crunch that transforms each bite into a celebration of taste and texture. Not only is this dish incredibly easy to prepare, but it’s also a crowd-pleaser that’s perfect for everything from casual family dinners to special gatherings with friends. With a blend of golden, crispy rice, fresh seafood, and creamy avocado, this sushi variation is bound to impress both seasoned sushi lovers and curious newcomers. Ready to elevate your sushi game and explore this delightful recipe? Let’s dive in!
Why is Crispy Rice Sushi so special?
Crunchy Delight: The unique crispy texture gives this sushi a satisfying crunch that traditional rolls just can’t match.
Easy to Make: Perfect for home cooks of all skill levels, it’s a straight-forward recipe that requires minimal preparation.
Fresh and Flavorful: The combination of sushi-grade fish and creamy avocado creates a luxurious flavor profile that’s hard to resist.
Versatile Options: Customize with seafood or plant-based alternatives to suit your dietary preferences, like swapping tuna for Honey Chicken or using tofu for a vegetarian option.
Crowd-Pleaser: Serve it at gatherings, and watch it disappear—everyone loves this modern take on sushi!
Great for Day-to-Day: Enjoy it as a light meal or snack, and pair it with simple sides such as Thanksgiving Wild Rice for an extra touch.
Crispy Rice Sushi Ingredients
This tasty dish is a fusion of flavors and textures!
For the Rice
- Sushi Rice – This short-grain rice provides the sticky texture needed for shaping; avoid long-grain types for the best results.
- Vegetable Oil – Essential for frying the rice blocks to achieve that golden, crispy exterior.
For the Filling
- Sushi-Grade Tuna – Adds high-quality protein; feel free to substitute with salmon or cooked shrimp if preferred.
- Avocado – Brings a creamy texture that complements the crispy rice; cucumber slices or mango chunks work well as alternatives.
For the Sauce
- Mayonnaise – Forms a creamy base for the spicy mayo; opt for Japanese mayo for a sweeter touch if desired.
- Sriracha – Adds a kick to the mayo—adjust to your taste or omit for a milder flavor.
For the Toppings
- Tobiko or Masago – Provides pops of color and texture; you can use toasted sesame seeds as a substitution if necessary.
- Chopped Green Onions – Brings freshness and a pop of color to your sushi.
Step‑by‑Step Instructions for Crispy Rice Sushi
Step 1: Rinse the Sushi Rice
Begin by rinsing 2 cups of sushi rice under cold water until the water runs clear; this removes excess starch. Transfer the rice to a rice cooker or a pot with 2½ cups of water and cook according to the manufacturer’s instructions or over medium heat until the rice is tender and fluffy, which typically takes around 15-20 minutes, depending on your method.
Step 2: Season the Rice
Once the sushi rice is cooked, transfer it to a large bowl and allow it to cool slightly for about 5 minutes. While it’s still warm, gently fold in a mixture of rice vinegar, sugar, and salt. This seasoning gives your Crispy Rice Sushi that signature flavor. Spread the seasoned rice evenly on a baking sheet to cool completely for about 30 minutes.
Step 3: Shape the Rice Blocks
With your cooled rice, dampen your hands to prevent sticking, then scoop out portions of rice and shape them into small rectangular blocks, roughly 2x2x1 inches. It’s important to pack the rice firmly enough so that the blocks hold together but not so much that they lose their light texture. This forming step is key for achieving the perfect base for your crispy rice sushi.
Step 4: Fry the Rice Blocks
Heat about 1 inch of vegetable oil in a skillet over medium-high heat. Once the oil is shimmering, carefully add the formed rice blocks in batches, ensuring not to overcrowd the pan. Fry each side for approximately 3-4 minutes or until they are golden brown and crispy. Once fried, use a slotted spatula to transfer the rice blocks to a paper towel-lined plate to drain excess oil.
Step 5: Prepare the Tuna Filling
While your crispy rice blocks are cooling, take 8 ounces of sushi-grade tuna and dice it into small cubes. In a mixing bowl, combine the diced tuna with a drizzle of soy sauce, a teaspoon of sesame oil, and half of the chopped green onions. Toss gently to mix; this savory filling will complement your Crispy Rice Sushi perfectly.
Step 6: Make the Spicy Mayo
In a separate small bowl, combine ¼ cup of mayonnaise with 1-2 tablespoons of sriracha, depending on your desired spice level. Stir until smooth and well blended. This creamy, spicy mayo will be drizzled over your assembled sushi, adding flavor and richness to every bite.
Step 7: Assemble the Crispy Rice Sushi
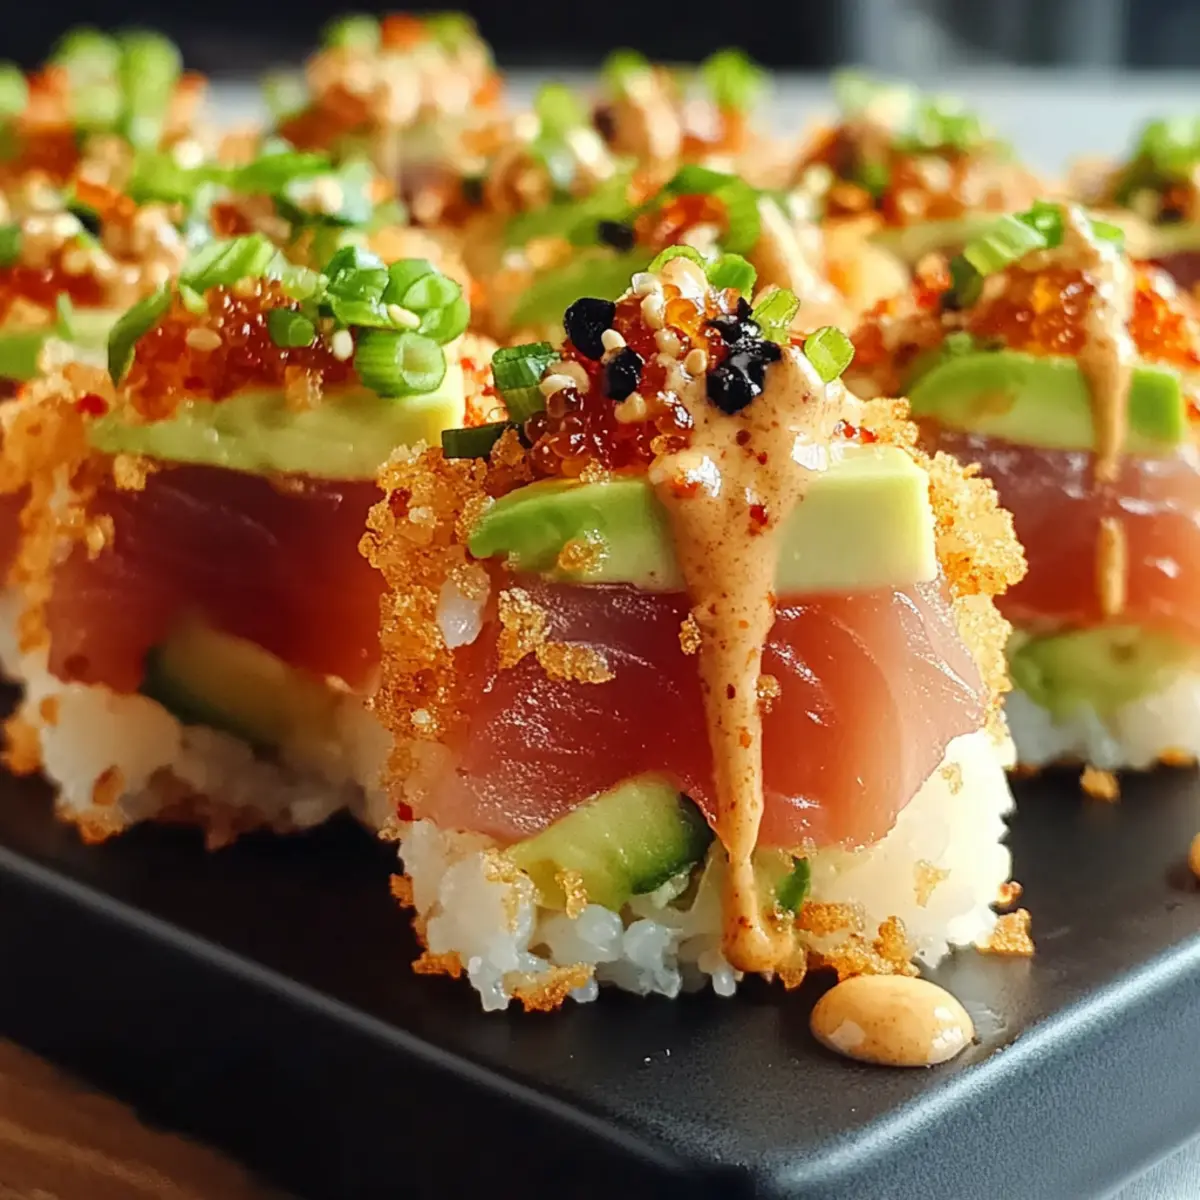
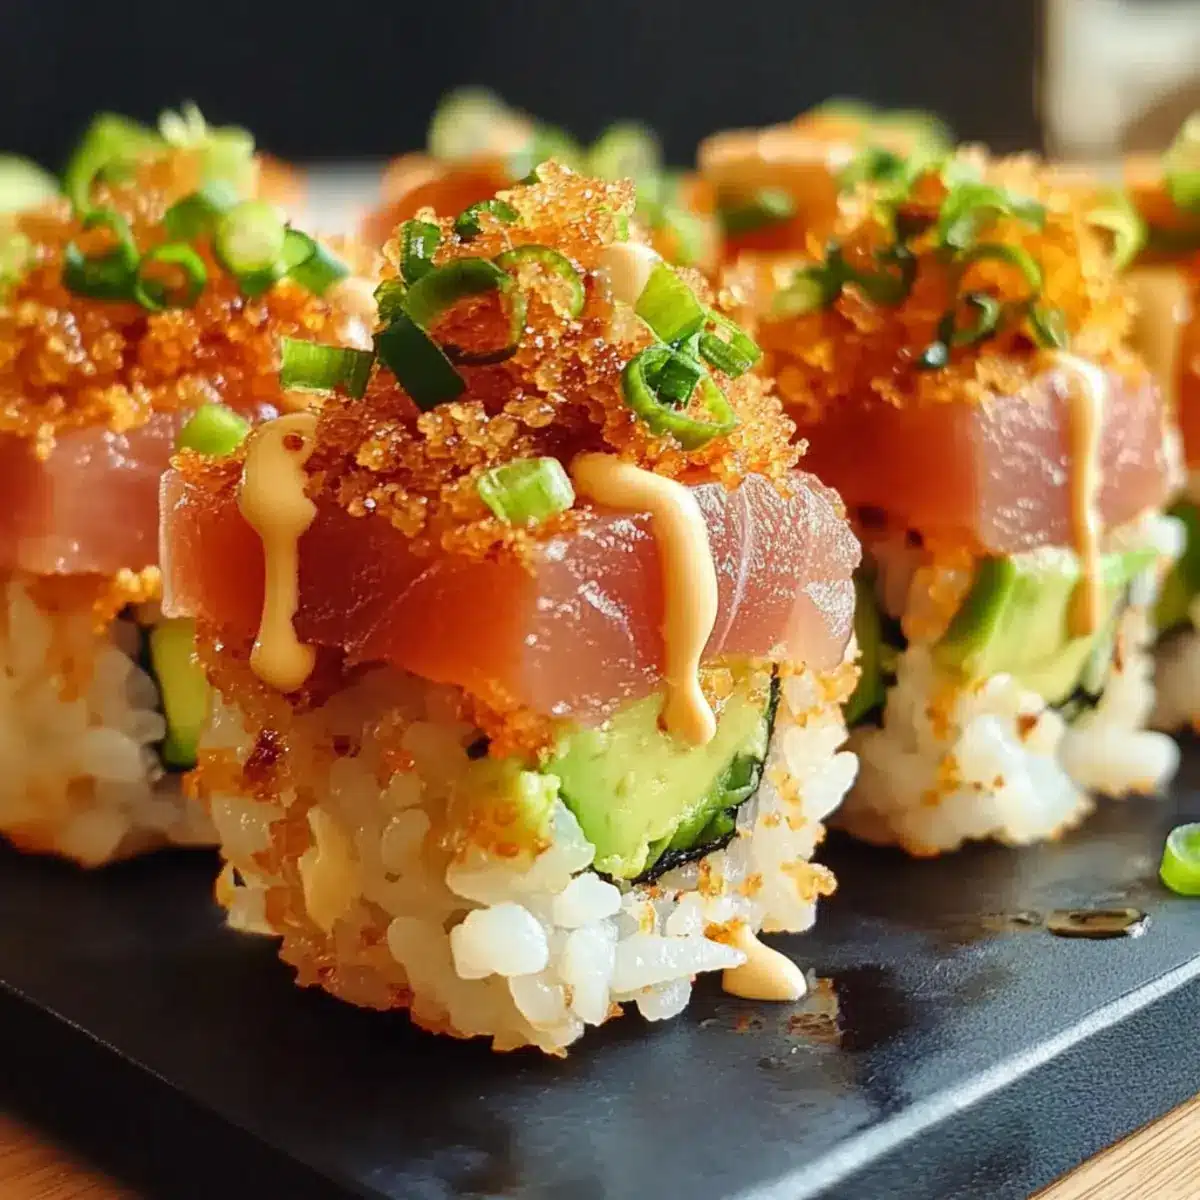
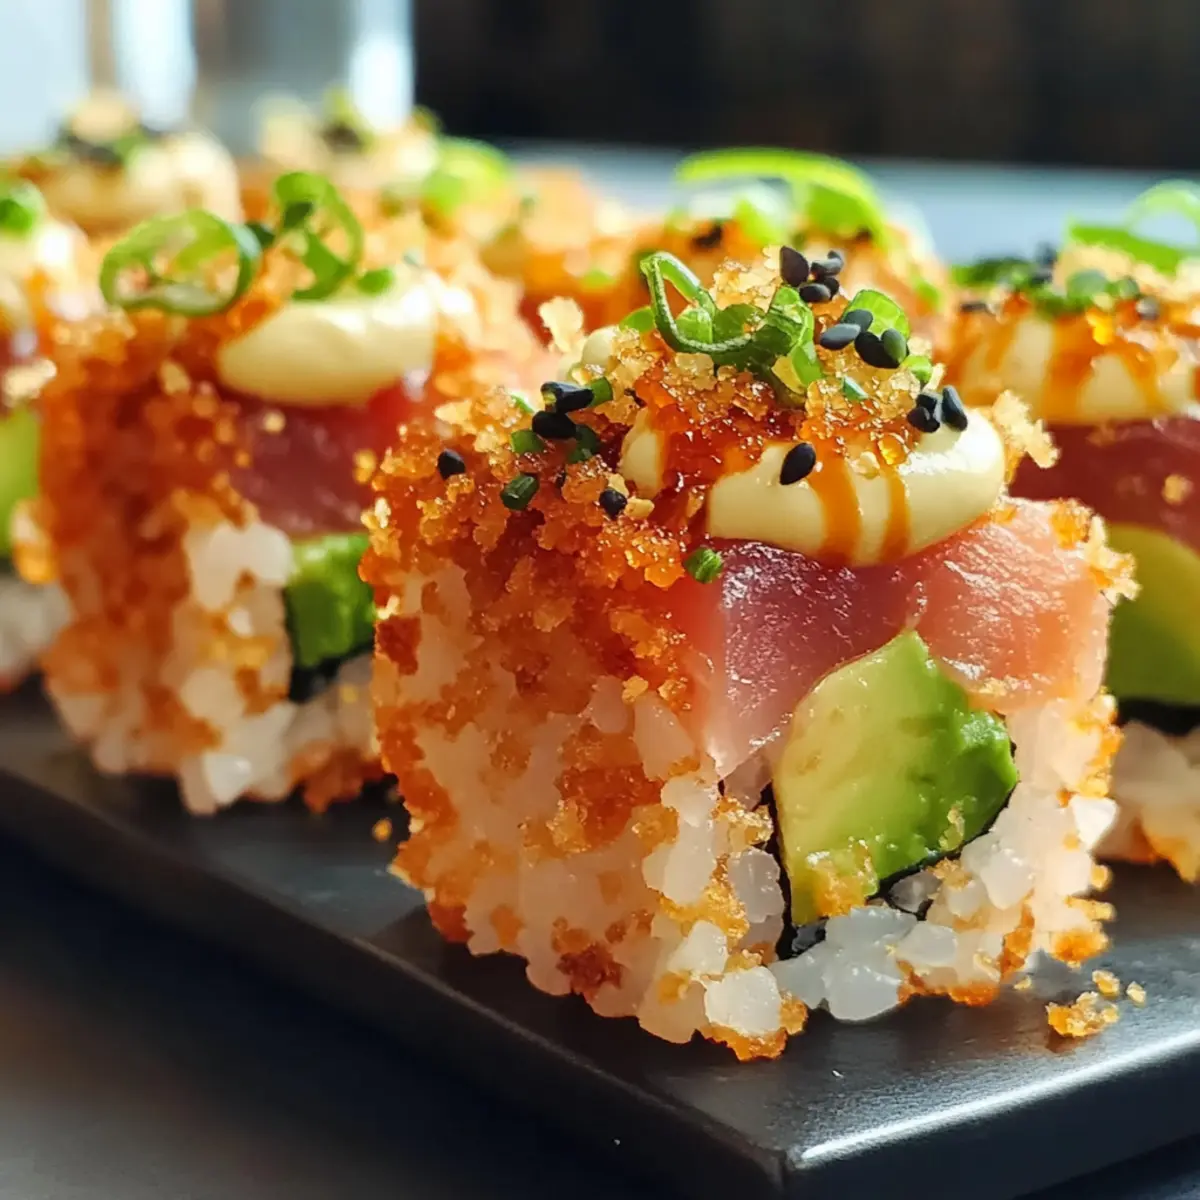
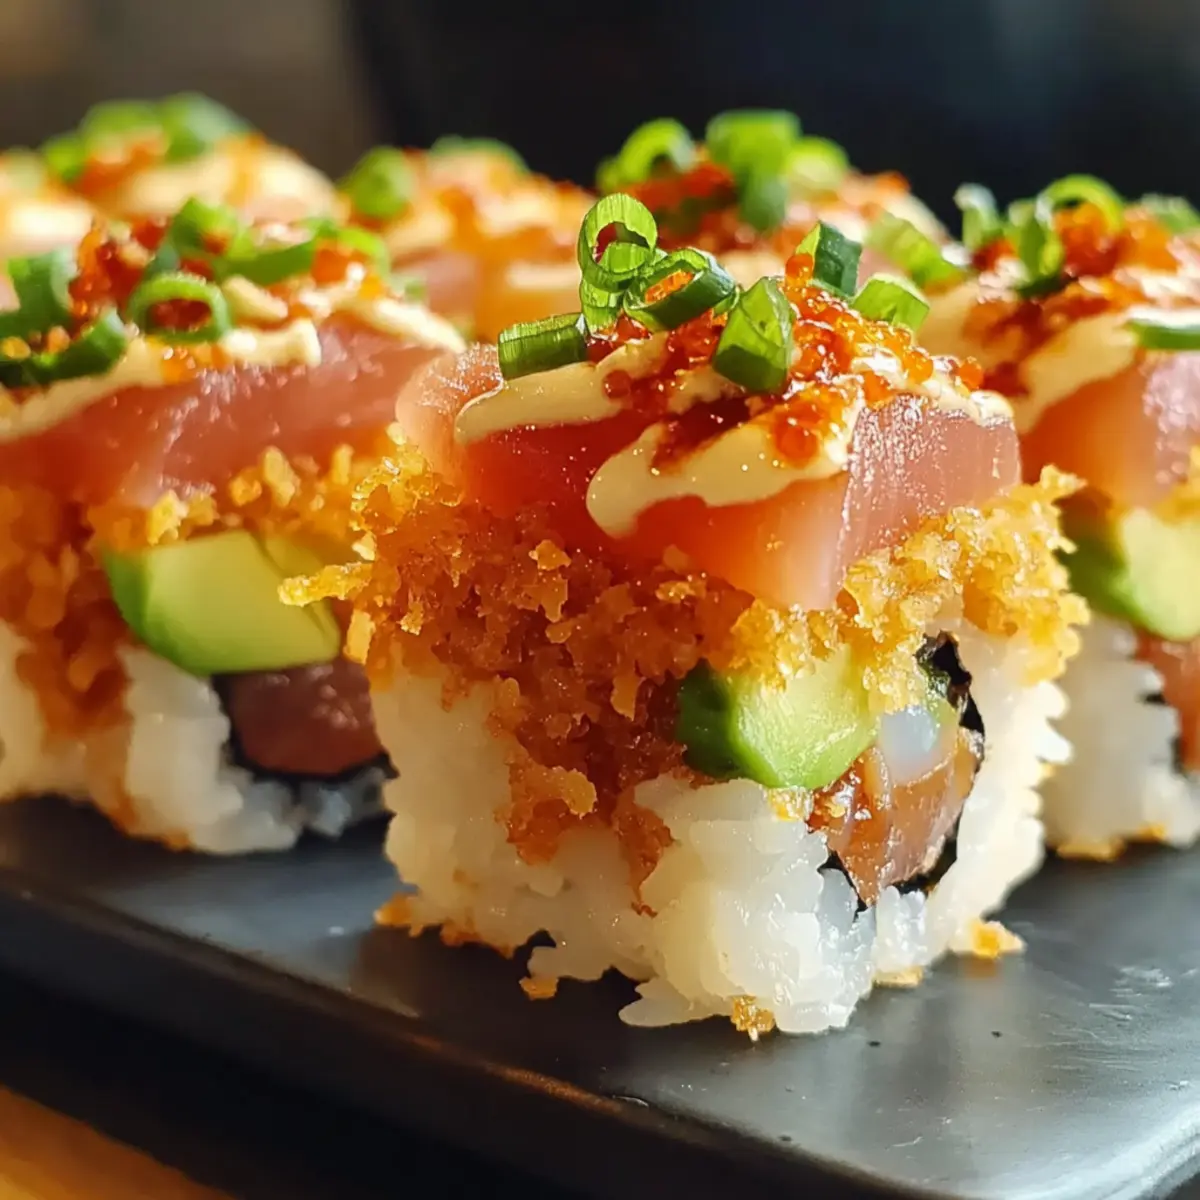
Now it’s time to assemble your delicious Crispy Rice Sushi! Take a fried rice block and layer a spoonful of the tuna mixture on top, followed by some diced avocado. Drizzle the spicy mayo generously over the layers, and finish with a sprinkle of tobiko, sesame seeds, and the remaining green onions for a colorful presentation.
Step 8: Serve Immediately
Serve your assembled Crispy Rice Sushi immediately for the best crunch and flavor. Consider providing some soy sauce on the side for dipping. This dish is best enjoyed fresh, capturing the delightful contrast of crispy rice and savory toppings in each satisfying bite!
Make Ahead Options
Crispy Rice Sushi is a fantastic option for meal prep enthusiasts looking to save time during busy weeknights! You can prepare the sushi rice and shape it into blocks up to 24 hours in advance, allowing you to refrigerate them in an airtight container to maintain freshness. Additionally, you can dice the sushi-grade tuna and mix it with sauce, storing it separately in the fridge for up to 3 days. When you’re ready to enjoy, simply fry the prepared rice blocks until golden, assemble with the tuna and avocado, and drizzle with spicy mayo for that delightful crunch and flavor that makes this Crispy Rice Sushi so special.
Crispy Rice Sushi Variations
Feel free to personalize your Crispy Rice Sushi for a unique twist on this crunchy classic!
- Fish Swap: Replace sushi-grade tuna with salmon or cooked shrimp for delightful flavor variations. Each fish brings a distinct taste profile that enhances your sushi.
- Vegetarian Delight: Substitute fish with tofu to create a completely plant-based version that’s equally satisfying. A crispy tofu block topped with avocado plays magnificently well!
- Tropical Twist: Add mango chunks alongside avocado for a fruity layer that further elevates the dish’s brightness. This sweet touch is a fantastic contrast to the salty elements.
- Extra Crunch: Sprinkle on crushed rice crackers or fried shallots as an additional topping after assembling your sushi. This step invites a satisfying crunch to each bite!
- Zesty Kick: Incorporate finely minced jalapeños or pickled ginger to add a spicy flair and an exciting zing to your sushi creation. Just a hint can transform the entire dish!
- Savory Boost: Drizzle with a touch of teriyaki sauce or sesame oil for an umami punch that complements the freshness of your rice and fish beautifully. This will make the flavors pop!
- Herb Infusion: Toss chopped fresh herbs like cilantro or basil into your filling for a fragrant flavor twist. These fresh notes offer a delightful surprise in each bite!
- Crispy Rice Substitution: Try using quinoa or farro as a base instead of rice for a heartier, whole-grain option that’s just as enjoyable. These grains lend a lovely chewiness that pairs well with other ingredients.
With these variations, you can keep your sushi experience fresh and exciting. If you’re looking for more inspiration, consider pairing your sushi with a refreshing side like Thanksgiving Wild Rice for a delightful contrast or letting your taste buds explore the flavors of Honey Chicken. Enjoy your culinary adventures!
What to Serve with Crispy Rice Sushi
Bring your dining experience to life by exploring delightful pairings that enhance the flavors and textures of this crunchy sushi dish.
-
Miso Soup: This warm, savory soup complements the freshness of sushi and adds comforting umami tones. It’s a classic pairing that rounds out your meal beautifully.
-
Edamame: These lightly salted, tender soybeans provide a satisfying bite and a fresh contrast to the rich sushi flavors, making them an ideal appetizer.
-
Seaweed Salad: Vibrant and tangy, this salad adds brightness to your plate, enhancing the overall experience with its chewy texture and refreshing taste.
-
Pickled Ginger: A traditional sushi accompaniment, this sweet and sharp garnish cleanses the palate, allowing your taste buds to fully appreciate each bite of crispy rice sushi.
-
Sake or Green Tea: Enjoy a glass of chilled sake for a celebratory touch or a cup of soothing green tea to cleanse the palate and heighten flavors.
-
Crispy Tempura Vegetables: A crunchy, fried side dish that mirrors the texture of your sushi, tempura vegetables add variety while maintaining that delightful crunch.
-
Sesame Noodles: These flavorful noodles, tossed in a light sesame dressing, complement the sushi’s textures and flavors without overwhelming them, providing a savory side.
-
Fruit Sorbet: For dessert, a refreshing fruit sorbet cleanses the palate and offers a sweet end to your meal, bringing in a burst of fruity flavor.
Expert Tips for Crispy Rice Sushi
- Perfectly Fried Rice: Monitor the frying process closely; if you leave them too long, the blocks can burn. Look for a golden-brown crust for perfect Crispy Rice Sushi.
- Sushi-Grade Safety: Always use sushi-grade fish to ensure safety. It’s essential to thaw frozen fish properly and pat it dry before use to prevent excess moisture.
- Store Carefully: Enjoy your Crispy Rice Sushi fresh! If you have leftovers, store them in an airtight container, but consume within a day for optimal texture and flavor.
- Rice Texture: When shaping your rice blocks, pack them firmly but not too tight to maintain a light, airy texture. This will enhance the crunchiness when fried.
- Customize Your Filling: Feel free to explore different fillings and toppings—experiment with vegetables or different seafood for a unique twist on this classic dish!
How to Store and Freeze Crispy Rice Sushi
Airtight Container: Store any leftovers in an airtight container in the fridge for up to 1 day to maintain freshness and crunchiness.
Reheating: To restore the crispy texture, reheat the rice blocks gently in a skillet over medium heat for a few minutes until warmed through.
Freezing: While it’s best enjoyed fresh, you can freeze unassembled crispy rice blocks for up to 3 months. Fry them fresh after thawing for the ultimate crunchy experience.
Avoid Freezing Fillings: It’s best not to freeze pre-assembled sushi or the fillings like tuna and avocado, as they may change texture when thawed.
Crispy Rice Sushi Recipe FAQs
What type of rice is best for Crispy Rice Sushi?
The best choice is sushi rice, a short-grain rice that provides the sticky texture necessary for shaping. If sushi rice isn’t available, Japanese rice is an acceptable substitute, while long-grain varieties should be avoided, as they will not adhere properly.
How should I store leftover Crispy Rice Sushi?
Store any leftovers in an airtight container in the fridge for up to 1 day to maintain freshness and texture. I recommend consuming it quickly, as it’s best enjoyed fresh. If you need to reheat the rice blocks, do so in a skillet over medium heat for a few minutes until warmed through, which can help restore some crispiness.
Can I freeze Crispy Rice Sushi?
Absolutely! You can freeze unassembled crispy rice blocks for up to 3 months. To do this, prepare the rice as instructed but don’t fry them. Once they are shaped, lay them in a single layer on a baking sheet and freeze until firm. Transfer them to an airtight container or freezer bag, and when you’re ready to enjoy, simply fry them directly from the freezer until golden and crispy.
What should I do if my rice blocks are falling apart?
If your rice blocks are falling apart, it might be that they weren’t packed tightly enough when shaping. Ensure you’re forming them firmly enough to hold together without losing their light texture. Also, pressing the rice slightly while shaping can help bind it better. If you find the fried blocks crumbling, frying at a slightly lower temperature can help set the shape without burning.
Are there any dietary considerations when making Crispy Rice Sushi for pets or people with allergies?
When serving this dish, consider that raw fish can be harmful to pets, especially cats and dogs. If you have guests with seafood allergies, I suggest using alternatives like cooked shrimp or tofu, as this can cater to varying dietary needs. Always double-check the ingredient labels for allergens, especially in mayonnaise and sauces used in your recipes.
Crispy Rice Sushi: A Delightful Crunch for Sushi Lovers
Ingredients
Equipment
Method
- Rinse the sushi rice under cold water until the water runs clear. Cook in a rice cooker or pot with 2½ cups of water for 15-20 minutes.
- Transfer the cooked sushi rice to a bowl, cool slightly, and fold in rice vinegar, sugar, and salt. Spread on a baking sheet to cool completely for 30 minutes.
- Shape cooled sushi rice into small rectangular blocks, about 2x2x1 inches, ensuring they hold together.
- Heat vegetable oil in a skillet over medium-high heat. Fry rice blocks in batches for 3-4 minutes per side until golden brown.
- Dice the sushi-grade tuna and mix with soy sauce, sesame oil, and half of the chopped green onions.
- Mix mayonnaise with sriracha to create the spicy mayo.
- Assemble sushi by placing tuna mixture on a fried rice block, topping with diced avocado and drizzling with spicy mayo. Finish with tobiko, sesame seeds, and green onions.
- Serve immediately for optimal crunch. Consider soy sauce on the side for dipping.
Leave a Reply