
As I whisked together the silky batter for this Small (4-inch) Chocolate Cake, I couldn’t help but feel a wave of nostalgia wash over me—like a warm hug on a chilly day. Perfect for intimate celebrations or even a whimsical smash cake, this recipe is not just adorable, but incredibly easy to whip up in one bowl! With its delightful small-batch size, you can enjoy a rich, decadent dessert without the worry of overwhelming leftovers. Plus, there’s even a gluten-free option for those looking to indulge without the gluten. Are you ready to create a cake that’s as charming as it is tasty? Let’s dive into this delightful baking adventure together!

Why You’ll Love This Mini Cake
Delightful Size: This small (4-inch) chocolate cake is perfectly portioned for intimate gatherings, ensuring you savor every bite without extra slices to manage.
One-Bowl Wonder: Whipping this up is a breeze! From mixing the batter to the frosting, you’ll spend more time enjoying it than cleaning up.
Versatile Allergy-Friendly Option: You can easily transform this cake into a gluten-free dessert, making it accommodating for various dietary needs without sacrificing flavor.
Stunning Presentation: Its petite layers not only look elegant but also create a stunning centerpiece—perfect for birthdays or special occasions!
Customizable Flavor: Want to add a personal twist? Feel free to incorporate espresso for a mocha variation or try switching to almond extract for a unique flavor boost.
You’ll find yourself effortlessly falling in love with this cake, whether you’re celebrating a special event or simply want a delicious treat. Consider pairing it with a side of whipped cream or berry compote, much like what I do with my Coconut Poke Cake for an added flavor punch!
Small (4-inch) Chocolate Cake Ingredients
• For the Cake
- All-Purpose Flour – Structure; can be swapped with a gluten-free flour blend for a delicious, gluten-free option.
- Granulated Sugar – Sweetness; essential for moisture and rich flavor.
- Unsweetened Cocoa Powder – Chocolate flavor; sift before use for a silky batter.
- Baking Powder – Leavening agent for that perfect rise.
- Fine Salt – Enhances flavor; omit if using salted butter.
- Unsalted Butter – Provides moisture and richness; substitute with salted butter (omit added salt) or vegan butter if needed.
- Vegetable or Canola Oil – Adds moisture; use refined oil for a neutral flavor.
- Large Egg – Binds ingredients together; try a flax egg for a vegan option.
- Buttermilk – Moisture and tenderness; can be replaced with almond milk + vinegar (1/2 cup + 1/2 tsp).
- Vanilla Extract or Bean Paste – Flavor enhancer; consider using almond extract for a different note.
• For the Frosting
- Milk or Dark Chocolate Chips – Adds richness; should be melted and cooled prior to incorporating.
- Powdered Sugar – Provides sweetness and structure for frosting.
- Heavy Whipping Cream – Creates a smooth texture in frosting, adding flavor and visual appeal.
Step‑by‑Step Instructions for Small (4-inch) Chocolate Cake
Step 1: Preheat the Oven
Begin by preheating your oven to 350°F (175°C). While that heats up, take three 4-inch cake pans and prepare them by lining the bottoms with parchment paper and giving them a light spray of cooking spray. This ensures your Small (4-inch) Chocolate Cake layers will release easily once baked.
Step 2: Mix Dry Ingredients
In a large mixing bowl, combine 1 cup of all-purpose flour, 1 cup of granulated sugar, 1/3 cup of sifted unsweetened cocoa powder, 1 teaspoon of baking powder, and a pinch of fine salt. Whisk these ingredients together until they’re evenly blended, creating a dry base that will provide the structure for your rich chocolate cake.
Step 3: Incorporate Wet Ingredients
Now, add 1/3 cup of melted unsalted butter, 1/4 cup of vegetable oil, 1 large egg, 1/2 cup of buttermilk, and 1 teaspoon of vanilla extract to the dry mixture. Use a whisk and mix until the batter is smooth and silky, ensuring all the ingredients are well combined. This should take about 1-2 minutes of whisking for that perfect texture.
Step 4: Bake the Cake Layers
Carefully divide the batter evenly among your prepared pans, smoothing out the tops with a spatula. Place them in the oven and bake for 32-35 minutes. You’ll know they are done when a toothpick inserted into the center comes out with only a few moist crumbs attached.
Step 5: Cool the Layers
Once baked, remove the pans from the oven and let them cool on a wire rack for about 10 minutes. After that, carefully transfer the layers to the freezer for 20 minutes. Cooling them in the freezer will make it easier to remove them from the pans without breaking.
Step 6: Make the Frosting
While your layers cool, prepare the frosting. In a mixing bowl, beat 1/2 cup of room temperature unsalted butter until creamy, then add 1 teaspoon of vanilla and a pinch of salt. Gradually mix in 1 cup of powdered sugar, 1/3 cup of cocoa powder, 1/4 cup of heavy whipping cream, and 1/4 cup of melted chocolate until the frosting is smooth and spreadable.
Step 7: Assemble the Cake
Once the cake layers are fully cooled, take a serrated knife and level the tops if necessary. Place the first layer on your serving plate, add a generous amount of frosting on top, then add the second layer, repeating the process. Finally, stack the last layer on top and frost the sides and top of the Small (4-inch) Chocolate Cake to achieve an even coat.
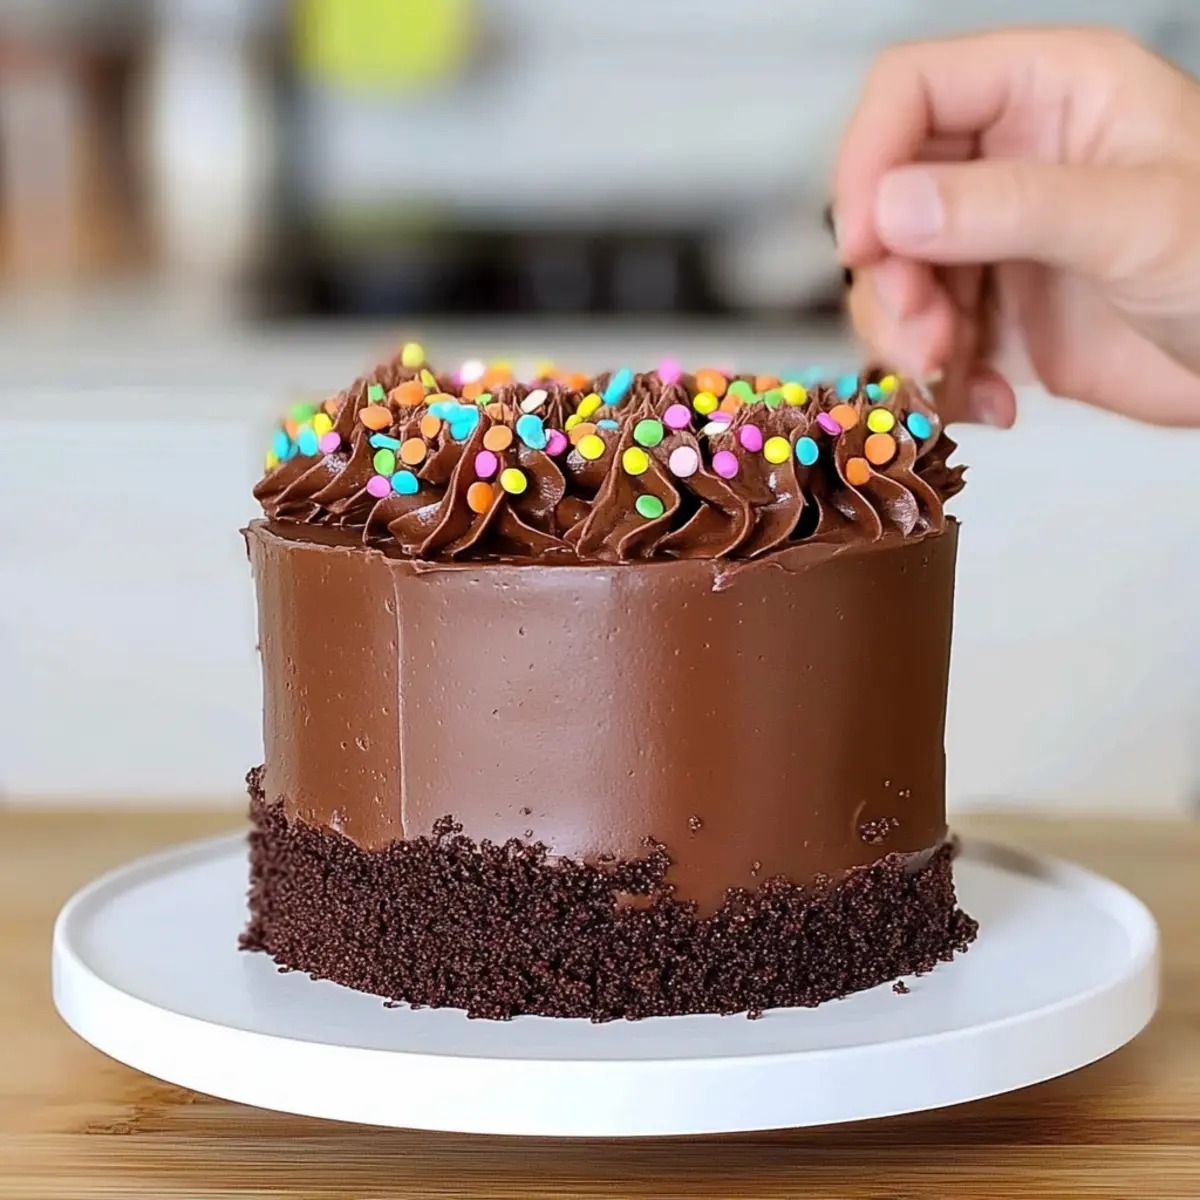
Step 8: Decorate
To finish, feel free to add any personal touches, such as sprinkles, chocolate shavings, or fresh berries to the top of your frosted cake. This is your chance to get creative! Once decorated, place the cake in the refrigerator for about 30 minutes to allow the frosting to set beautifully before slicing and serving.

What to Serve with Small (4-inch) Chocolate Cake
Indulging in a slice of this velvety chocolate heaven is just the beginning; let’s explore delightful pairings for a complete experience.
-
Whipped Cream: A dollop of freshly whipped cream adds a light, airy contrast to the rich chocolate, enhancing every bite beautifully.
-
Fresh Berries: Juicy strawberries or raspberries bring a burst of tartness that complements the chocolate’s sweetness while adding a vibrant color.
-
Vanilla Ice Cream: Creamy vanilla ice cream creates a luxurious balance against the cake’s richness, making it a classic pairing for celebrations.
-
Chocolate Ganache Drizzle: For true chocolate lovers, a warm ganache adds an extra layer of indulgence, creating a show-stopping effect on your plate.
-
Coffee or Espresso: A cup of freshly brewed coffee or a shot of espresso will elevate the flavors, bringing out the chocolate’s depth delightfully.
Imagine enjoying your petite cake with the icy cream melting against the warm sun while surrounded by laughter and love. No matter the accompaniment, each bite will create cherished memories together.
How to Store and Freeze Small (4-inch) Chocolate Cake
Room Temperature: Keep your cake covered with a cake dome or in an airtight container for up to 3 days to maintain its freshness.
Fridge: If frosted, store the cake in the refrigerator for up to a week. Be sure to cover it well to prevent it from drying out.
Freezer: For longer storage, wrap individual layers or the whole cake tightly in plastic wrap and aluminum foil. It can be frozen for up to 3 months.
Reheating: When ready to enjoy, thaw overnight in the fridge. For a quick warm-up, place slices in the microwave for about 15-20 seconds, just to take the chill off!
Small (4-inch) Chocolate Cake Variations
Feel free to experiment with these variations that can elevate your Small (4-inch) Chocolate Cake into something truly unique and delightful!
-
Gluten-Free: Swap all-purpose flour for a gluten-free flour blend. Just whisk well and let it rest for a smoother texture. You’ll be amazed at how delicious a gluten-free cake can be!
-
Alternative Frostings: For a lighter touch, consider using Russian or Italian meringue buttercream. These options offer a delightful sweetness without being overwhelming.
-
Flavor Additions: Add a tablespoon of espresso powder to the batter for a mocha twist, or replace vanilla with almond extract for a unique flavor profile. Little tweaks can create delightful surprises!
-
Fruit-Filled Layers: Add a layer of raspberry or strawberry jam between the cake layers for a refreshing burst of flavor. The tartness pairs beautifully with rich chocolate!
-
Nutty Crunch: Fold in chopped walnuts or pecans into the batter for added texture. You could also sprinkle some on top for an elegant finish, similar to what I do with my Winter Wonderland Chocolate Cookies!
-
Zesty Citrus: Incorporate some finely grated orange or lemon zest into your batter. This twist introduces a delightful brightness that cuts through the richness!
-
Dairy-Free: Substitute buttermilk with almond milk plus vinegar (1/2 cup + 1/2 tsp) and use coconut or almond butter for a dairy-free version without losing any flavor.
-
Spicy Kick: Add a pinch of cayenne or chili powder to the batter for a surprising and delicious heat that complements the chocolate beautifully.
With these creative spins, your Small (4-inch) Chocolate Cake will surely be a hit at any gathering, or even just as a special treat for yourself!
Make Ahead Options
These Small (4-inch) Chocolate Cake layers are ideal for meal prep! You can bake the cake up to three days in advance; simply allow the layers to cool completely before wrapping them in plastic wrap and refrigerating. To maintain quality, store your frosted cake in an airtight container, which will keep it just as delicious and fresh. When it’s time to serve, you can whip up the frosting the day before as well, refrigerating it in an airtight container. A quick beat with the mixer before assembly will bring it back to life! Just layer, frost, and enjoy that rich chocolate goodness with minimal effort!
Expert Tips for Small (4-inch) Chocolate Cake
• Proper Baking Times: Bake the layers at 32-35 minutes; less time can result in undercooked centers, while more can dry them out.
• Cool to Perfection: Always chill the cake layers in the freezer for 20 minutes after baking. This helps in easy removal and prevents breakage.
• Layer Leveling: Use a serrated knife to trim the tops of the layers for even stacking. This ensures a balanced and beautiful Small (4-inch) Chocolate Cake.
• Mixing Method: Whisk the batter thoroughly for a lump-free mixture, but be cautious not to over-mix, especially when working with gluten-free flour blends.
• Frosting Consistency: If the frosting is too thick, add a splash of heavy cream to achieve the perfect spreadable texture.
• Presentation Tip: For a stunning finish, add decorations like fresh berries or sprinkles just before serving to keep them fresh and vibrant!

Small (4-inch) Chocolate Cake Recipe FAQs
What is the best way to choose ripe ingredients?
Absolutely! For this Small (4-inch) Chocolate Cake, pick fresh ingredients like unsalted butter that is creamy and not too soft, and opt for eggs that are at room temperature for better mixing. When selecting cocoa powder, ensure it’s rich and flavorful with no lumps. For gluten-free versions, choose a high-quality gluten-free flour blend, checking that there are no dark spots or moisture in the packaging.
How should I store my chocolate cake after baking?
Very! Once cooled, you can store your Small (4-inch) Chocolate Cake in a covered cake dome at room temperature for up to 3 days. If it’s frosted, store it in the refrigerator for up to a week; just be sure to cover it well to keep it moist. An airtight container works like a charm!
Can I freeze cake layers for later use?
Absolutely! To freeze your Small (4-inch) Chocolate Cake layers, let them cool completely. Then, wrap each layer tightly in plastic wrap followed by aluminum foil to protect against freezer burn. You can freeze them for up to 3 months. When ready to enjoy, simply thaw overnight in the fridge. For a quick warm-up, slice and microwave for about 15-20 seconds!
What if my cake layers come out uneven or domed?
No problem! If your layers turn out uneven, don’t fret. Use a serrated knife to carefully level the tops before stacking. This ensures neat layers and an attractive final cake. If they domed too much, cut off the tops to create level surfaces. It’s a simple fix for a beautifully presented cake!
Are there any dietary considerations for this cake?
Yes, definitely! This Small (4-inch) Chocolate Cake can easily accommodate dietary needs. For gluten-free options, use a gluten-free flour blend and mix the batter thoroughly for better texture. Also, for a vegan version, substitute the egg with a flax egg and use plant-based butter and milk. Just be mindful of any specific allergies you or your guests may have and adjust ingredients accordingly.
How can I decorate my chocolate cake for a special occasion?
Very! You can personalize your Small (4-inch) Chocolate Cake with various decorations. Try using fresh berries, whipped cream, or sprinkles for color. For a more sophisticated touch, consider adding chocolate shavings or edible flowers. Decorate just before serving to keep everything fresh and inviting. Enjoy getting creative!
Small 4-Inch Chocolate Cake for Sweet Celebrations
Ingredients
Equipment
Method
- Preheat your oven to 350°F (175°C) and prepare three 4-inch cake pans by lining the bottoms with parchment paper and spraying with cooking spray.
- In a large mixing bowl, combine the flour, sugar, cocoa powder, baking powder, and salt. Whisk until evenly blended.
- Add melted butter, vegetable oil, egg, buttermilk, and vanilla extract to the dry mixture. Whisk until smooth and silky.
- Divide the batter evenly among the prepared pans, smoothing out tops. Bake for 32-35 minutes.
- Let the pans cool on a wire rack for about 10 minutes, then transfer to the freezer for 20 minutes.
- For the frosting, beat room temperature butter until creamy, then add vanilla and salt. Gradually mix in powdered sugar, cocoa powder, heavy whipping cream, and melted chocolate until smooth.
- Once layers are cool, level tops if necessary, stack and frost the layers.
- Decorate with personal touches like sprinkles, chocolate shavings, or fresh berries. Chill in the refrigerator for 30 minutes before serving.
Leave a Reply