
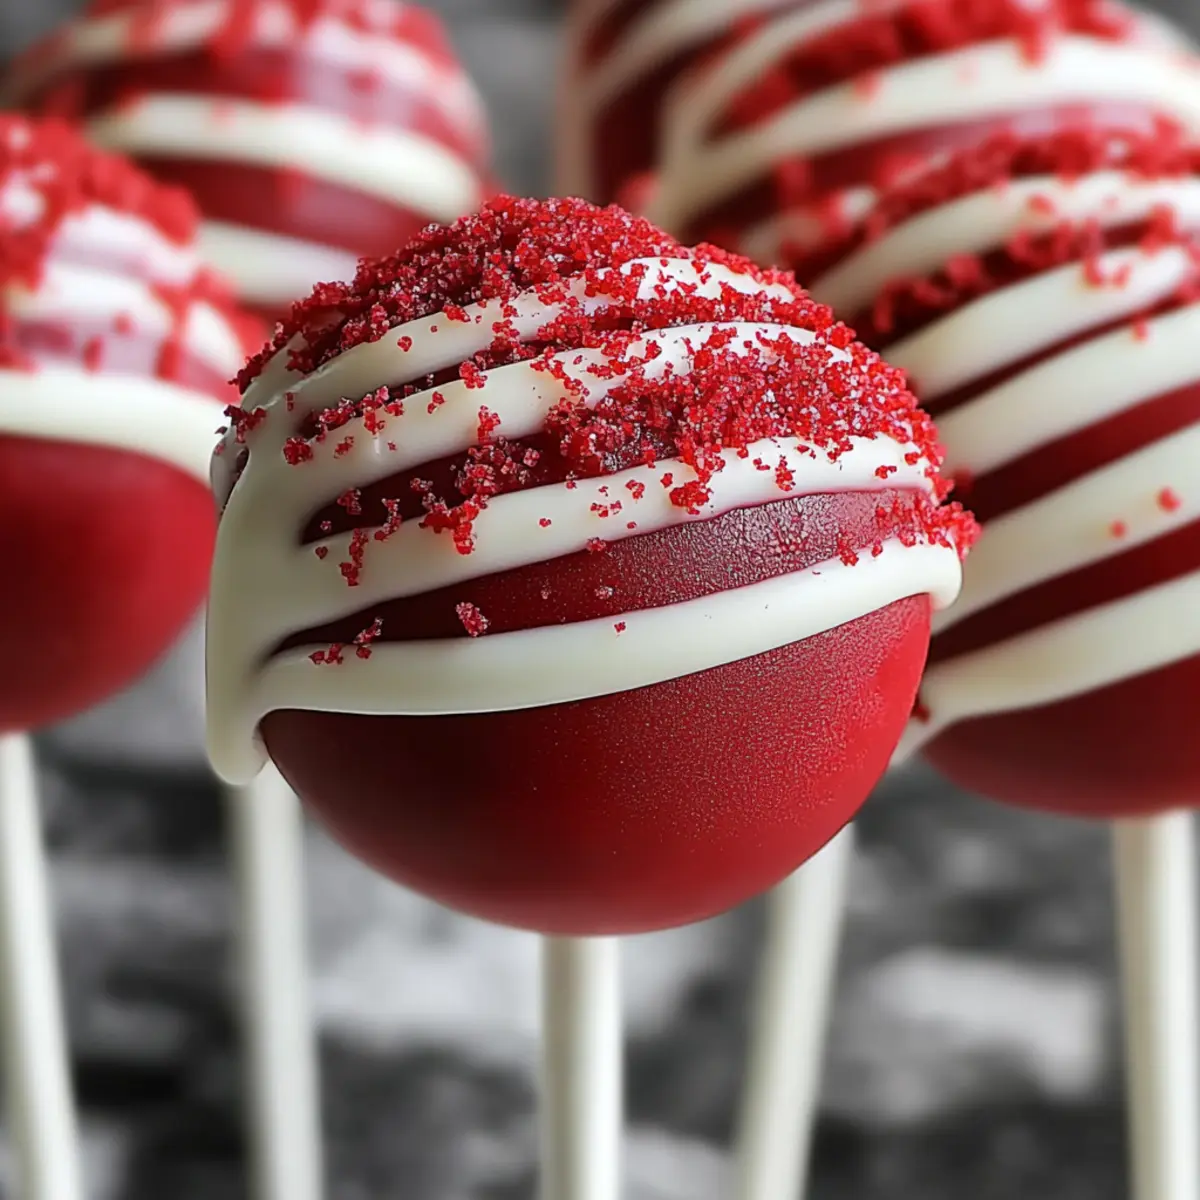
There’s something magical about bite-sized desserts that take you back to childhood celebrations. These Easy & Fun Red Velvet Cake Pops are not just a feast for the eyes with their vibrant red hue; they pack a delightful cocoa flavor that melts in your mouth. If you’re looking for a quick baking project that doubles as a crowd-pleaser, these treats check all the boxes. With minimal prep and ingredients, you can whip up a stunning dessert that both children and adults will adore. Perfect for birthday parties or festive gatherings, these cake pops bring a sweet touch of joy to any occasion. Curious to find out just how easy it is to create these dreamy dessert delights? Let’s get started!
Why Are Red Velvet Cake Pops So Irresistible?
Bite-sized bliss: These cake pops are the perfect grab-and-go treat, satisfying cravings with just one pop!
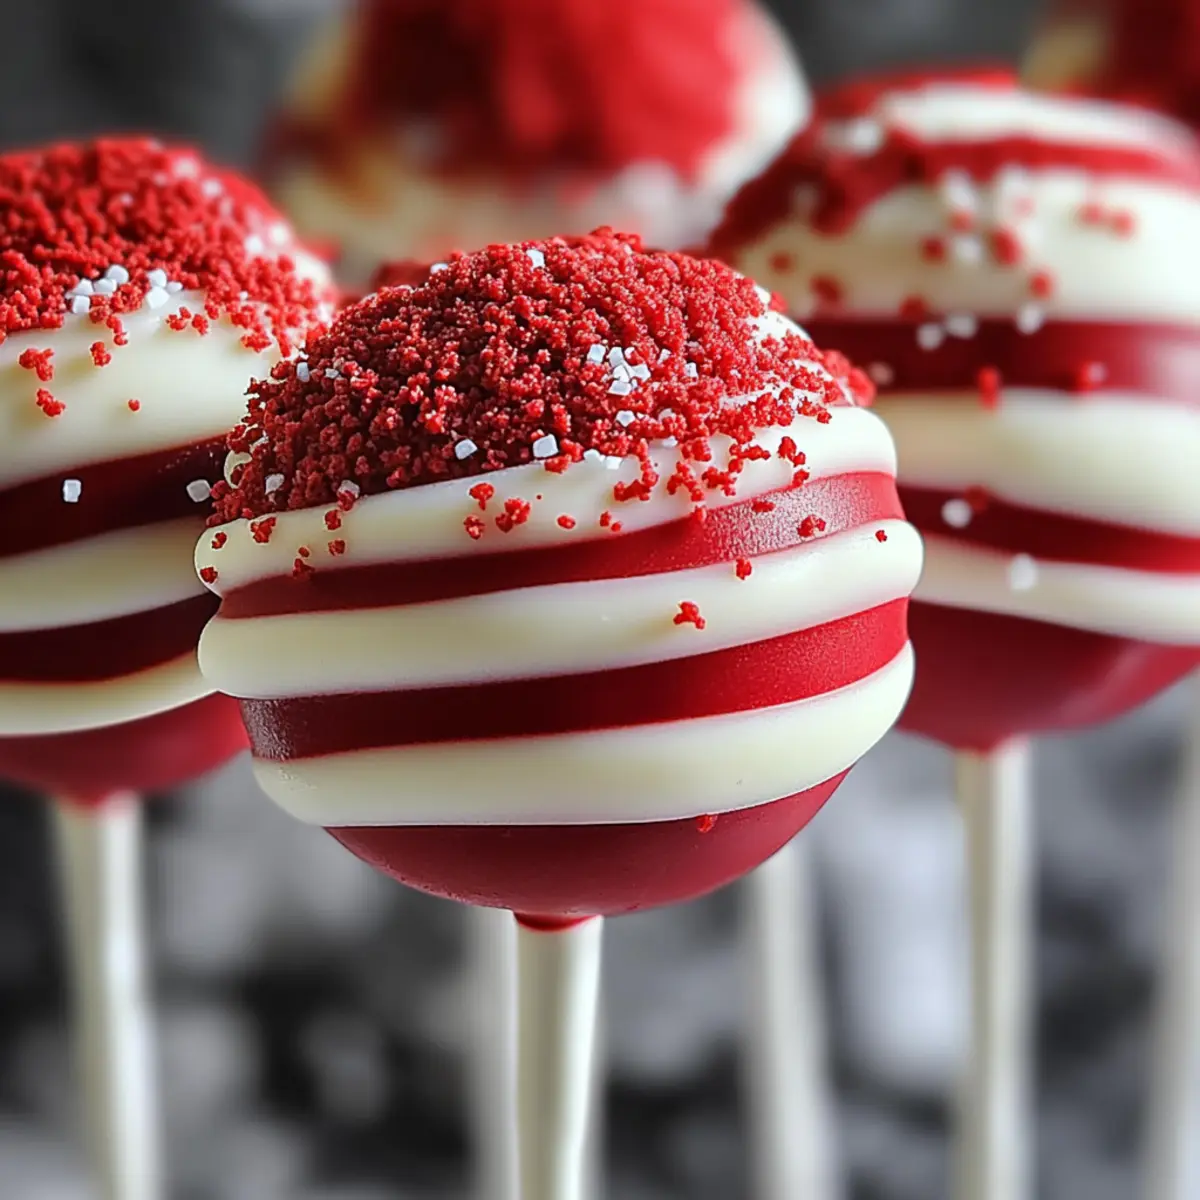
Vibrant presentation: Their bright red color makes them a showstopper at any event, catching the eye and sparking conversations.
Fun for all ages: Whether you’re a kid or just young at heart, rolling, dipping, and decorating cake pops is a joyfully engaging experience for everyone.
Customizable treats: Want a different flavor? It’s easy to swap the red velvet cake mix for chocolate or vanilla to suit any palate.
Quick and easy: With straightforward steps, you’ll have these delectable desserts ready in no time, making them a great option for surprise guests.
These Red Velvet Cake Pops are not just sweet treats—they’re a delightful way to share happiness, just like my Coconut Poke Cake or Grandma’s Fruit Cake!
Red Velvet Cake Pops Ingredients
For the Cake
- Vegetable Oil – Adds moisture and richness; can be substituted with canola or melted coconut oil.
- Eggs – Provide structure and binding; for a vegan option, use flax eggs.
- Water – Hydrates the cake mix; using milk enhances the flavor.
- Red Velvet Cake Mix – The star ingredient that delivers flavor and color; try chocolate or vanilla cake mix for variations.
For the Frosting Mixture
- Pillsbury Creamy Supreme Vanilla Frosting – Binds the crumbled cake together; any cream cheese frosting adds a delightful tang.
For the Coating
- Wilton Candy Melts – Sweet coating that adds aesthetic appeal; colored white chocolate or chocolate melts can be used as substitutes.
- Melting Aid – Thins the candy melts for a smooth finish; shortening works as a convenient alternative.
Support & Presentation
- Cake Pop Sticks – Provide sturdy support for each cake pop; heavy-duty skewers are a great alternative if needed.
- Cake Pop Former – Helps ensure consistent sizing; while not required, it’s useful for uniformity.
- Styrofoam – Holds the cake pops upright while they set; you can use any sturdy surface if styrofoam isn’t available.
Step‑by‑Step Instructions for Easy & Fun Red Velvet Cake Pops
Step 1: Bake the Cake
Preheat your oven to the temperature indicated on the red velvet cake mix package. In a large bowl, combine the cake mix, eggs, vegetable oil, and water, stirring until smooth. Pour the batter into a greased baking dish and bake for the time specified, usually around 30-35 minutes. The cake is ready when a toothpick inserted in the center comes out clean. Allow it to cool completely.
Step 2: Prepare Cake for Crumbling
Once cooled, trim any dry edges from the cake to ensure a moist texture. Using your hands or a fork, crumble the cake into fine pieces in a large mixing bowl. The crumbles should resemble coarse crumbs, as this will help bind the cake pops together. Make sure there are no large chunks, as they can affect the final consistency.
Step 3: Mix and Shape Cake Balls
Add about half a container of the Pillsbury Creamy Supreme Vanilla Frosting to the crumbled cake. Mix with your hands or a spoon until the frosting is fully incorporated, and the mixture holds together when squeezed. Use a scoop or your hands to form the mixture into uniform balls, about the size of a golf ball, ensuring that your Red Velvet Cake Pops are evenly shaped for consistent baking.
Step 4: Insert Cake Pop Sticks
Melt a small amount of Wilton Candy Melts according to the package instructions. Dip the end of each cake pop stick into the melted candy and gently insert it into a cake ball, about halfway. This step helps secure the stick, so repeat for all cake balls. Place them on a tray lined with parchment paper and freeze for about 15 minutes to firm up.
Step 5: Melt the Coating
While the cake pops are chilling, melt the remaining Wilton Candy Melts in a microwave-safe bowl. Heat in 30-second intervals, stirring after each until smooth and glossy—about 1-2 minutes total. If the mixture is too thick, add a little melting aid to achieve a thin, easily-dippable consistency, ensuring the perfect coating for your Red Velvet Cake Pops.
Step 6: Dip the Cake Pops
Once the cake pops are firm, carefully dip each pop into the melted candy coating, making sure to cover it completely. Allow excess coating to drip back into the bowl, giving a smooth finish. If needed, gently twirl the cake pop to help shake off the excess candy. Place the dipped pops back on the parchment-lined tray.
Step 7: Decorate and Set
Insert the decorated cake pops upright into a block of styrofoam or any sturdy surface to hold them while they set. If desired, drizzle with additional colored candy melts for a decorative touch, or add sprinkles while the coating is still wet. Allow the Red Velvet Cake Pops to set completely for about 30 minutes at room temperature before serving or storing them for later enjoyment.

Red Velvet Cake Pops Variations & Substitutions
Feel free to enhance your cake pops with these fun twists and substitutions that’ll make your taste buds dance!
-
Flourless Option: Use ground almond flour mixed with cocoa for a gluten-free version that’s just as moist and delicious.
For those avoiding traditional flour, this swap offers a nutty flavor that complements the sweet chocolate notes beautifully. -
Lower Sugar: Substitute sugar in the cake mix with an equal amount of applesauce.
This will give you moistness and a subtle sweetness without all the sugar. The natural sugars in applesauce create a lovely, soothing taste, perfect if you’re cutting back on sweetness. -
Nutty Addition: Fold in crushed nuts or toffee bits into the cake mix for added crunch.
The textural contrast of these ingredients not only elevates the taste but also adds a gourmet touch that will surprise your guests. -
Dairy-Free Delight: Swap out the frosting for a coconut cream frosting for a luscious and rich experience.
This variation will not only cater to dairy-free friends but also introduces a refreshing coconut note. -
Seasonal Spice: Add a teaspoon of cinnamon or nutmeg to the cake mix for a hint of warm spices.
This tiny adjustment can transform your cake pops into dreamy holiday treats, filling your kitchen with festive aromas. -
Surprise Filling: Insert a small piece of a chocolate truffle in the center of each cake ball before shaping.
Imagine that delightful moment as you bite into a cake pop and discover a melt-in-your-mouth truffle inside—it’s pure bliss! -
Colorful Coatings: Experiment with pastel candy melts for a springtime vibe or dark chocolate for a more sophisticated treat.
Color affects the mood of the dessert, so cater to the season or occasion with a fun twist that brings joy to the presentation. -
Spicy Kick: Mix in a pinch of cayenne pepper or chili powder to the cake batter for a daring flavor twist.
The slight heat from these spices plays wonderfully with the sweet cocoa, creating an unexpected and exciting bite!
There’s so much room to get creative with your Red Velvet Cake Pops! If you loved these ideas, you might also enjoy the bright flavors in my Buttermilk Breakfast Cake or the decadent layers of the Cheats Opera Cake. Happy baking!
Storage Tips for Red Velvet Cake Pops
Room Temperature: Store your cake pops at room temperature in a sealed container for up to 3 days to maintain freshness and flavor.
Fridge: If you need to keep them longer, place the cake pops in the fridge for up to a week. Make sure they are in an airtight container to avoid drying out or absorbing odors.
Freezer: For long-term storage, freeze uncoated cake balls for up to 3 months. Thaw in the fridge before dipping them in candy melts, keeping them fresh and ready for coating.
Reheating: There’s no need to reheat these treats, but if you’ve stored them in the fridge, let them come to room temperature before serving for the best texture and taste. Enjoy your delicious Red Velvet Cake Pops!
Make Ahead Options
These Red Velvet Cake Pops are perfect for meal prep enthusiasts looking to save time during busy weeks! You can prepare the cake balls up to 3 days in advance. Simply bake the cake, crumble it, and mix with frosting, then shape the balls and freeze them until you’re ready to dip. To maintain their quality, store the uncoated cake balls in an airtight container in the freezer. When you’re ready to serve, thaw them in the fridge overnight and dip them in melted candy coatings. This little advance prep will provide you with delicious cake pops that are just as delightful as freshly made, giving you sweet treats with minimal effort!
Expert Tips for Red Velvet Cake Pops
-
Chill for Success: Ensure your cake balls are cold before dipping; this helps maintain their shape and prevents melting during coating.
-
Use Quality Cake Mix: Opt for a high-quality red velvet cake mix to guarantee a rich flavor and vibrant color in your Red Velvet Cake Pops.
-
Monitor Candy Temperature: A candy thermometer can be your best friend—keep the candy melts at the right temperature to avoid cracking during the dipping process.
-
Piping for Precision: For a beautiful drizzle, use a piping bag to control the melted candy flow over your cake pops for an eye-catching finish.
-
Experiment with Flavors: Feel free to get creative! Swap the frosting for flavored varieties or try different cake mixes to keep things exciting.
What to Serve with Easy & Fun Red Velvet Cake Pops
Elevate your dessert table by pairing these delightful treats with complementary sides and beverages that will enchant your guests.
- Creamy Cheesecake Mousse: This light, airy dessert provides a contrast to the dense cake pops, enhancing the overall sweetness of your spread.
- Fruity Garden Salad: A fresh mix of fruit adds a refreshing contrast, balancing the rich flavors of the cake pops while introducing vibrant colors.
- Rich Coffee: Pair with a warm cup of coffee to cut through the sweet decadence. The bitterness of coffee beautifully complements the cake’s flavor profile.
- Chocolate Dipped Strawberries: These luscious strawberries echo the cake pops’ sweet appeal while adding a burst of freshness and rich chocolatey goodness.
- Vanilla Ice Cream: The cool, creamy texture of vanilla ice cream serves as the perfect base for your cake pops, enhancing your dessert experience with delightful creaminess.
- Sparkling Lemonade: This zesty beverage offers a refreshing, citrusy twist, cleansing the palette and complementing the vibrant red velvet pops.
- Mini Cupcakes: A variety of mini cupcakes provide flavor diversity, allowing guests to indulge in different baked delights without overwhelming their taste buds.
- Chocolate Milkshake: This indulgent drink is the ultimate comfort pairing, perfectly matching the rich, cocoa flavor of the cake pops while satisfying sweet cravings.
- Homemade Whipped Cream: A dollop of fluffy whipped cream elevates each bite of cake pop, adding a luscious layer of creaminess that ties everything together.
- Caramel Sauce: Drizzling caramel sauce over your cake pops adds a sweet, buttery richness that enhances their texture and flavor.
Red Velvet Cake Pops Recipe FAQs
What is the best way to choose red velvet cake mix?
Absolutely! When selecting a red velvet cake mix, look for one with recognizable ingredients and vibrant color. I often choose mixes that contain cocoa for that rich flavor. If possible, give the box a gentle shake; if it sounds too empty, it may be stale!
How should I store my red velvet cake pops?
You can easily store your cake pops at room temperature in a sealed container for up to 3 days. This keeps them fresh and ready to enjoy. If you need them longer, move them to the refrigerator for up to a week, but make sure they’re airtight to avoid any unwanted odors or drying out.
Can I freeze red velvet cake pops?
Yes, you can! To freeze your cake pops, shape the uncoated cake balls and place them on a baking sheet lined with parchment paper. Freeze them for about 30 minutes, then transfer to an airtight container or a freezer bag. They can stay in the freezer for up to 3 months. When you’re ready to coat them, simply thaw in the fridge overnight before dipping in your melted candy melts.
What if my dipping chocolate is too thick?
Very! If you find that your melted candy melts are too thick to coat your cake pops smoothly, add a small amount of melting aid, like shortening, while melting. Stir it in until the mixture reaches a thin, drizzle-like consistency. Heat it in 30-second intervals if needed, stirring well after each until it’s perfect for dipping. You want a smooth and shiny coating!
Are red velvet cake pops suitable for those with egg allergies?
That’s a great question! To make these cake pops suitable for someone with egg allergies, you can use flax eggs as a substitute. To prepare a flax egg, mix 1 tablespoon of ground flaxseed with 2.5 tablespoons of water and let it sit for a few minutes until it thickens. This will help bind the ingredients just as eggs would!
How can I enhance the flavor of my red velvet cake pops?
Definitely! Consider using milk instead of water when mixing your cake batter to enhance the flavor. Additionally, you can mix in a teaspoon of vanilla extract or a splash of almond extract for an incredible depth in taste. It’s a simple tweak that makes a big difference!

Irresistibly Soft Red Velvet Cake Pops for Sweet Celebrations
Ingredients
Equipment
Method
- Preheat your oven to the temperature indicated on the red velvet cake mix package. In a large bowl, combine the cake mix, eggs, vegetable oil, and water, stirring until smooth. Pour the batter into a greased baking dish and bake for about 30-35 minutes. The cake is ready when a toothpick inserted in the center comes out clean. Allow it to cool completely.
- Once cooled, trim any dry edges from the cake to ensure a moist texture. Using your hands or a fork, crumble the cake into fine pieces in a large mixing bowl. The crumbles should resemble coarse crumbs, as this will help bind the cake pops together.
- Add about half a container of the Pillsbury Creamy Supreme Vanilla Frosting to the crumbled cake. Mix until the frosting is fully incorporated and the mixture holds together when squeezed. Form the mixture into uniform balls, about the size of a golf ball.
- Melt a small amount of Wilton Candy Melts according to the package instructions. Dip the end of each cake pop stick into the melted candy and gently insert it into a cake ball halfway. Freeze for about 15 minutes to firm up.
- Melt the remaining Wilton Candy Melts in a microwave-safe bowl, heating in 30-second intervals until smooth and glossy—about 1-2 minutes total. If the mixture is too thick, add a little melting aid to achieve a thin consistency.
- Carefully dip each cake pop into the melted candy coating, ensuring it is covered completely. Allow excess coating to drip back into the bowl. Place dipped pops back on the tray.
- Insert the decorated cake pops upright into a block of styrofoam to hold them while they set. Drizzle with additional colored candy melts or add sprinkles, then allow to set for about 30 minutes before serving or storing.
Leave a Reply