
I can still hear the crackling of chocolate melting in the microwave, filling my kitchen with an irresistible aroma. When I first tried making my own Homemade Dark Chocolate Chips, I never imagined how simple yet satisfying the process would be. With just two key ingredients, you can whip up a batch of these delightful, sugar-free treats in no time. Not only do they satisfy my sweet tooth, but they also fit perfectly into my clean eating routine. Whether I’m drizzling them over yogurt or tossing them into freshly baked cookies, they add a rich touch of indulgence without the guilt. Curious about how to make these luscious morsels yourself? Let’s dive into the sweet details!
Why Make Homemade Dark Chocolate Chips?
Simplicity at its Best: With just two ingredients, you can create a versatile treat that’ll wow anyone.
Guilt-Free Indulgence: Satisfy your sweet cravings without any added sugars.
Versatile Use: Perfect for snacking, baking, or topping desserts like yogurt or ice cream. These chips can spice up your favorite recipes like Savory Cabbage Beef or even add flair to classic cookies!
Little Prep Time: Done in less than 30 minutes, making them an ideal addition to your clean eating routine.
Customizable Sweetness: Experiment with various sweeteners to find your perfect flavor profile. Make them truly yours!
Experience the beauty of homemade treats and enjoy the rich chocolatey goodness today!
Homemade Dark Chocolate Chips Ingredients
• Dive into these delightful flavors with just two key ingredients!
For the Chocolate Base
- Unsweetened Chocolate – This is the heart of your dark chocolate chips, so choose high-quality bars for the best flavor.
- Truvia (or sweetener of choice) – Use this for sweetness without sugar; just remember that it may create a slightly grainy texture.
Optional Customizations
- Flavor Extracts (like vanilla or mint) – A few drops can elevate the chocolate chips to a whole new level of indulgence.
- Other Sweeteners (like Stevia or agave) – Feel free to experiment! Different options can change the taste and texture significantly.
These homemade dark chocolate chips are not only decadent but also fit beautifully into various diets, including gluten-free, sugar-free, and vegan.
Step‑by‑Step Instructions for Homemade Dark Chocolate Chips
Step 1: Prepare Your Workspace
Begin by lining a baking sheet with parchment paper, ensuring it’s flat and free of wrinkles. This is essential for maintaining the shape of your homemade dark chocolate chips. Make sure you have a microwave-safe bowl ready, as you’ll be melting the unsweetened chocolate shortly.
Step 2: Chop and Melt the Chocolate
Chop the unsweetened chocolate into small, uniform pieces for even melting. Place the chopped chocolate in your microwave-safe bowl and microwave on high power for 20 seconds. Remove and stir well; if not fully melted, continue microwaving in 5-second intervals, stirring after each session, until you achieve a smooth, glossy consistency.
Step 3: Sweeten the Chocolate
Once the chocolate is fully melted and smooth, add Truvia or your sweetener of choice. Stir vigorously until the sweetener is completely combined, ensuring there are no lumps and the mixture is evenly sweetened. The chocolate should still feel warm but not hot, creating a luscious consistency ready for piping.
Step 4: Prepare for Piping
Transfer the melted chocolate mixture into a zip-top bag. Snip off one corner of the bag to create a small opening for piping. This step is crucial for controlling the size of your homemade dark chocolate chips. Set the bag aside for a moment while you prepare to form your chocolate drops.
Step 5: Pipe the Chocolate Drops
Carefully squeeze the chocolate mixture onto the prepared parchment paper, creating small dots or chip shapes, leaving a little space in between each one. Work quickly, as the chocolate can start to harden in the bag. Don’t worry if they aren’t perfect; you can shape them as needed while they are still warm!
Step 6: Create Shape with Dots
To add a charming touch to your homemade dark chocolate chips, lightly touch the center of each dot with a toothpick or your fingertip. This will create a beautiful tip that resembles traditional chocolate chips. Continue this process until all the chocolate mixture is piped and shaped on the parchment.
Step 7: Allow to Harden
Let the chocolate chips sit at room temperature until they are completely hardened, which usually takes about 30 minutes. You can also speed up the process by placing them in the refrigerator for about 10-15 minutes. Once firm, they will be ready for use in your favorite recipes or enjoyed on their own!
Step 8: Store Your Chocolate Chips
Once hardened, carefully peel the chocolate chips from the parchment paper and transfer them to an airtight container. Store your homemade dark chocolate chips in a cool, dry place to maintain their freshness. They can also be frozen for longer storage, perfect for your next baking adventure!
Make Ahead Options
These Homemade Dark Chocolate Chips are a fantastic option for meal prep enthusiasts! You can melt the unsweetened chocolate and mix in your sweetener up to 24 hours in advance, storing the mixture in an airtight container in the refrigerator. When you’re ready to make the chocolate chips, simply reheat the mixture gently in the microwave for a few seconds before piping it onto the parchment paper. This will help maintain a smooth and glossy texture. Additionally, after forming the chocolate chips, they can be stored in an airtight container for up to 3 days in a cool, dry place, preserving their delicious quality for all your baking needs. Enjoy the convenience of having these delightful homemade treats ready to use at a moment’s notice!
Expert Tips for Homemade Dark Chocolate Chips
-
Ingredient Quality: Use high-quality unsweetened chocolate bars for the best flavor. Brands like Ghirardelli or Baker’s enhance your chocolate chips naturally.
-
Right Sweetener: Experiment with Truvia and other sweeteners to find your ideal taste. Some may create graininess, so try powdered Stevia for a smoother finish.
-
Piping Technique: Work quickly when piping to avoid chocolate hardening in the bag. If it cools too much, microwave it briefly to regain a workable consistency.
-
Shape Magic: For professional-looking chocolate chips, touch the center of each piped drop with a toothpick to create the traditional tip shape.
-
Storage Savvy: Store your homemade dark chocolate chips in an airtight container in a cool, dry place for maximum freshness. They freeze well too!
Variations & Substitutions for Homemade Dark Chocolate Chips
Feel free to get creative and tailor these delightful chocolate chips to your taste!
-
Sweetener Swap: Change Truvia for powdered Stevia or agave. Adjust the amount based on sweetness preferences. A splash of maple syrup can also add a delightful flavor twist.
-
Flavor Twist: Add a splash of flavor extracts like vanilla or peppermint to transform the chocolate chips. A hint of orange zest can also impart a refreshing touch!
-
Nutty Addition: Incorporate finely chopped nuts or seeds into the chocolate mix before piping for a delightful crunch. Almonds, walnuts, or even chia seeds can elevate the texture!
-
Dairy-Free Delight: Opt for dairy-free chocolate bars to keep these chips vegan. Brands like Enjoy Life offer delicious options without compromising flavor.
-
Richness Boost: Use dark chocolate for an even deeper flavor, or mix in some cocoa powder to enhance the chocolatey taste. A dash of espresso powder also enriches the overall flavor!
-
Spicy Kick: Add a touch of cayenne or chili powder for an unexpected heat that pairs beautifully with chocolate’s sweetness. Just a pinch can tantalize your taste buds!
-
Chunky Chocolate: After piping, sprinkle coarse sea salt over the chips for a sweet-salty contrast that keeps you coming back for more. These are great for topping desserts like Beef Lasagna Cheesy!
Explore these variations to make each batch truly unique, just like your culinary journey!
What to Serve with Homemade Dark Chocolate Chips?
Indulging in rich, homemade dark chocolate chips opens up a world of delightful pairings that elevate your sweet creations.
-
Creamy Greek Yogurt: The tanginess of Greek yogurt provides a perfect contrast to the rich chocolate, making each bite wonderfully balanced.
-
Chewy Oatmeal Cookies: Toss these chocolate chips into homemade oatmeal cookies for a warm, gooey treat that’s both wholesome and indulgent.
-
Velvety Ice Cream: Use these chocolate chips as a topping for ice cream or blend them into dairy-free frozen yogurt for a rich chocolate experience.
-
Fresh Fruit Medley: Toss in a handful of chocolate chips with a mix of fresh berries or banana slices for a colorful, healthy dessert.
-
Nutty Trail Mix: Combine the chocolate chips with nuts, seeds, and dried fruit for a satisfying snack that satisfies both sweet and crunchy cravings.
-
Decadent Brownies: Elevate your brownies by folding in these dark chocolate chips, enhancing their fudgy texture and elevating the chocolate flavor.
-
Warm Pancakes or Waffles: Sprinkle these chips on warm pancakes or waffles right off the griddle, creating an irresistible breakfast treat.
-
Rich Hot Chocolate: Melt these chips into a mug of warm almond milk for a luxurious hot chocolate that’s sugar-free and utterly delightful.
Storage Tips for Homemade Dark Chocolate Chips
Room Temperature: Store your chocolate chips in an airtight container in a cool, dry place for up to 3 weeks to keep them fresh and flavorful.
Fridge: If you prefer a firmer texture, refrigerate your homemade dark chocolate chips in an airtight container for up to 2 months.
Freezer: For longer storage, freeze the chocolate chips in a single layer on a baking sheet before transferring to a freezer-safe bag. They can last up to 6 months without losing quality.
Reheating: If your homemade dark chocolate chips have hardened, gently microwave them for a few seconds or let them sit at room temperature for easier handling in future recipes.
Homemade Dark Chocolate Chips Recipe FAQs
How do I select the best chocolate for this recipe?
Absolutely! When choosing unsweetened chocolate, look for high-quality bars like Ghirardelli or Baker’s. These brands contain pure chocolate and no added sugars or fillers, which helps ensure a rich flavor in your homemade chocolate chips. Check the packaging for a simple ingredient list, ideally containing only chocolate.
What is the best way to store homemade dark chocolate chips?
To maintain freshness, store your homemade dark chocolate chips in an airtight container in a cool, dry place for up to 3 weeks. If you’d like to keep them longer, refrigerate them for up to 2 months. Just make sure they are sealed well to prevent moisture from affecting their texture.
Can I freeze homemade dark chocolate chips?
Yes, indeed! To freeze your chocolate chips, spread them out in a single layer on a baking sheet and place them in the freezer. Once frozen solid, transfer them to a freezer-safe bag. They can last up to 6 months! When you’re ready to use them, just remove the desired amount from the freezer, and they can go directly into your recipes.
What should I do if my melted chocolate starts to harden?
Don’t worry—it happens! If your melted chocolate begins to cool and harden while piping, simply microwave it for about 5 seconds at a time, stirring in between, until it reaches a smooth consistency again. This will allow you to continue shaping your chocolate chips without any issues.
Are there any dietary considerations I should keep in mind?
Very! This recipe is excellent for those following gluten-free, vegan, or low-sugar diets. However, always check the labels of your chocolate and sweeteners to ensure they meet your dietary needs. If making treats for pets, avoid chocolate entirely, as it can be harmful to them.
Can I use different sweeteners in this recipe?
Definitely! You can experiment with various sweeteners to find your ideal taste. Options like powdered Stevia or agave syrup can work well, but adjust quantities according to the potency of the sweetener you choose. Just remember that different sweeteners can alter the texture, so feel free to play around!
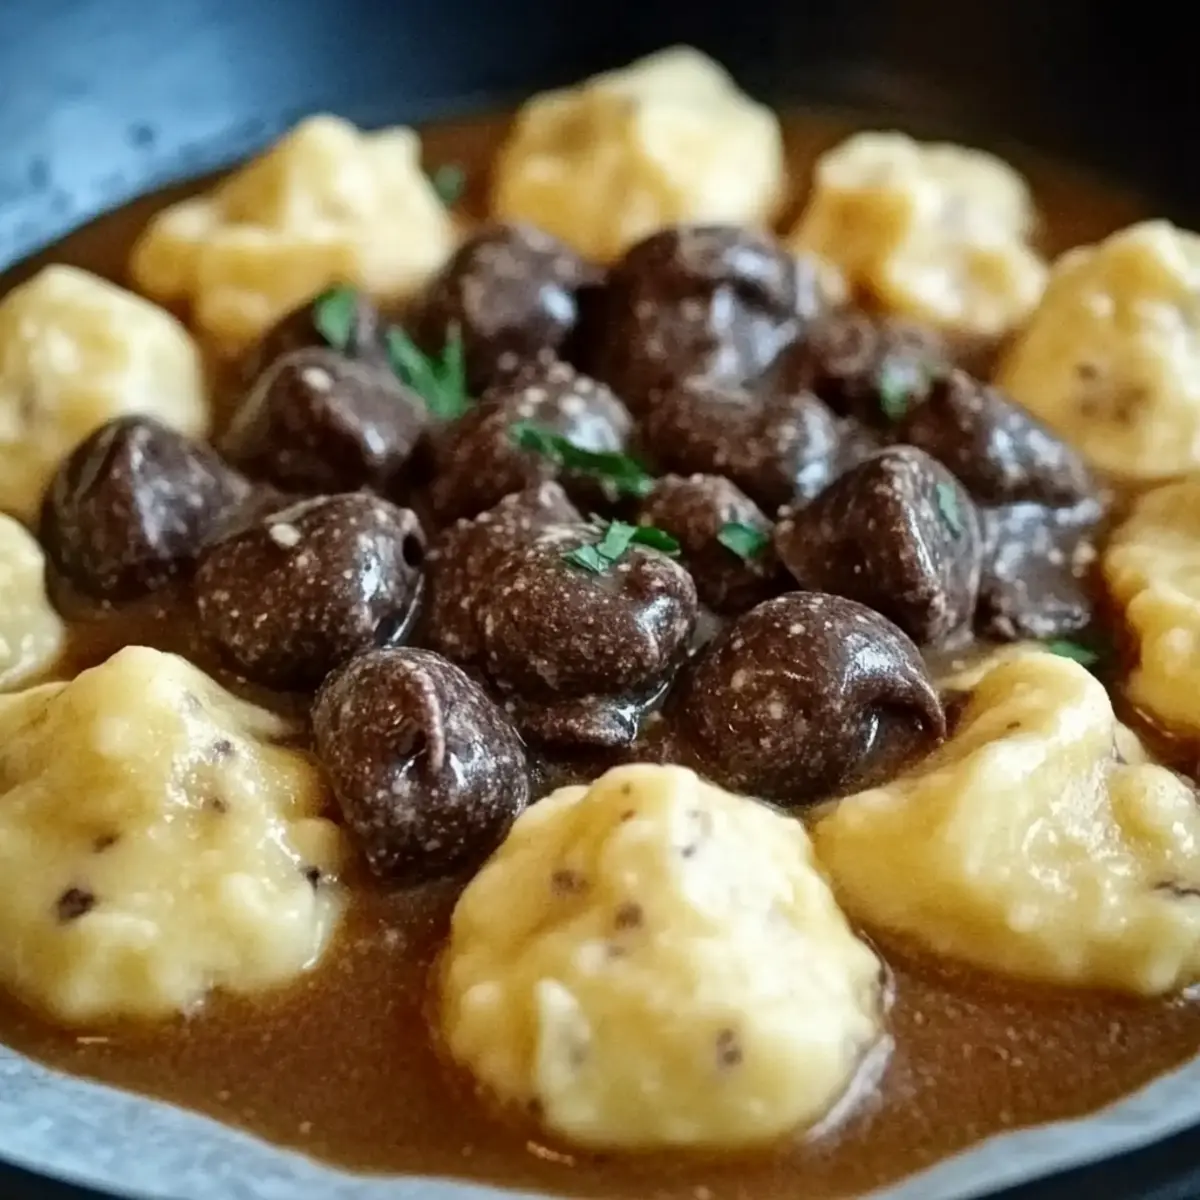
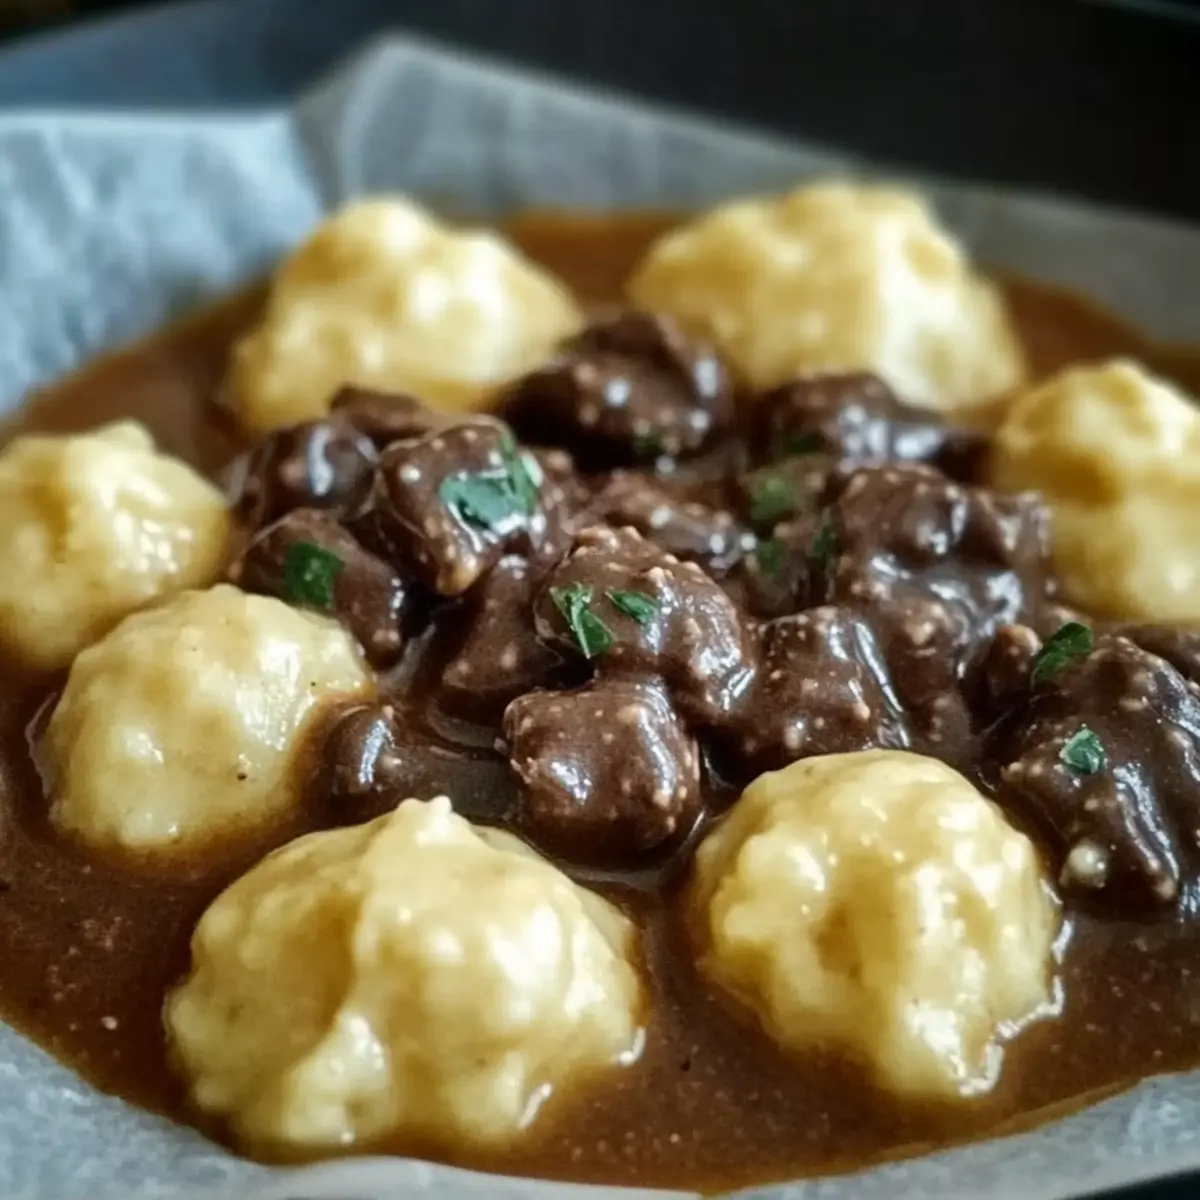
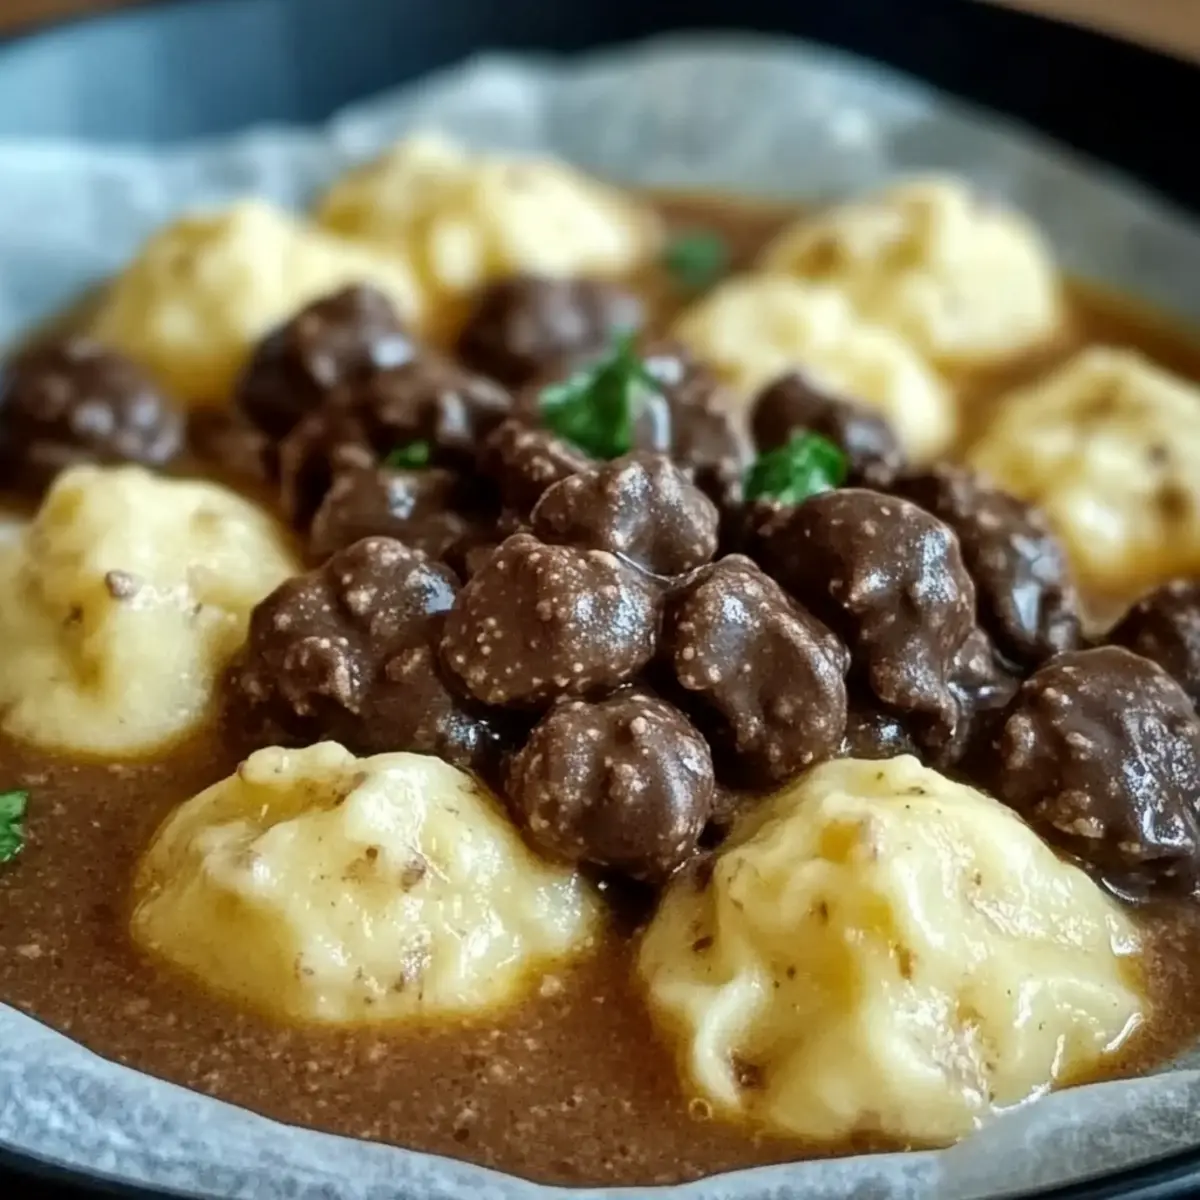
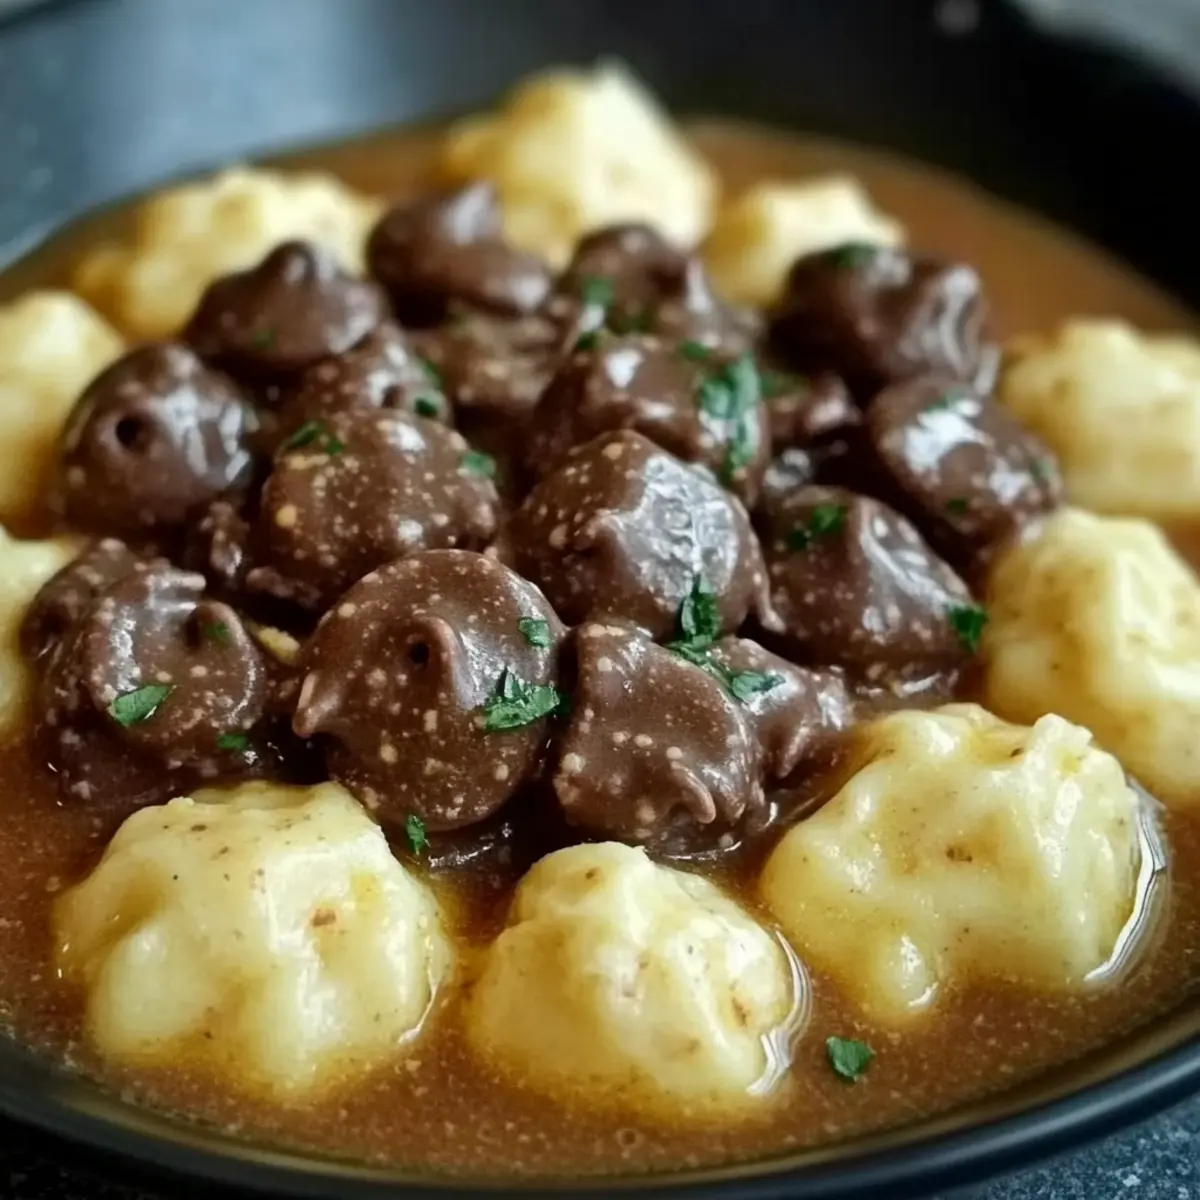
Ground Beef and Dumplings: Comfort Food Done Right
Ingredients
Equipment
Method
- Prepare Your Workspace by lining a baking sheet with parchment paper.
- Chop the unsweetened chocolate into small pieces and melt in the microwave.
- Stir in Truvia or sweetener of choice into the melted chocolate.
- Transfer melted chocolate into a zip-top bag for piping.
- Squeeze chocolate onto parchment in small dots for chips.
- Touch the center of each dot with a toothpick for shape.
- Allow chocolate chips to harden at room temperature or in the fridge.
- Store your chocolate chips in an airtight container.
Leave a Reply