
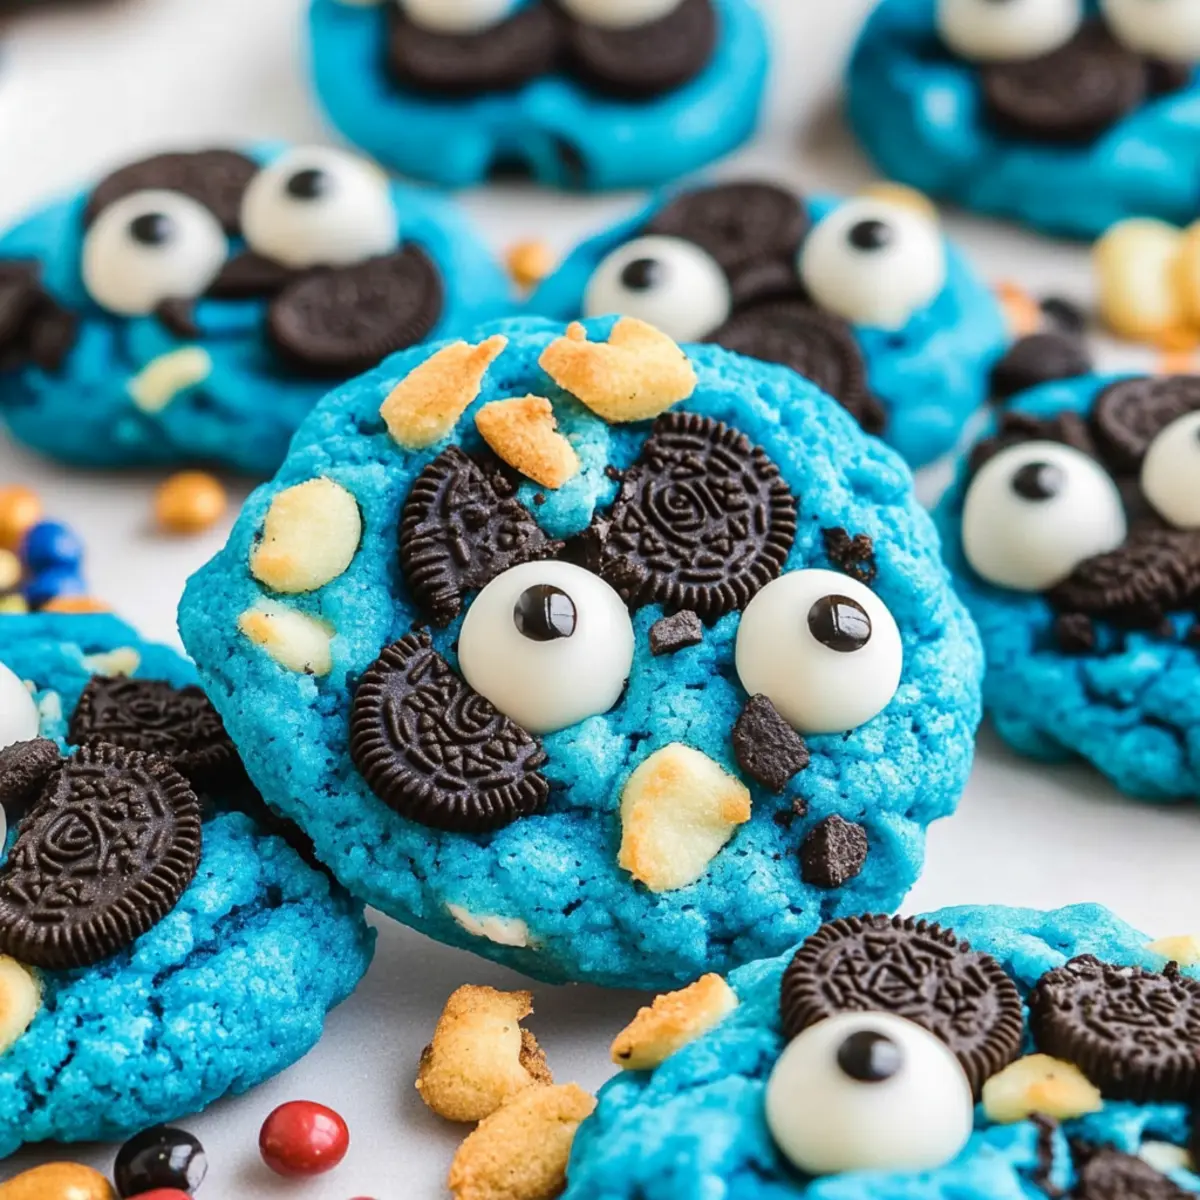
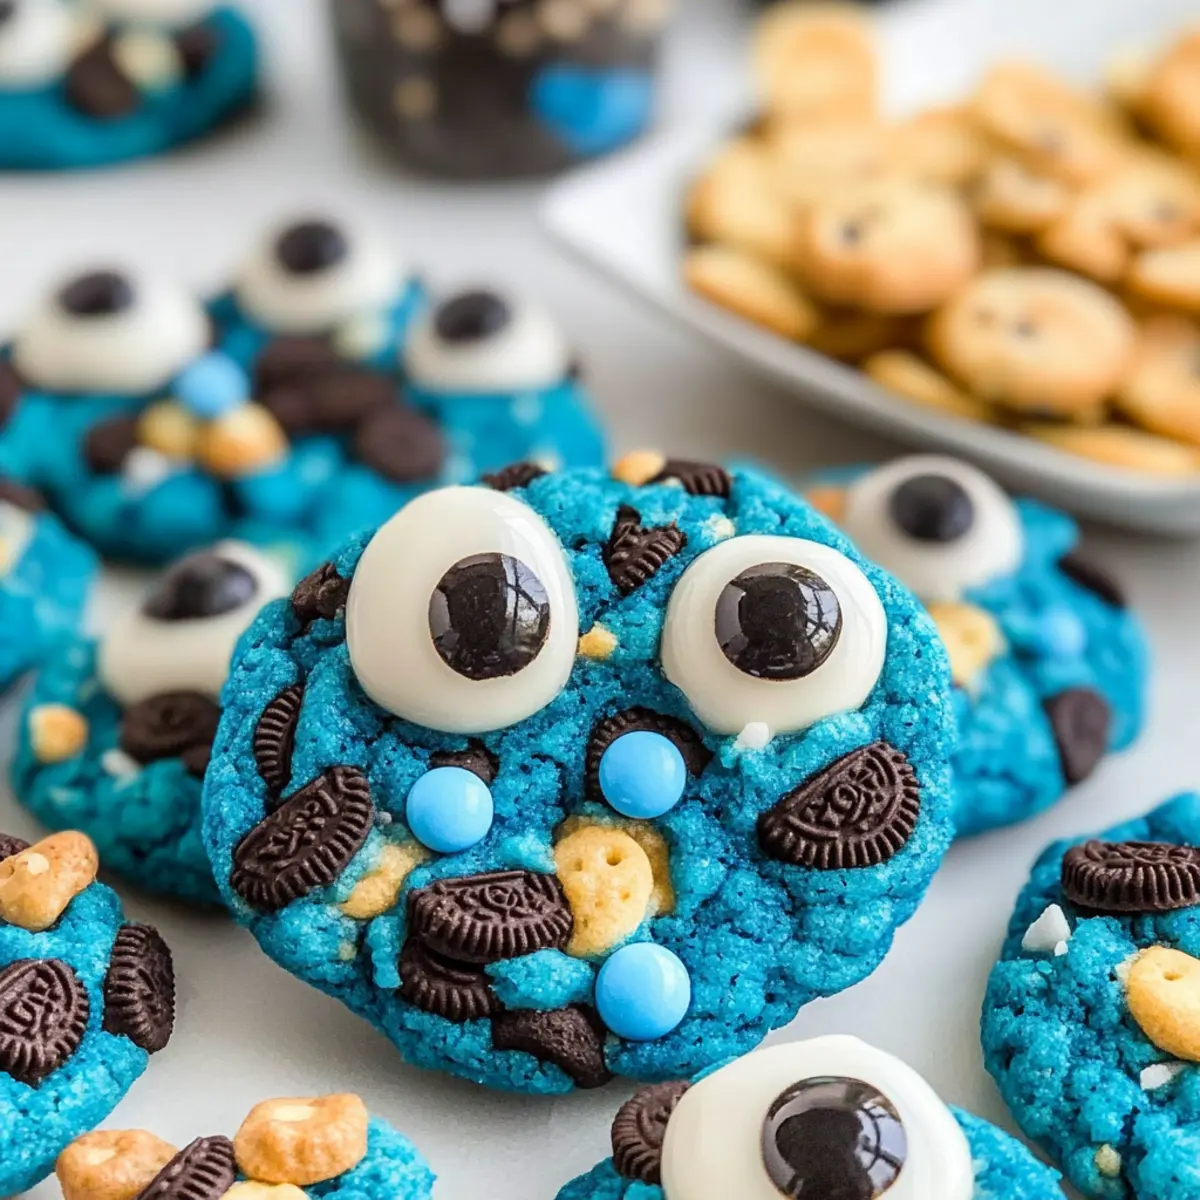
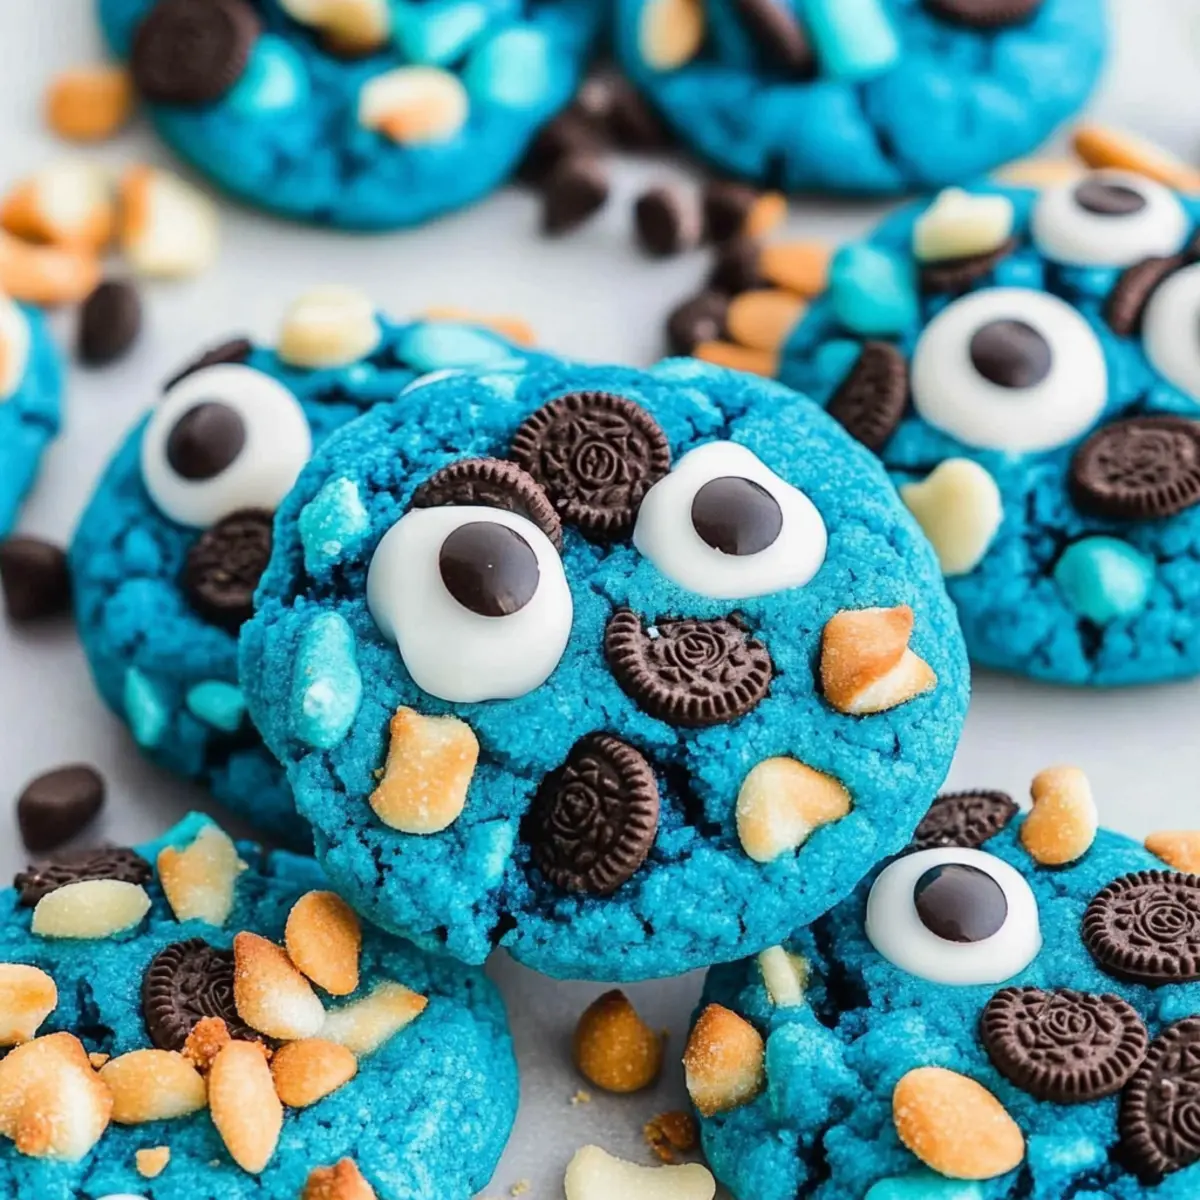
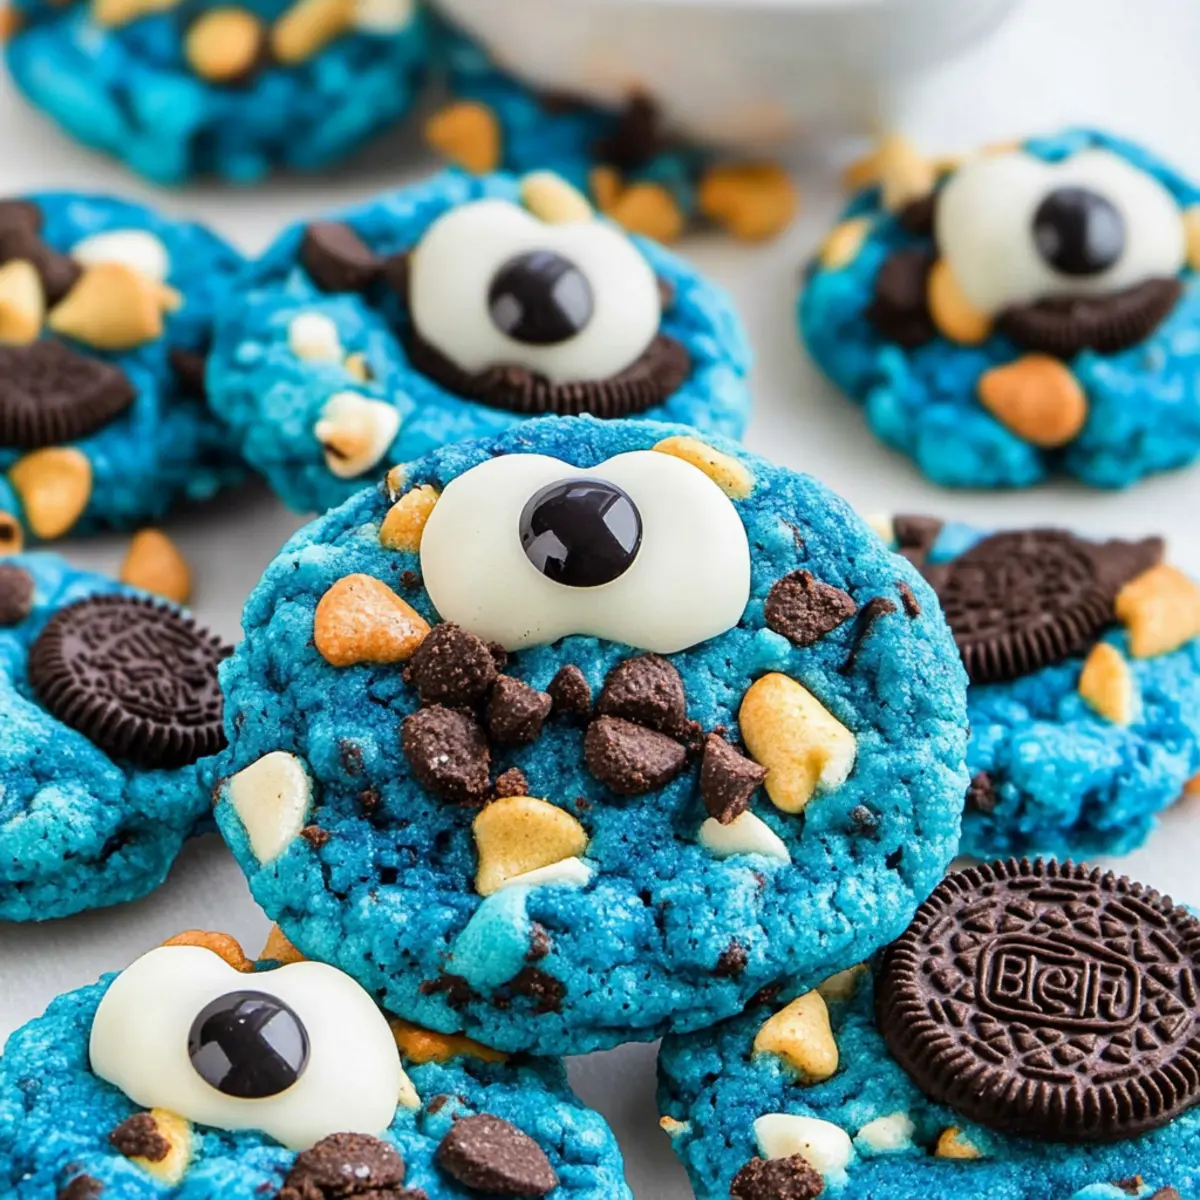
As I rummaged through my pantry last week, I stumbled upon a box of sugar cookie mix that transported me back to my childhood. With a spark of inspiration, I decided to whip up some whimsical Cookie Monster Cookies—a vibrant, fun twist on the classic treat. Picture soft, chewy cookies in a playful blue hue, brimming with mini Oreos and chocolate chips. Not only are these cookies a joyous hit for parties or movie nights, but they’re also incredibly easy to make! In just a few simple steps, you’ll create colorful delights that are sure to keep both kids and adults coming back for more. Are you ready to bake these cheerful confections and impress your friends? Let’s get started!
Why Are These Cookies a Must-Try?
Vibrant and Fun: These Cookie Monster Cookies are a feast for the eyes, boasting a bright blue color that instantly brings joy to any gathering.
Easy to Make: Relying on a sugar cookie mix, the process is streamlined for bakers of all experience levels—perfect for a quick treat!
Crowd-Pleasing Delight: Whether for kids’ parties or family movie nights, these cookies are sure to be a hit with both children and adults alike.
Versatile Treat: Feeling adventurous? Try substituting the mini Oreos with your favorite candy or create a gooey center by stuffing cookies with chocolate!
Nostalgic Appeal: Inspired by the beloved Sesame Street character, these cookies invite a playful nostalgia, making them a delightful addition to any celebration or cozy evening at home.
Ready to embark on this baking adventure? You might also enjoy these Snowball Cookies Melt or switch things up with Chocolate Meringue Cookies!
Cookie Monster Cookies Ingredients
For the Dough
- Sugar Cookie Mix – Serves as the sweet base for these colorful Cookie Monster cookies; feel free to use homemade dough for a personal touch.
- Salted Butter – Adds creaminess and depth; make sure it’s softened for easier blending.
- Large Egg – Acts as a binder, ensuring your cookies hold together beautifully.
- Vanilla Extract – A dash of this enhances the overall flavor, taking your cookies to the next level.
- Blue Food Coloring – Provides that playful Cookie Monster hue; use more for a deeper color, if desired.
For the Mix-Ins
- Mini Oreos (halved) – Introduces delightful crunch and a nod to the character’s cookie-loving nature; substitute with full-sized Oreos if needed.
- Mini Chips Ahoy! (halved) – Infuses extra chocolatey goodness and keeps cookie sizes just right.
- White Chocolate Chips – Brightens each bite with sweetness and adds a lovely contrast.
- Semi-Sweet Chocolate Chips – Balances the sweetness with a rich, chocolatey flavor.
For the Decor
- Large Candy Eyeballs – Add whimsical charm and character to your Cookie Monster Cookies, making them even more fun!
Step‑by‑Step Instructions for Cookie Monster Cookies
Step 1: Preheat and Prepare
Begin by preheating your oven to 350°F (175°C) as instructed on the sugar cookie mix package. While the oven heats up, line two baking sheets with parchment paper to prevent sticking and make cleanup easier. Having everything ready will ensure a smooth baking process for your delightful Cookie Monster Cookies.
Step 2: Mix the Dough
In a large mixing bowl, combine the sugar cookie mix, softened salted butter, large egg, and vanilla extract. Mix these ingredients together until a soft and cohesive dough forms, taking about 2-3 minutes with a hand mixer or a sturdy spatula. This step is crucial to ensure your Cookie Monster Cookies have a pleasant texture and flavor.
Step 3: Add Color
Once the dough is ready, add a few drops of blue food coloring and mix until the color is evenly distributed throughout the dough. Aim for a vibrant blue hue that mimics the fun of Cookie Monster himself! This should take about a minute. Adjust the coloring as desired, but remember that a little goes a long way.
Step 4: Fold in Mix-Ins
Gently fold in the halved mini Oreos, mini Chips Ahoy!, white chocolate chips, and semi-sweet chocolate chips into the dough. Use a spatula to ensure these delicious mix-ins are evenly incorporated without overworking the dough. This will create a delightful contrast in textures and flavors for your Cookie Monster Cookies.
Step 5: Scoop the Dough
Using a large cookie scoop (approximately 3 tablespoons), scoop out portions of dough and place them onto the lined baking sheets. Leave enough space (about 2 inches apart) between each cookie to allow for spreading. You should see colorful dough balls ready to transform into cookies with every scoop!
Step 6: Bake
Slide the baking sheets into the preheated oven and bake the cookies for 13-16 minutes. Keep an eye on them; they’re done when the edges are lightly golden but the centers still look soft. This texture is key to achieving the chewy consistency that makes Cookie Monster Cookies so enjoyable.
Step 7: Add Eyeballs
Once baked, remove the cookies from the oven and immediately press a large candy eyeball into the front of each cookie while they are still warm. This step adds the fun character element to your creations and should be done quickly before the cookies cool completely.
Step 8: Cool and Serve
Allow the Cookie Monster Cookies to cool on the baking sheets for about 5 minutes before carefully transferring them to wire racks. Let them cool completely on the racks. This final cooling period is essential for developing the perfect chewy texture while retaining the delightful shape.
Cookie Monster Cookies Variations & Substitutions
Feel free to get creative and customize these Cookie Monster Cookies to suit your preferences; the possibilities are endless!
-
Chocolate Base: Swap the sugar cookie mix for chocolate chip cookie dough for a deliciously different flavor. The added richness will be a delightful surprise!
-
Gooey Centers: Stuff each cookie dough ball with a small piece of chocolate or an entire mini Oreo for an indulgent, melty center. Your family and friends will love finding that unexpected treat!
-
Nutty Twist: Incorporate chopped nuts like walnuts or pecans for extra crunch and flavor. This adds a rustic charm and a wholesome touch to your whimsical cookies.
-
Healthier Options: Replace mini Oreos with crushed whole-grain cookies or granola bites for a slightly healthier take. You’ll retain the fun while making a more nutritious choice!
-
Flavor Variety: Experiment with different types of chocolate chips—try peanut butter, mint, or dark chocolate for a unique flavor profile. Each will bring a delightful twist to the iconic Cookie Monster treat.
-
Colorful Sprinkles: Add colorful sprinkles into the mix for an extra festive touch. This can transform your cookies into party-ready treats that catch everyone’s attention!
-
Cooling Advice: Make sure to cool the cookies minimally before adding candy eyeballs to prevent them from melting. This little tip makes a big difference in presentation!
If you’re looking for more fun cookie ideas, try these delightful Snowball Cookies Melt or treat yourself to some Chocolate Meringue Cookies that are sure to impress!
Expert Tips for Cookie Monster Cookies
-
Mix Thoroughly: Make sure to blend the dough until fully combined to avoid uneven textures and ensure delightful Cookie Monster Cookies in every bite.
-
Mind the Cooling: Let cookies cool for a few minutes before adding the candy eyeballs to prevent them from melting, keeping your cookies looking fun and festive.
-
Use Parchment Paper: When storing cookies, layer them with parchment paper in an airtight container to prevent sticking and maintain freshness.
-
Experiment with Flavors: Don’t hesitate to explore different types of chocolate chips or mix-ins for unique twists on your colorful Cookie Monster Cookies!
-
Keep an Eye on Baking: Watch your cookies closely during baking; they should be lightly golden at the edges and soft in the center for the best chewy texture.
How to Store and Freeze Cookie Monster Cookies
Room Temperature: Store your freshly baked Cookie Monster Cookies in an airtight container at room temperature for up to 3-4 days to maintain their softness and flavor.
Fridge: If you’d like to keep them fresh for a bit longer, you can place the cookies in the fridge for up to a week, but note that they may become firmer in texture.
Freezer: For extended storage, freeze the cookies for up to 2-3 months. Layer them with parchment paper in an airtight container to prevent sticking.
Reheating: When you want to enjoy a cookie, simply microwave it for about 10-15 seconds to bring back that warm, chewy goodness!
What to Serve with Cookie Monster Cookies
These playful treats pair beautifully with a variety of delicious sides and beverages to enhance your baking experience.
-
Cold Milk: Nothing beats the classic pairing of cookies and milk. The creaminess enhances the sweet, chewy goodness of the Cookie Monster Cookies.
-
Fruit Salad: A refreshing mix of fruits adds a healthy balance to the sweetness, complementing the cookies’ rich flavors.
-
Ice Cream: Serve a scoop of vanilla or cookie dough ice cream alongside for a truly indulgent dessert that kids (and adults!) will love.
-
Festive Sprinkles: Sprinkle some colorful candy sprinkles on top before serving for an additional pop of color and fun, fitting the Cookie Monster theme beautifully.
-
Chocolate Milkshake: For a chocolatey twist, pair these cookies with a thick chocolate milkshake, creating a rich flavor experience.
-
Tea or Coffee: A warm cup of tea or coffee offers a comforting contrast to the sweetness of the cookies, making for a delightful afternoon treat.
Create a playful dessert table at your next gathering with these delicious pairings, sure to delight both kids and adults alike!
Make Ahead Options
These delightful Cookie Monster Cookies are perfect for busy home cooks who want to save time during the week! You can prepare the dough up to 24 hours in advance by mixing all ingredients and storing the dough in an airtight container in the refrigerator. This prevents any premature spreading and keeps the dough fresh. Additionally, you can scoop the dough balls and place them on lined baking sheets, then cover and refrigerate them for up to 3 days before baking. When you’re ready to bake, just preheat your oven and follow the baking instructions. With these make-ahead options, you’ll have fun, colorful cookies ready in no time—just as delicious and whimsical!
Cookie Monster Cookies Recipe FAQs
What is the best way to select blue food coloring?
Absolutely! When choosing blue food coloring, opt for gel-based varieties as they deliver a vibrant hue without adding too much liquid to your dough. Look for brands that are specifically labeled for baking, and remember: a little goes a long way! Start with a small amount and gradually add more until you reach your desired shade.
How should the cookies be stored for maximum freshness?
To keep your Cookie Monster Cookies fresh, store them in an airtight container at room temperature for up to 3-4 days. If you want to maintain their softness, avoid placing any added ingredients on top of them. For longer-lasting storage, freezing is a fantastic option. Just make sure to layer the cookies with parchment paper in an airtight container to prevent sticking; they will stay delightful for up to 2-3 months!
Can I freeze my Cookie Monster Cookies?
Yes! Freezing your Cookie Monster Cookies is a great way to enjoy them later. To freeze, once the cookies are completely cooled, place them in a single layer on a baking sheet and freeze until solid. Then, transfer them to an airtight container, layered with parchment paper. To enjoy them later, simply thaw at room temperature or microwave for 10-15 seconds for that freshly baked feel!
What should I do if my cookies spread too much while baking?
Very! If your Cookie Monster Cookies spread too much during baking, revisit your dough consistency—make sure to chill the dough for 30 minutes before scooping to help retain their shape. Additionally, check that your butter is softened but not melted, as melted butter can lead to extra spreading too. If spreading continues to be an issue, consider adding an extra tablespoon of flour to the dough for added structure.
Are these cookies safe for my pets or those with allergies?
While Cookie Monster Cookies are a fun treat for humans, they are not safe for pets, especially due to the chocolate and other ingredients that can be harmful. If serving to children or someone with allergies, ensure that all ingredients are allergy-friendly, particularly with chocolate chips. You might want to consider substituting dark chocolate or using carob chips as a safer alternative!
How can I customize these cookies for a fun twist?
Oh, the more, the merrier! To give your Cookie Monster Cookies a unique twist, feel free to substitute the mini Oreos with your favorite candies, such as M&M’s or even gummy bears for an unexpected surprise! Alternatively, you can stuff the cookies with a piece of chocolate or an Oreo before baking for a gooey center that takes the fun to another level. Happy baking!
Cookie Monster Cookies: Joyful Treats That Kids Adore
Ingredients
Equipment
Method
- Preheat your oven to 350°F (175°C) and line two baking sheets with parchment paper.
- In a large mixing bowl, combine the sugar cookie mix, softened salted butter, large egg, and vanilla extract.
- Add a few drops of blue food coloring and mix until evenly distributed.
- Gently fold in the halved mini Oreos, mini Chips Ahoy!, white chocolate chips, and semi-sweet chocolate chips.
- Scoop out portions of dough onto the lined baking sheets, leaving enough space between each cookie.
- Bake for 13-16 minutes or until the edges are lightly golden and the centers look soft.
- Press a large candy eyeball into the front of each cookie while they are still warm.
- Cool on the baking sheets for 5 minutes before transferring to wire racks to cool completely.
Leave a Reply