
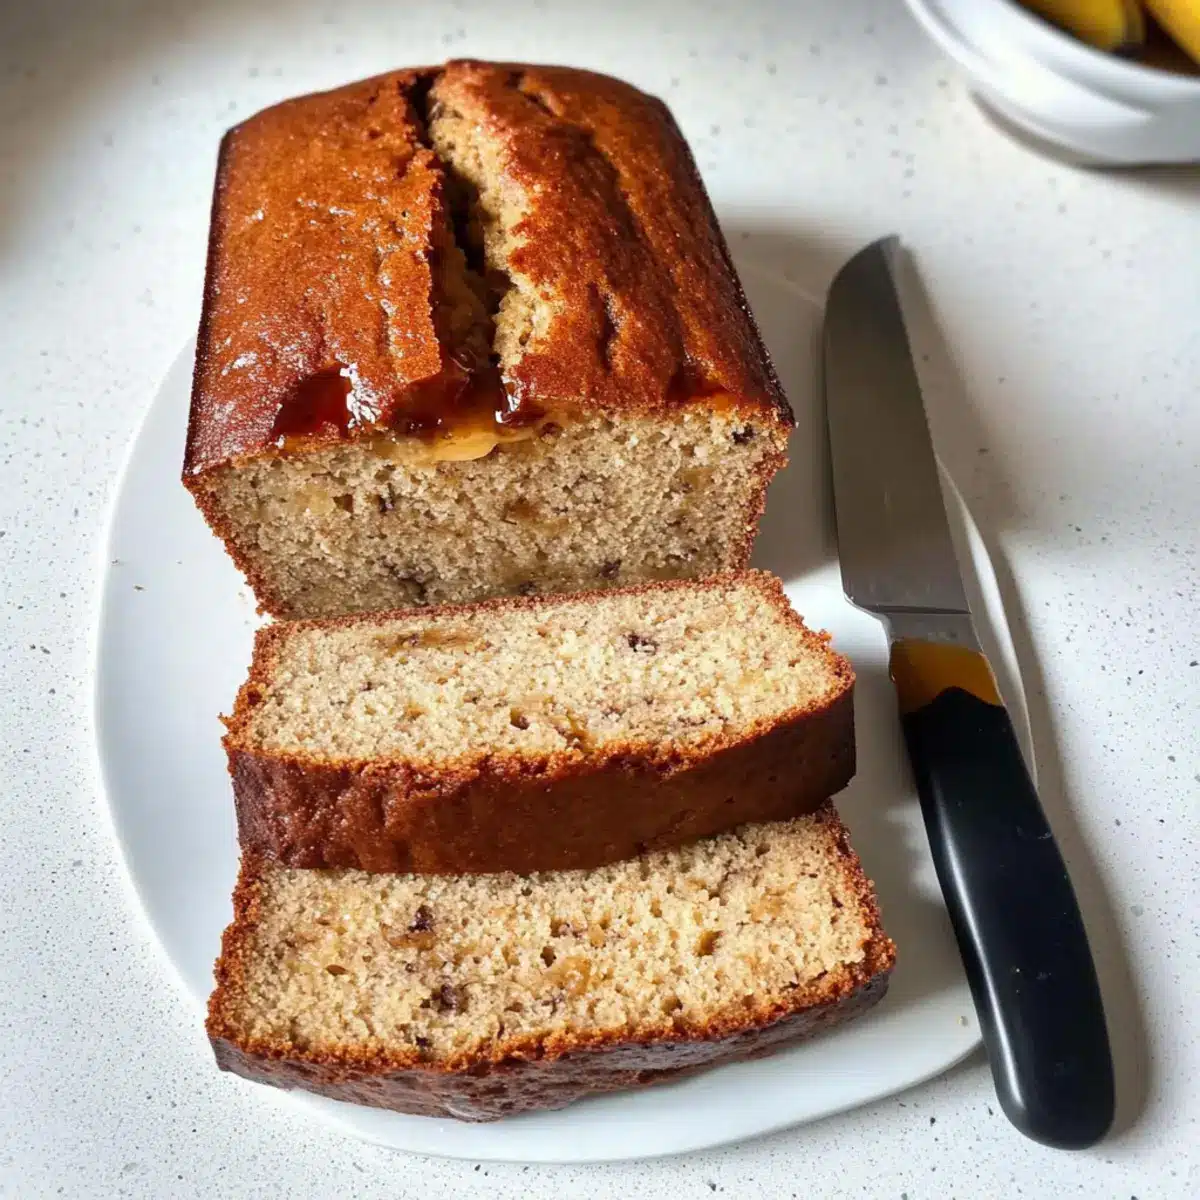
A luscious aroma wafts through the kitchen as I blend the ingredients for my Gluten-free Blender Banana Bread. It’s a delightful twist on a classic that turns ripe bananas into a moist and fluffy loaf, all while keeping it lower in sugar. What I love most about this recipe is how quick it is to prepare—just 10 minutes of hands-on time means I can whip it up before my busy mornings begin. Plus, it’s a healthy option that feels indulgent, making it perfect for breakfast or a wholesome snack. Whether you have a crowd to please or simply want a comforting slice for yourself, this gluten-free banana bread delivers. Ready to find out how to create this easy yet satisfying treat? Let’s dive in!

Why is this banana bread a must-try?
Quick Preparation: In just 10 minutes, you can have this delightful batter ready for baking—ideal for busy mornings!
Healthy Twist: This gluten-free option swaps refined sugars for natural sweeteners and includes protein-rich ricotta for added nutrition.
Fluffy Texture: Expect a moist and tender loaf that rivals traditional banana bread, ensuring everyone takes a second slice!
Versatile Flavor: Customize it with chocolate chips, nuts, or spices to match your mood—there’s endless room for creativity!
Crowd-Pleaser: Perfect for brunch gatherings or cozy afternoons at home, this bread will impress your guests and satisfy your cravings.
If you’re looking for more takes on banana bread, check out this delicious Chocolate Chip Banana recipe for a sweet twist!
Gluten-free Blender Banana Bread Ingredients
For the Batter
- Ripe Bananas – Ensure they’re very ripe to maximize natural sweetness and moisture.
- Ricotta Cheese – Provides moisture and protein; can be swapped with Greek yogurt if needed.
- Oats (or Gluten-free Flour) – The primary structure; blend oats for a gluten-free option.
- Eggs – Essential for binding and giving the bread its rise.
- Baking Powder – A must for leavening to achieve that fluffy texture.
- Vanilla Extract – Adds a lovely depth of flavor; almond extract can offer a delightful twist.
- Honey or Maple Syrup – These natural sweeteners keep the recipe low in sugar; adjust to your taste.
Step‑by‑Step Instructions for Gluten-free Blender Banana Bread
Step 1: Preheat the Oven
Begin by preheating your oven to 350°F (175°C). While the oven warms up, take a moment to grease a standard loaf pan lightly with cooking spray or a thin layer of butter. This ensures your Gluten-free Blender Banana Bread will release easily once baked and maintain its beautiful shape.
Step 2: Combine Ingredients in the Blender
In your blender, add the well-ripened bananas, ricotta cheese, eggs, oats, baking powder, vanilla extract, and your choice of honey or maple syrup. Blend the mixture on high until you achieve a smooth, creamy consistency, usually about 30 to 60 seconds. The ingredients should be fully combined, with no banana lumps remaining, creating a batter that’s rich and inviting.
Step 3: Pour and Smooth the Batter
Carefully pour the blended batter into the prepared loaf pan. Use a spatula to smooth the top if necessary; this will help it bake evenly, creating a lovely dome as it rises. Make sure to spread it out to ensure even baking throughout the Gluten-free Blender Banana Bread.
Step 4: Bake the Bread
Place the loaf pan in the oven and bake for approximately 45 minutes. As it bakes, the wonderful aroma will fill your kitchen. Check for doneness by inserting a toothpick into the center; it should come out clean or with a few moist crumbs—your golden moment of deliciousness is near!
Step 5: Cool in the Pan
Once baked, remove the loaf pan from the oven and allow the banana bread to cool in the pan for about 15 minutes. This cooling period is essential, as it helps set the bread’s texture. You’ll notice the loaf will slightly pull away from the edges as it cools, which is a great sign!
Step 6: Transfer and Finish Cooling
After 15 minutes, gently transfer the loaf from the pan onto a wire rack. Allow it to cool completely at room temperature before slicing. This step is crucial for achieving the perfect texture, making your Gluten-free Blender Banana Bread even more delightful to enjoy!

Gluten-free Blender Banana Bread Variations
Feel free to get creative and customize your gluten-free banana bread to match your preferences or dietary needs!
-
Dairy-Free: Swap ricotta cheese for coconut yogurt to keep the bread moist while making it dairy-free.
Using coconut yogurt lends a subtle tropical flavor that pairs beautifully with bananas, creating a dreamy loaf. -
Nut-Free: If allergies are a concern, simply omit nuts entirely or use sunflower seeds for a nut-free option that adds crunch.
This way, you can enjoy the satisfying texture without worrying about nut allergies. -
Chocolate Lovers: Fold in a generous half-cup of dark chocolate chips for an indulgent treat that’s hard to resist.
The rich chocolatey goodness combined with bananas will bring smiles to every taste bud! -
Spicy Twist: Add 1 teaspoon of cinnamon or a pinch of nutmeg to warm up the flavor profile, perfect for cozy mornings.
This spice addition will enhance the overall aroma and make your home smell divine while baking. -
Fruitful Variation: Substitute half of the bananas with unsweetened applesauce for a different yet equally delicious flavor.
It provides an enticing apple twist, complementing the banana’s sweetness while maintaining moisture. -
Protein-Packed: Incorporate a scoop of your favorite protein powder into the batter for a protein boost, perfect for post-workout snacks.
Not only does it increase the nutritional value, but it also helps keep you full longer! -
Sweetener Swap: Try using agave nectar instead of honey or maple syrup for an alternative sweetness that’s easy to pour.
Agave nectar has a mild flavor, allowing the ripe bananas to shine through even more in your delicious loaf. -
Gluten-Free Flour: Instead of oats, use a blend of gluten-free all-purpose flour to simplify your baking process.
This option is great if you’re looking for a traditional texture and want quick, hassle-free prep.
For more delightful ways to enjoy banana bread, don’t miss out on my favorite Banana Bread Comfort recipe!
Make Ahead Options
Preparing your Gluten-free Blender Banana Bread in advance is a fantastic way to save time on busy mornings! You can blend the ingredients up to 24 hours ahead and store the batter in an airtight container in the refrigerator to maintain its freshness. If you’re planning to bake it later, just give the batter a quick stir before pouring it into the loaf pan. Alternatively, you can bake an extra loaf and keep it in the fridge for up to 3 days. To enjoy the best texture, allow it to cool completely before wrapping it tightly in plastic wrap. Simply slice it and toast or serve at room temperature for a quick, delicious breakfast or snack!
Storage Tips for Gluten-free Blender Banana Bread
Room Temperature: Store the bread wrapped in plastic wrap or placed in an airtight container for up to 2 days. This keeps it fresh without drying out.
Fridge: For extended freshness, keep it in the fridge in an airtight container for up to 5 days. Make sure it’s fully cooled before wrapping to prevent sogginess.
Freezer: Wrap slices or the whole loaf in plastic wrap, then foil for optimal protection. It can be frozen for up to 2 months, allowing you to enjoy it anytime!
Reheating: To reheat, simply microwave slices for about 15-20 seconds or warm them in a toaster oven. Enjoy your Gluten-free Blender Banana Bread warm for a lovely treat!
What to Serve with Gluten-free Blender Banana Bread?
This delightful bread is perfect for elevating your breakfast or snack time experience, inviting warmth and comfort to every bite.
-
Creamy Greek Yogurt: A dollop adds a refreshing touch, balancing the sweetness while adding protein for a hearty meal. Consider topping it with fresh fruit for additional flavor and nutrition.
-
Fresh Berries: A bowl of mixed berries brings vibrant flavor and a touch of tartness that complements the sweetness of the banana bread beautifully. This pairing not only brightens up your plate but also adds a refreshing crunch.
-
Nut Butter: Smooth almond or peanut butter spread over a slice enhances richness and adds healthy fats, making it a satisfying snack perfect for a busy afternoon. The nutty flavor pairs perfectly with the banana bread.
-
Honey Drizzle: A touch of honey on top offers an extra layer of sweetness while keeping it wholesome. Plus, it’s simple and elevates the piece to a breakfast worthy of a café.
-
Chai Tea: Enjoy a warm cup of spiced chai with your bread, blending aromatic flavors that create a cozy morning vibe or a peaceful afternoon break. Its warmth and panoply of spices make every bite even more comforting.
-
Cinnamon Sugar Topping: A sprinkle of cinnamon sugar before baking adds a sweet crunch on the crust, making for a delightful balance with the soft interior. It’s a simple twist that delivers more warmth and flavor.
-
Dark Chocolate Squares: For a touch of indulgence, serve with a side of dark chocolate, providing a sophisticated contrast to the bread’s flavor while adding a healthy antioxidant boost. It’s the perfect sweet ending to a delightful treat.
Expert Tips for Gluten-free Blender Banana Bread
• Choose Ripe Bananas: Using very ripe bananas ensures maximum sweetness and moisture, resulting in a flavorful banana bread.
• Avoid Oven Peeking: Resist the urge to open the oven door too soon; this can cause the bread to collapse and lose its fluffy texture.
• Check Your Substitutes: If replacing ricotta with Greek yogurt, make sure to monitor the batter’s moisture content, as it might affect baking time.
• Cooling Time Matters: Let the banana bread cool completely in the pan for better slicing; a warm loaf can lead to gummy slices.
• Incorporate Mix-ins: Feel free to add chocolate chips or nuts for extra flavor and texture, tailoring your Gluten-free Blender Banana Bread to your preference!

Gluten-free Blender Banana Bread Recipe FAQs
How ripe should the bananas be for this recipe?
Absolutely! The riper the bananas, the better. Look for bananas with a deep yellow color and some brown spots. They should be soft to the touch—this ensures maximum moisture and natural sweetness in your Gluten-free Blender Banana Bread!
What is the best way to store leftover banana bread?
For optimal freshness, wrap your banana bread in plastic wrap or place it in an airtight container and keep it at room temperature for up to 2 days. For longer storage, transfer it to the fridge where it will last for about 5 days. Make sure it’s completely cooled before wrapping to keep the moisture locked in!
Can I freeze the banana bread? If so, how?
Yes! Freezing is a great option. Allow the banana bread to cool completely, then slice it if desired. Wrap each slice or the whole loaf tightly in plastic wrap, and then in foil for extra protection. You can freeze it for up to 2 months. When you’re ready to enjoy it, just thaw it in the refrigerator overnight or pop it in the microwave for about 15-20 seconds!
What should I do if my banana bread doesn’t rise properly?
If your bread doesn’t rise as expected, it might be due to old baking powder or too much moisture in the batter. Make sure your baking powder is fresh—check the expiration date! Additionally, be cautious with ingredient substitutions, especially with ricotta and yogurt, as different moisture levels can affect the rise.
Is this banana bread safe for everyone?
While this Gluten-free Blender Banana Bread is a healthier option, it’s important to note that it contains dairy from ricotta cheese. If you have a gluten intolerance or nut allergies, this recipe is perfect as long as gluten-free oats are used. Always consider your guests’ dietary needs and feel free to substitute where necessary.
Gluten-free Blender Banana Bread: Quick, Moist, and Delicious
Ingredients
Equipment
Method
- Preheat your oven to 350°F (175°C) and grease a standard loaf pan lightly with cooking spray or a thin layer of butter.
- In your blender, add the well-ripened bananas, ricotta cheese, eggs, oats, baking powder, vanilla extract, and your choice of honey or maple syrup. Blend until smooth and creamy.
- Carefully pour the blended batter into the prepared loaf pan and smooth the top with a spatula if necessary.
- Place the loaf pan in the oven and bake for approximately 45 minutes, checking for doneness with a toothpick.
- Once baked, remove the loaf pan from the oven and let it cool in the pan for about 15 minutes.
- After cooling, gently transfer the loaf onto a wire rack and allow it to cool completely before slicing.
Leave a Reply