
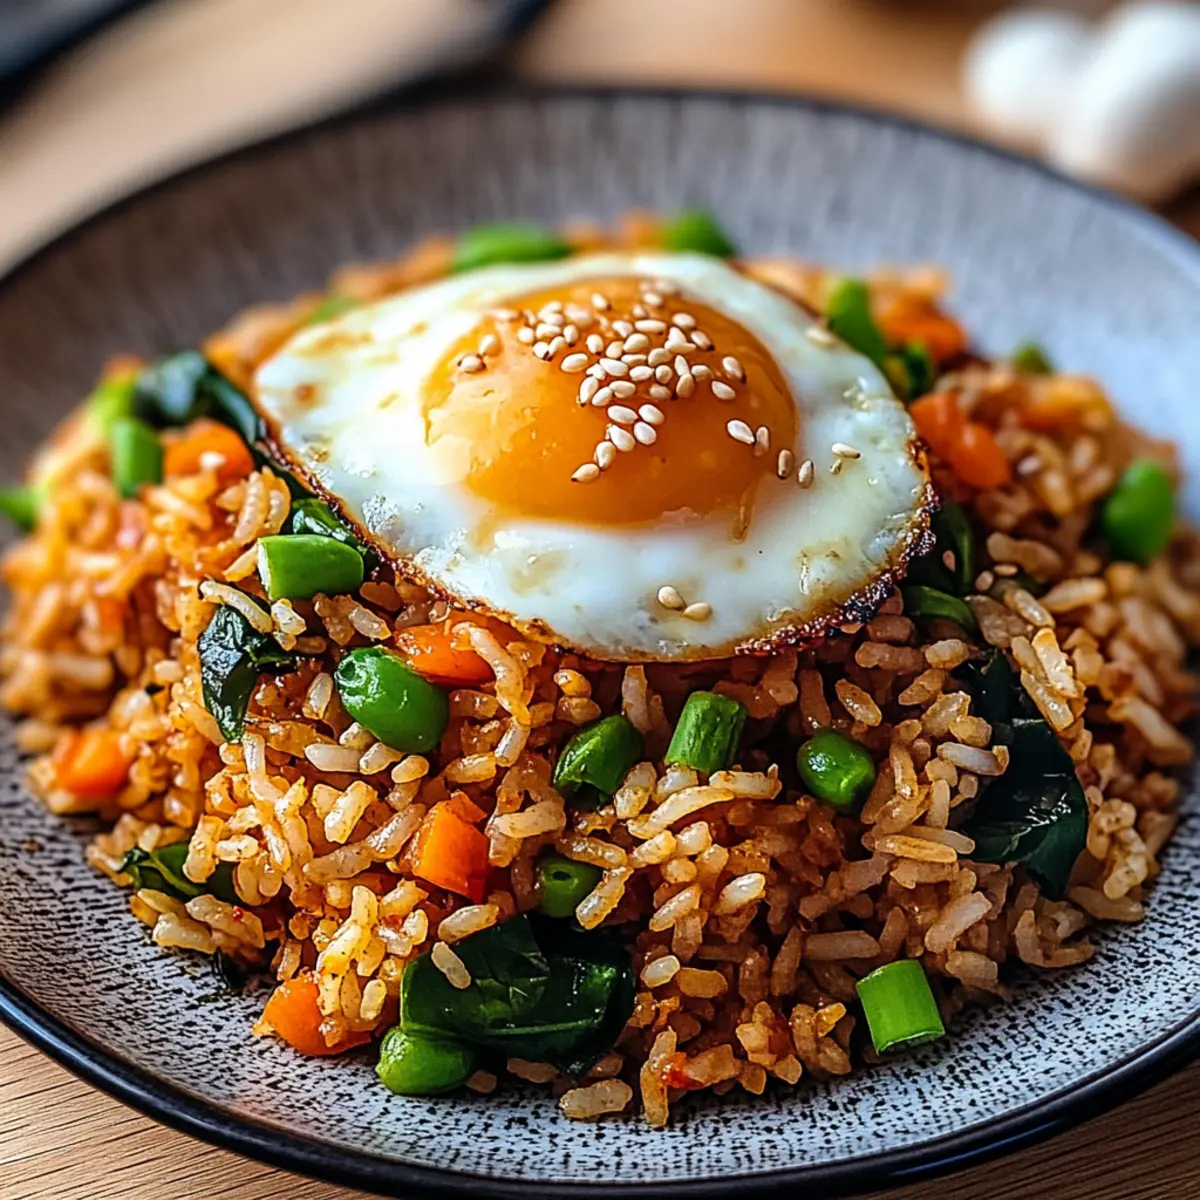
Picture a busy weeknight when the clock is ticking, and your appetite is calling for something delicious yet effortless. That’s when my Quick and Easy Kimchi Fried Rice Recipe comes to the rescue! This vibrant dish marries tangy fermented kimchi with perfectly cooked rice, creating a symphony of flavors that will tantalize your taste buds. It’s not only a speedy solution for dinner but also a treasure trove of nutrients, making it a healthy choice for anyone looking to shake off the fast-food blues. Plus, it’s a one-pan wonder, which means less time cleaning up and more time enjoying your creation. Are you ready to dive into this comforting bowl of Korean goodness?
Why Choose This Kimchi Fried Rice Recipe?
Quick and Easy: This recipe is perfect for busy weeknights, taking just 20% less time than traditional methods.
Nutrient-Packed: Loaded with veggies and protein, it’s a satisfying way to nourish your body without hassle.
Flavor Explosion: The bold taste of aged kimchi adds a unique tang that elevates every bite, leaving you craving more.
One-Pan Wonder: Say goodbye to piles of dishes! This effortless recipe means minimal cleanup and maximum satisfaction.
Versatile Base: Feel free to customize it with your favorite veggies or protein, just like in my Turkey Chili Comforting.
Crowd-Pleaser: This dish is sure to impress family and friends, making it a go-to for gatherings and casual dinners.
Kimchi Fried Rice Ingredients
• Here’s everything you need to create this delicious and quick Kimchi Fried Rice Recipe.
For the Rice Base
- Day-Old Rice – Ideal for achieving the perfect texture; prevents mushiness by being firmer.
- Vegetable Oil – Great for sautéing; you can substitute with sesame oil for an authentic touch.
For the Aromatics
- Onion – Adds a sweet depth; yellow or white onions work best for this dish.
- Garlic – Enhances the aroma and flavor; always opt for fresh for the best taste.
For the Veggies
- Carrot – Provides sweetness and crunch; you may swap with peas or bell peppers for variety.
For the Star Ingredient
- Kimchi – The essential component; aged, fermented kimchi offers the richest flavor, enhancing your fried rice significantly.
For Protein
- Eggs – Introduces richness and protein; can be replaced with scrambled tofu for a vegan option.
For the Seasoning
- Soy Sauce – For seasoning balance; consider low-sodium or tamari if you’re cooking gluten-free.
For Garnishing
- Sesame Seeds – Adds a delightful crunch and nutty flavor when sprinkled on top.
- Green Onions – Provides a fresh finish that brightens the dish, giving it that pop of color and flavor!
Get ready to enjoy a comforting bowl of Kimchi Fried Rice, infused with flavors that will keep your taste buds dancing!
Step‑by‑Step Instructions for Kimchi Fried Rice Recipe
Step 1: Heat the Oil
In a large pan or wok, heat 2 tablespoons of vegetable oil over medium heat until shimmering. This typically takes about 1-2 minutes. Once heated, add in chopped onion and sauté them until they become translucent and soft, which should take about 3-4 minutes. Ensure to stir occasionally for even cooking and to release their sweet aroma.
Step 2: Sauté Aromatics
Add minced garlic and diced carrot to the pan, continuing to sauté for another 2-3 minutes. You want the carrots to become tender but still retain a bit of crunch. The garlic should emit a fragrant aroma, enhancing the depth of this Kimchi Fried Rice Recipe. Stir occasionally to prevent the garlic from browning.
Step 3: Incorporate Kimchi
Stir in the chopped kimchi along with any reserved juice for extra flavor. Cook this mixture for about 3-4 minutes, allowing the kimchi to soften and its flavors to meld with the sautéed vegetables. You’ll see the colors brighten, and the dish will start to take on that signature tangy aroma, signaling it’s time for the next step.
Step 4: Add the Rice
Next, add in the day-old rice, breaking up any clumps with a spatula. Stir-fry the rice along with the kimchi mixture for approximately 5 minutes, ensuring that the rice gets heated through and well-mixed with the vegetables and kimchi. The rice should start to turn a lovely golden color and becomes well-coated with flavors.
Step 5: Scramble the Eggs
Push the rice mixture to one side of the pan, creating space to pour in 2 beaten eggs on the other side. Let the eggs cook undisturbed for about 2 minutes before scrambling them until fully cooked. Once scrambled, mix them into the rice, incorporating the protein seamlessly into your Kimchi Fried Rice for added richness.
Step 6: Season and Garnish
Finally, drizzle in soy sauce to taste, tossing everything together to ensure an even coating. Cook for an additional minute to let the flavors combine, then remove from heat. Garnish the Kimchi Fried Rice with a sprinkle of sesame seeds and sliced green onions for a burst of fresh texture and color, creating an inviting dish ready to enjoy.
Kimchi Fried Rice Recipe Variations
Feel free to make this delicious Kimchi Fried Rice recipe your own by trying out different flavors and ingredients!
-
Vegan Option: Replace eggs with scrambled tofu or chickpea flour for a delightful plant-based alternative. This not only retains the rich texture but also makes it suitable for vegan diets.
-
Extra Veggies: Add colorful bell peppers, zucchini, or snap peas for a nutritional boost and a pop of freshness. Sauté them just until tender to keep that delightful crunch.
-
Spicy Kick: Incorporate gochujang (Korean chili paste) while stir-frying for an extra layer of heat. Adjust the quantity according to your spice tolerance for a personalized flare.
-
Protein-Packed: Toss in diced cooked chicken, shrimp, or even beef for a heartier meal. This addition transforms the fried rice into a satisfying dish that’s perfect for hungry appetites.
-
Umami Lovers: Introduce a splash of fish sauce or a few drops of shiitake mushroom soy sauce for an added depth of flavor that enhances the overall taste profile.
-
Nuts for Crunch: Sprinkle roasted peanuts or cashews on top before serving for an unexpected, crunchy texture that brings delightful variety to every bite.
-
Herbed Twist: Fresh herbs, such as cilantro or Thai basil, can be folded in at the end to provide a refreshing contrast to the warm, savory rice. This elevates the dish while adding a vibrant green touch.
If you want to make your meals further irresistible, consider pairing your Kimchi Fried Rice with some traditional Korean sides like kimchi and pickled vegetables, enhancing the full flavor experience! For more exciting ideas, check out my Thanksgiving Wild Rice or General Tsos Chicken recipes!
What to Serve with Quick and Easy Kimchi Fried Rice?
Elevate your meal experience with delightful pairings that complement the bold flavors of your dish.
-
Crispy Korean Fried Chicken: The crunchy, juicy chicken adds a satisfying contrast to the tangy rice, making it a match made in culinary heaven. Imagine savoring each juicy bite alongside the vibrant flavors of your fried rice—pure bliss!
-
Spicy Kimchi: Add an extra kick with this traditional side. Its fermented flavor accentuates the rice, enhancing the dish’s overall depth and richness.
-
Fresh Cucumber Salad: Cool, light, and refreshing, this salad tones down the spice and adds a lovely crunch. Drizzle with sesame oil for a harmonious blend that keeps the palate singing!
-
Miso Soup: The warm, umami-filled broth of miso soup pairs beautifully, balancing the sturdiness of fried rice. It’s a cozy addition that warms the heart with every spoonful.
-
Korean Pickled Radishes: Their sweet and tangy notes provide an excellent contrast to the savory fried rice, breaking up the richness and invigorating your taste buds.
-
Sweet Potato Fries: These crispy bites offer a delightful sweetness that complements the savory rice, perfect for satisfying any lingering cravings.
-
Korean Soju: This traditional spirit is subtly sweet and smooth, making it a great partner for the flavors of your Kimchi Fried Rice, enhancing your dining experience.
-
Mango Sticky Rice: For dessert, this sweet and creamy dish provides a lovely finale to your meal, showcasing contrasting textures and flavors that your taste buds will adore.
Make Ahead Options
These Kimchi Fried Rice Recipe components are perfect for meal prep! You can chop the vegetables (onion, carrot, and garlic) and store them in an airtight container in the fridge for up to 3 days. Additionally, you can cook and refrigerate your rice ahead of time—make sure it’s cooled completely to prevent clumping. Just prep the rice and veggies, and when you’re ready to serve, sauté them with kimchi and eggs in about 10 minutes. This way, you save time on busy weeknights while enjoying a delicious, homemade meal that tastes just as delightful as if it were made fresh.
Expert Tips for Kimchi Fried Rice
Choose the Right Rice: Use day-old rice for best texture; fresh rice can become mushy, disrupting the dish’s integrity.
Cool Before Cooking: If using fresh rice, ensure it’s fully cooled to prevent clumping during frying.
Watch the Heat: Medium heat is essential—too high can burn garlic and vegetables, while too low may leave your rice unevenly cooked.
Mix Well: Toss all ingredients thoroughly to ensure even flavor. Be generous with the soy sauce, but taste as you go.
Customize Freely: Feel free to add extra veggies or your favorite proteins to make this Kimchi Fried Rice Recipe truly your own!
Storage Tips for Kimchi Fried Rice
Fridge: Store leftovers in an airtight container for up to 3 days to keep flavors fresh.
Freezer: Freeze any extra portions in a freezer-safe container for up to 2 months. Thaw in the fridge overnight before reheating.
Reheating: To reheat, add a splash of water to keep the Kimchi Fried Rice moist, then microwave for 1-2 minutes or heat in a skillet over medium heat.
Room Temperature: Avoid leaving it at room temperature for more than 2 hours to ensure safety and maintain flavor quality.
Kimchi Fried Rice Recipe FAQs
What type of kimchi should I use for this recipe?
Absolutely! For the best flavor, opt for aged, fermented kimchi as it adds a depth of taste that fresh kimchi cannot provide. The richness of flavors from the fermentation process enhances the entire dish. If you’re unsure, feel free to select your favorite variety—each brings its own unique flair!
How long can I store leftover Kimchi Fried Rice?
You can refrigerate any leftovers in an airtight container for up to 3 days. For the most flavorful experience, it’s best to consume it within that time frame. Just remember to check for any off-smells or visible changes before diving in.
Can I freeze Kimchi Fried Rice?
Yes! You can freeze any extra portions of Kimchi Fried Rice. To do this, place the rice in a freezer-safe container, ensuring you leave a little space at the top for expansion. It will keep well for up to 2 months. When ready to enjoy, thaw it in the fridge overnight.
How do I reheat Kimchi Fried Rice without drying it out?
Great question! To reheat, add a splash of water to the Kimchi Fried Rice before placing it into the microwave or skillet. This helps keep it moist and flavorful. Microwave on medium heat for 1-2 minutes, or heat in a skillet over medium heat until warmed through. Stir to distribute moisture evenly.
Is this dish suitable for people with dietary restrictions, like gluten intolerance?
Very! You can easily customize this Kimchi Fried Rice Recipe to be gluten-free by using tamari instead of regular soy sauce. Additionally, if you’re vegan, simply substitute the eggs with scrambled tofu or chickpea flour to maintain that hearty protein content without compromising flavor.
What can I do if my Kimchi Fried Rice comes out too mushy?
If you find your rice has come out mushy, it’s often due to using fresh rice or too much moisture. To salvage it, try spreading the rice mixture on a baking sheet and letting it cool to room temperature for a bit. This can help to dry out the rice slightly. For future attempts, always aim for day-old rice or ensure that freshly cooked rice is cooled thoroughly before frying it.
Savory Kimchi Fried Rice Recipe for Quick Comfort Food
Ingredients
Equipment
Method
- Heat the oil in a large pan or wok over medium heat until shimmering, about 1-2 minutes. Add chopped onion and sauté until translucent, about 3-4 minutes.
- Add minced garlic and diced carrot to the pan, and sauté for another 2-3 minutes until the carrots are tender.
- Stir in the chopped kimchi and reserved juice, cooking for about 3-4 minutes until softened.
- Add day-old rice, breaking up clumps, and stir-fry for approximately 5 minutes until heated through.
- Push the rice mixture to one side, pour in beaten eggs, and cook undisturbed for about 2 minutes before scrambling.
- Drizzle in soy sauce to taste, toss everything together, and cook for an additional minute. Garnish with sesame seeds and green onions.
Leave a Reply