
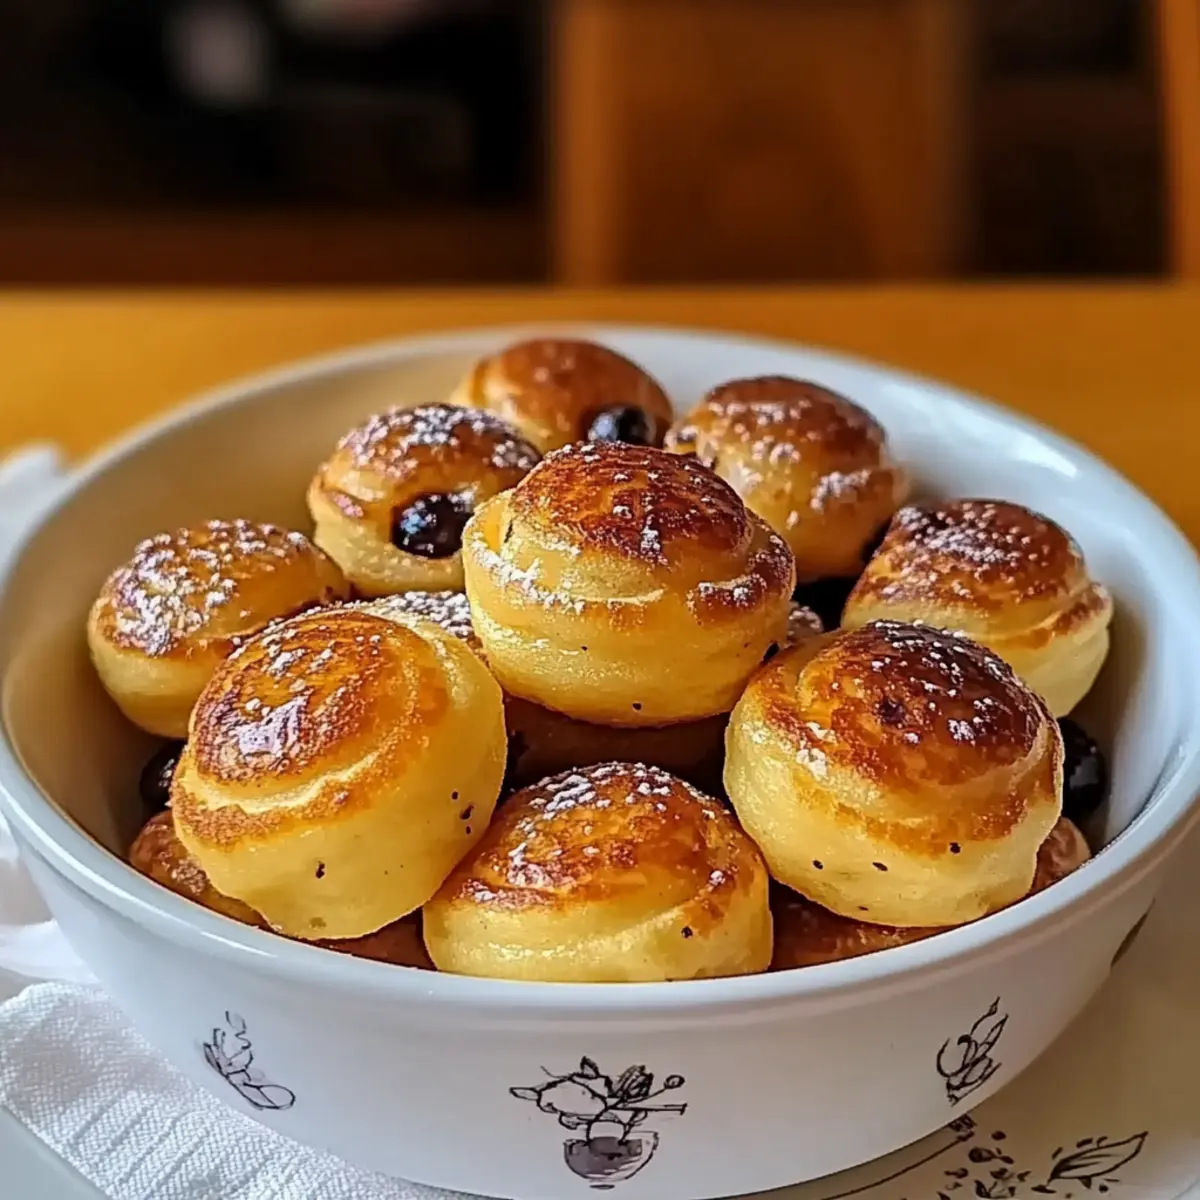
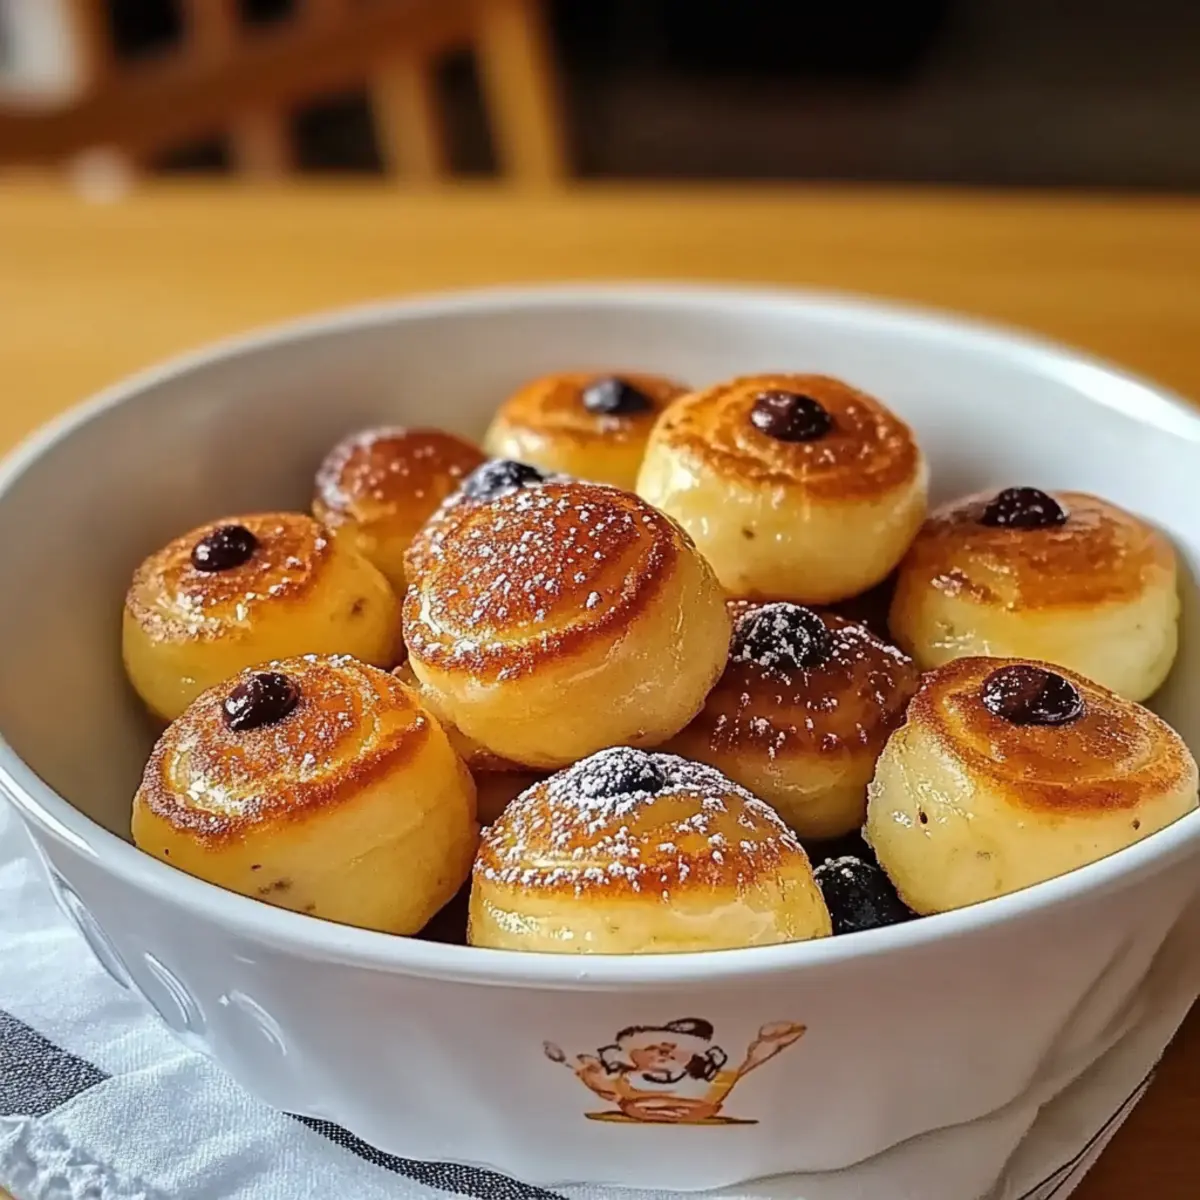
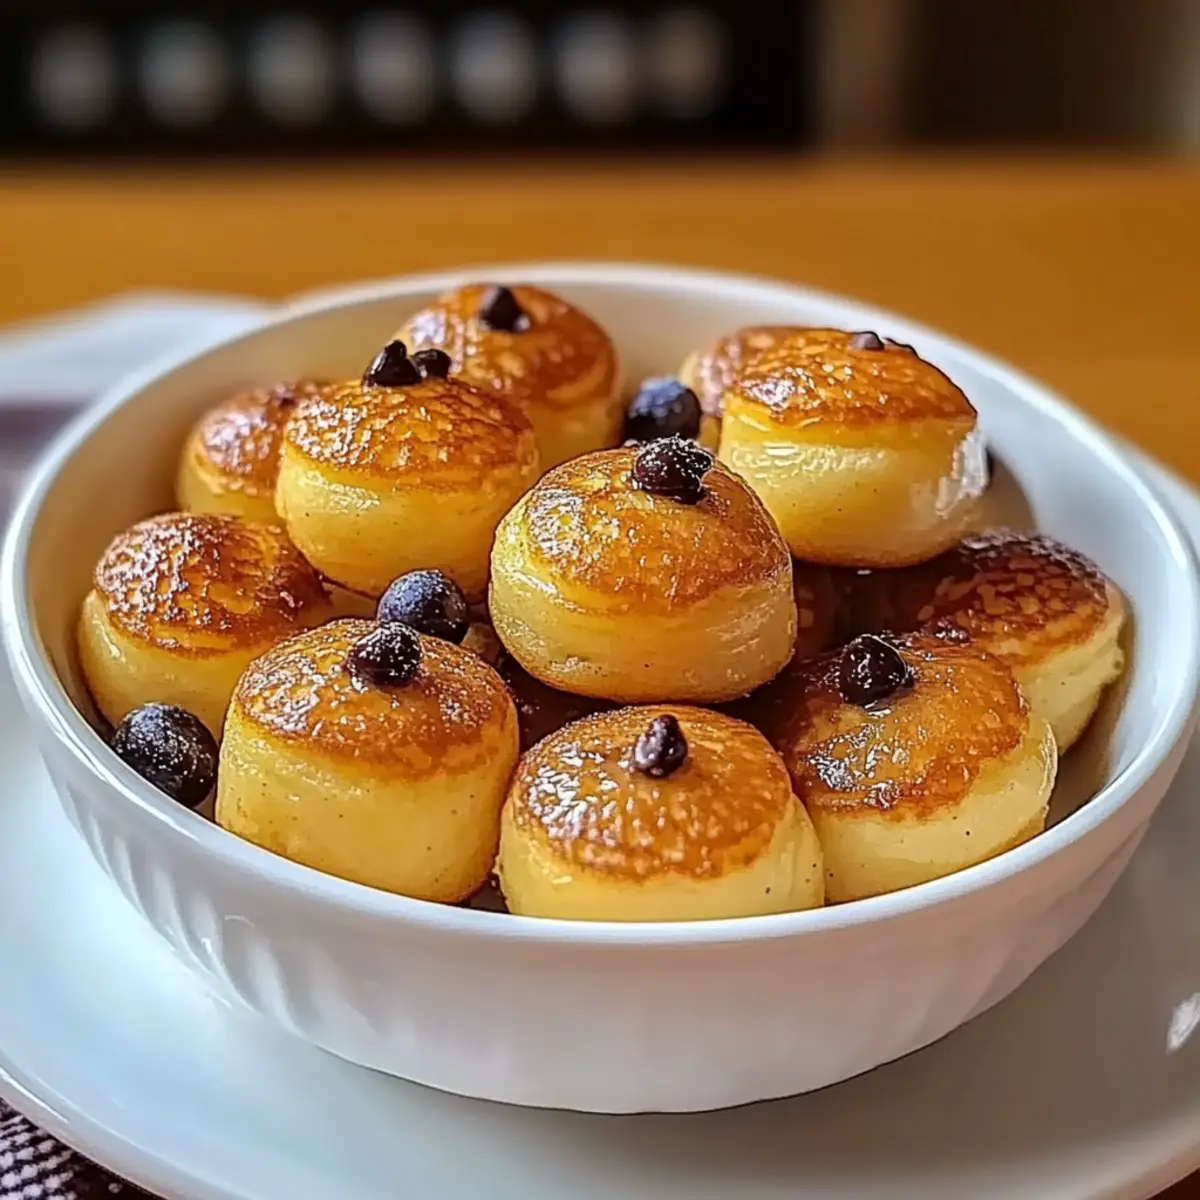
The delightful aroma of breakfast wafting through the air makes my heart flutter with anticipation, no matter the day. Today, I’m excited to share my take on a beloved favorite—Pancake Poppers! These fluffy, mini morsels are the joyful combination of light, airy pancakes and convenience rolled into one poppable treat. Perfect for busy mornings and whimsical brunches, Pancake Poppers are not just quick to prepare; they’re also highly customizable, inviting everyone to join in on the fun. Whether you prefer chocolate chips, fresh berries, or a dash of nut butter, there’s a flavor for every palate. Plus, they can easily be adapted to fit gluten-free or healthier dietary needs, making them a win-win for the whole family. How will you customize your pancake poppers today?

Why Are Pancake Poppers So Appealing?
Irresistibly Fluffy: Each bite of these poppers delivers a light, airy texture that melts in your mouth.
Endless Customization: Add your favorite mix-ins like chocolate chips or fresh berries, making every batch a unique delight.
Time-Saving Delight: With minimal prep and baking time, you can whip up these treats in no time, perfect for busy mornings!
Family-Friendly: Kids love their mini size and fun flavors, ensuring everyone gathers happily around the table.
Healthy Options: Easily adapt this recipe to be gluten-free or incorporate whole wheat flour for added nutrition! For more fun breakfast ideas, check out my Breakfast Pancake Poppers or consider some delicious Apple Cinnamon Pancakes to switch things up.
Pancake Poppers Ingredients
• Get ready to gather your essentials for these delightful treats!
For the Batter
- All-Purpose Flour – Provides structure and tender crumb; swap it for a 1:1 gluten-free flour blend for a gluten-free option.
- Sugar – Adds sweetness to the batter; consider honey or maple syrup for a natural twist.
- Baking Powder – Essential for rising and fluffiness; don’t skip this key ingredient!
- Baking Soda – Works with buttermilk for that extra lift; it’s a must for a light texture.
- Salt – Enhances overall flavor, bringing balance to the sweetness.
- Buttermilk – Creates a light and airy texture; use regular milk with vinegar or lemon juice as a substitute if needed.
- Egg – Binds everything together and adds richness; a flax egg is a great vegan alternative.
- Vanilla Extract – Infuses your batter with a lovely depth of flavor.
- Melted Butter – Ensures moistness and a crispy exterior; coconut oil can be used for a dairy-free option.
For Mix-ins
- Chocolate Chips – A favorite addition for those who love a sweet treat.
- Fresh Berries – Add a burst of freshness and sweetness; blueberries or strawberries work beautifully.
- Chopped Bananas – Bring a natural sweetness that’s especially loved by kids.
- Nuts – For a delightful crunch and added protein; feel free to get creative!
For Serving
- Powdered Sugar – A light dusting enhances presentation and sweetness.
- Syrup – Perfect for dipping or drizzling over your warm poppers; maple syrup is recommended!
- Fruit Preserves – A delicious alternative for those who want a fruity topping.
- Yogurt – Versatile for dipping, adding creaminess and a tangy bite.
Get ready to create your own irresistible Pancake Poppers; these ingredients will lead you there!
Step‑by‑Step Instructions for Pancake Poppers
Step 1: Preheat the Oven
Begin by preheating your oven to 375°F (190°C). While the oven is heating, generously grease a mini muffin tin using cooking spray or melted butter to ensure your Pancake Poppers release easily after baking. This step is crucial for achieving that delightful crispy exterior while keeping the insides fluffy and soft.
Step 2: Combine Dry Ingredients
In a large mixing bowl, whisk together 1 cup of all-purpose flour, 2 tablespoons of sugar, 2 teaspoons of baking powder, ½ teaspoon of baking soda, and a pinch of salt. Mix these dry ingredients thoroughly to ensure the baking powder and soda are evenly distributed, which is essential for the fluffiness of your Pancake Poppers once baked.
Step 3: Mix Wet Ingredients
In a separate bowl, combine ¾ cup of buttermilk, 1 large egg, 1 teaspoon of vanilla extract, and 2 tablespoons of melted butter. Whisk the mixture until it’s smooth and creamy, creating a harmonious blend that will add richness to your batter. This step ensures the flavors meld perfectly before combining with the dry ingredients.
Step 4: Combine Wet and Dry Ingredients
Pour the wet mixture into the bowl with the dry ingredients, gently stirring with a spatula until just combined. The batter should be slightly lumpy—avoid overmixing as this can lead to dense Pancake Poppers. This is where the magic happens, turning your individual components into a delightful, fluffy batter ready for baking!
Step 5: Fill Muffin Cups
Using a spoon or small scoop, carefully fill the greased mini muffin cups about ¾ full with the batter. If desired, sprinkle in your favorite mix-ins like chocolate chips or fresh berries at this stage, ensuring even distribution. This step adds a personal touch to your Pancake Poppers and invites some excitement in every bite!
Step 6: Bake the Poppers
Place the filled muffin tin in the preheated oven and bake for 12–15 minutes. Keep an eye on them as they bake; they’re ready when they turn golden brown, and a toothpick inserted into the center comes out clean. The aroma wafting from your oven will tell you deliciousness awaits—just a few more minutes!
Step 7: Cool and Serve
Once baked, remove the muffin tin from the oven and let it cool for about 5 minutes. Gently pry the Pancake Poppers out with a fork or your fingers (be careful, they will be hot!), and transfer them to a wire rack. For an added treat, dust them with powdered sugar or serve with maple syrup for dipping. Enjoy the burst of flavors in each delightful bite!
How to Store and Freeze Pancake Poppers
Fridge: Store leftovers in an airtight container for up to 4 days. This keeps your Pancake Poppers fresh and ready to enjoy later.
Freezer: For longer storage, freeze individual Pancake Poppers in a single layer on a baking sheet. Once frozen, transfer them to a bag for up to 3 months.
Reheating: Reheat in the microwave for about 20-30 seconds, or warm them in the oven at 350°F (175°C) for 5-8 minutes until heated through. Enjoy the fluffy goodness once more!
Make Ahead Options
These Pancake Poppers are perfect for meal prep enthusiasts looking to save time during busy mornings! You can prepare the batter up to 24 hours in advance; simply mix the dry ingredients in one bowl and the wet ingredients in another, cover with plastic wrap, and refrigerate until you’re ready to bake. Additionally, pre-filling the muffin cups with batter (without mix-ins) can be done and stored in the fridge for up to 3 days. Just add your desired mix-ins before baking, and enjoy fresh, fluffy poppers that taste just as delicious as when made fresh! When ready to serve, pop them in the oven for 12-15 minutes, and your family will love the effortless breakfast!
What to Serve with Pancake Poppers?
Elevate your breakfast experience by pairing these delightful bites with scrumptious accompaniments that complement their fluffy textures and delicious flavors.
- Fresh Fruit Medley: A colorful mix of berries, bananas, and citrus adds freshness and a burst of sweetness that balances the richness of the poppers.
- Maple Syrup: This classic pairing can’t be beaten—its rich, sweet flavor is perfect for drizzling or dipping, enhancing every fluffy bite.
- Yogurt Parfait: Serve with a side of creamy yogurt layered with granola and fruit for added texture and nutritious benefits, turning your breakfast into a wholesome indulgence.
- Creamy Nut Butter: A delightful scoop of almond or peanut butter provides richness and protein, making every popper feel like a comforting hug.
- Savory Bacon or Sausage: The salty crunch of crispy bacon or savory sausage links adds a satisfying contrast to the sweetness of the poppers, rounding out your meal beautifully.
- Coffee or Herbal Tea: A warm beverage, whether it’s a smooth coffee or a calming herbal tea, completes the experience and enhances the flavors enjoyed at breakfast.
- Chocolate Sauce Dip: For a sweet twist, serve with a small bowl of rich chocolate sauce for drizzling or dunking—perfect for dessert-style enjoyment any time!
Expert Tips for Pancake Poppers
Avoid Overmixing: Mixing just until combined results in lighter, fluffier Pancake Poppers. Overmixing can make them dense and chewy.
Rest the Batter: Allow the batter to rest for 5 minutes before baking. This helps improve the texture and allows the baking agents to activate.
Grease Generously: Properly greasing the mini muffin tin is crucial to prevent sticking. Use melted butter for a crispy finish.
Customize with Care: When adding mix-ins, like chocolate chips or berries, be mindful not to overload. Too many can affect the batter’s rise.
Check Early: Begin checking for doneness at the 12-minute mark, as ovens can vary. They’re done when golden brown and a toothpick inserted comes out clean.
Pancake Poppers Variations & Substitutions
Embrace your culinary creativity and make these pancake poppers truly yours with delightful swaps and variations!
-
Gluten-Free: Use a 1:1 gluten-free flour blend for a light and fluffy treat that’s suitable for gluten-sensitive eaters. Enjoy the same great taste without compromise!
-
Vegan: Substitute the egg for a flax egg (1 tablespoon flaxseed meal + 2.5 tablespoons water) and replace buttermilk with almond milk mixed with vinegar for a dairy-free delight. Your family will love these poppers just as much!
-
Chocolate Lovers: Fold in chocolate chips or chunks directly into the batter for a rich, indulgent treat. Consider pairing this with maple syrup for an unforgettable breakfast experience.
-
Berry Burst: Add fresh or frozen berries like strawberries or blueberries into the mix for a fruity explosion of flavor in every bite! These poppers will brighten up your mornings with their vibrant colors and tastes.
-
Savory Twist: Omit sugar and mix in shredded cheese, chopped herbs, or cooked crispy bacon for a deliciously savory version. These are fantastic for brunches or as a unique snack.
-
Nut Butter Delight: Swirl in a spoonful of nut butter into each cup before baking for a nutty flavor and extra moisture. It gives a lovely richness you won’t want to miss!
-
Pancake Popper Bar: Create a fun pancake popper bar with a variety of toppings like yogurt, honey, nuts, and fresh fruits. This makes for an interactive and enjoyable breakfast experience for everyone!
For more exciting breakfast ideas, check out my Pancakes Mornings for traditional favorites, or indulge in the warm, spiced goodness of Apple Cinnamon Pancakes when you’re ready to switch things up.
Pancake Poppers Recipe FAQs
How do I know if my buttermilk is fresh?
To ensure your buttermilk is fresh, check for a slightly sour smell and a thicker consistency. If you notice any separation or lumps, it’s best to discard it. You can also use regular milk mixed with 1 tablespoon of vinegar or lemon juice as a substitute for fresh buttermilk if needed.
How should I store leftovers?
Absolutely! Store leftover Pancake Poppers in an airtight container in the refrigerator for up to 4 days. This helps maintain their fluffiness and flavor, so you can enjoy them even after your initial brunch. Make sure they are completely cool before sealing to avoid moisture buildup.
Can I freeze Pancake Poppers?
Yes, you can! To freeze Pancake Poppers, place them on a baking sheet in a single layer until fully frozen, which usually takes about 1-2 hours. Once frozen, transfer them to a freezer-safe bag for up to 3 months. This method helps to retain their texture, so they stay just as fluffy when reheated!
What should I do if my Pancake Poppers are dense?
If your Pancake Poppers come out dense, it could be due to overmixing the batter. Gently mix just until combined—small lumps are totally fine! Additionally, make sure your baking powder is fresh and has not expired, as this is essential for fluffiness. If they still seem heavy, ensure you’re not packing the flour too tightly when measuring.
Are Pancake Poppers suitable for kids with gluten allergies?
Yes! Simply use a 1:1 gluten-free flour blend in place of all-purpose flour. This way, even those with gluten sensitivities can enjoy these delicious, poppable treats. Always check packaging to ensure other ingredients, like baking powder and add-ins, are also gluten-free!
What can I use as mix-ins for varied flavors?
The more the merrier! Feel free to customize your Pancake Poppers with a variety of add-ins. Popular choices include chocolate chips, fresh berries like blueberries or strawberries, chopped bananas, or even a sprinkle of nuts for added crunch. Just make sure to add them in moderation to avoid affecting the batter’s rise.
Pancake Poppers: Irresistibly Fluffy Mini Breakfast Delights
Ingredients
Equipment
Method
- Preheat the oven to 375°F (190°C) and grease a mini muffin tin.
- In a large bowl, whisk together the dry ingredients: flour, sugar, baking powder, baking soda, and salt.
- In a separate bowl, mix the wet ingredients until smooth: buttermilk, egg, vanilla extract, and melted butter.
- Pour the wet mixture into the dry ingredients and gently stir until just combined.
- Fill the mini muffin cups ¾ full with batter, adding mix-ins if desired.
- Bake for 12–15 minutes until golden brown and a toothpick comes out clean.
- Cool for 5 minutes, then dust with powdered sugar or serve with syrup.
Leave a Reply