
As I prepared for a casual gathering, the pressure mounted to find the perfect dessert that wasn’t just delicious but also a breeze to make. Enter the Creamy Biscoff Cottage Cheesecake Cups—my sweet salvation! These no-bake delights are not only incredibly simple to whip up, but they also wrap a healthy high-protein twist around a decadent flavor profile. With rich cottage cheese and the irresistible taste of Biscoff, this dessert is bound to charm anyone who takes a bite. Treat your guests to these creamy cups with a crunchy crust, and you’ll easily steal the spotlight without breaking a sweat. Curious to learn how to put these delightful cups together? Let’s dive in!
Why are these cheesecake cups a must-try?
No-Bake Convenience: You can throw these together in no time, perfect for those busy days or spontaneous gatherings.
High-Protein Delight: Packed with cottage cheese and Greek yogurt, these cups offer satisfaction without the calorie guilt.
Irresistible Flavor: The fusion of creamy Biscoff and a crunchy crust ensures every bite is a flavor explosion!
Customizable Touch: Want to switch it up? Substitute Biscoff with Nutella or give it a sprinkle of sea salt for a gourmet experience.
Crowd-Pleaser: Your guests will be raving about this dessert, setting the stage for future invitations.
Serve this alongside a Creamy Southern Spaghetti Bake for a perfectly paired meal that impresses without the stress.
Creamy Biscoff Cottage Cheesecake Cups Ingredients
For the Crust
• Biscoff Cookies – Crushed to create a deliciously crunchy base; the perfect contrast to the creamy filling.
• Melted Butter – Binds the crust together; using salted butter adds a lovely balance to the sweetness.
For the Filling
• Cottage Cheese – The star ingredient that adds richness and high protein; opt for 2% Good Culture for the best texture.
• Plain Greek Yogurt – Adds creaminess and a slight tang; feel free to use any full-fat Greek yogurt you have on hand.
• Maple Syrup – This natural sweetener melds beautifully with the flavors; honey is a great substitute for a different twist.
• Biscoff Cookie Butter – The primary flavor that delivers that distinctive spiced sweetness; you can swap it for speculoos or gingerbread spread if needed.
• Vanilla Bean Paste – Elevates the flavor profile; vanilla extract can be used as an alternative if that’s what you have.
• Cinnamon (optional) – Enhances the warmth of the dessert; omit if you want a more straightforward flavor.
For the Topping
• Melted Biscoff Cookie Butter – Drizzling this on top adds an extra layer of indulgence; use it to impress your guests!
Each bite of these Creamy Biscoff Cottage Cheesecake Cups will take you to dessert paradise!
Step‑by‑Step Instructions for Creamy Biscoff Cottage Cheesecake Cups
Step 1: Crust Preparation
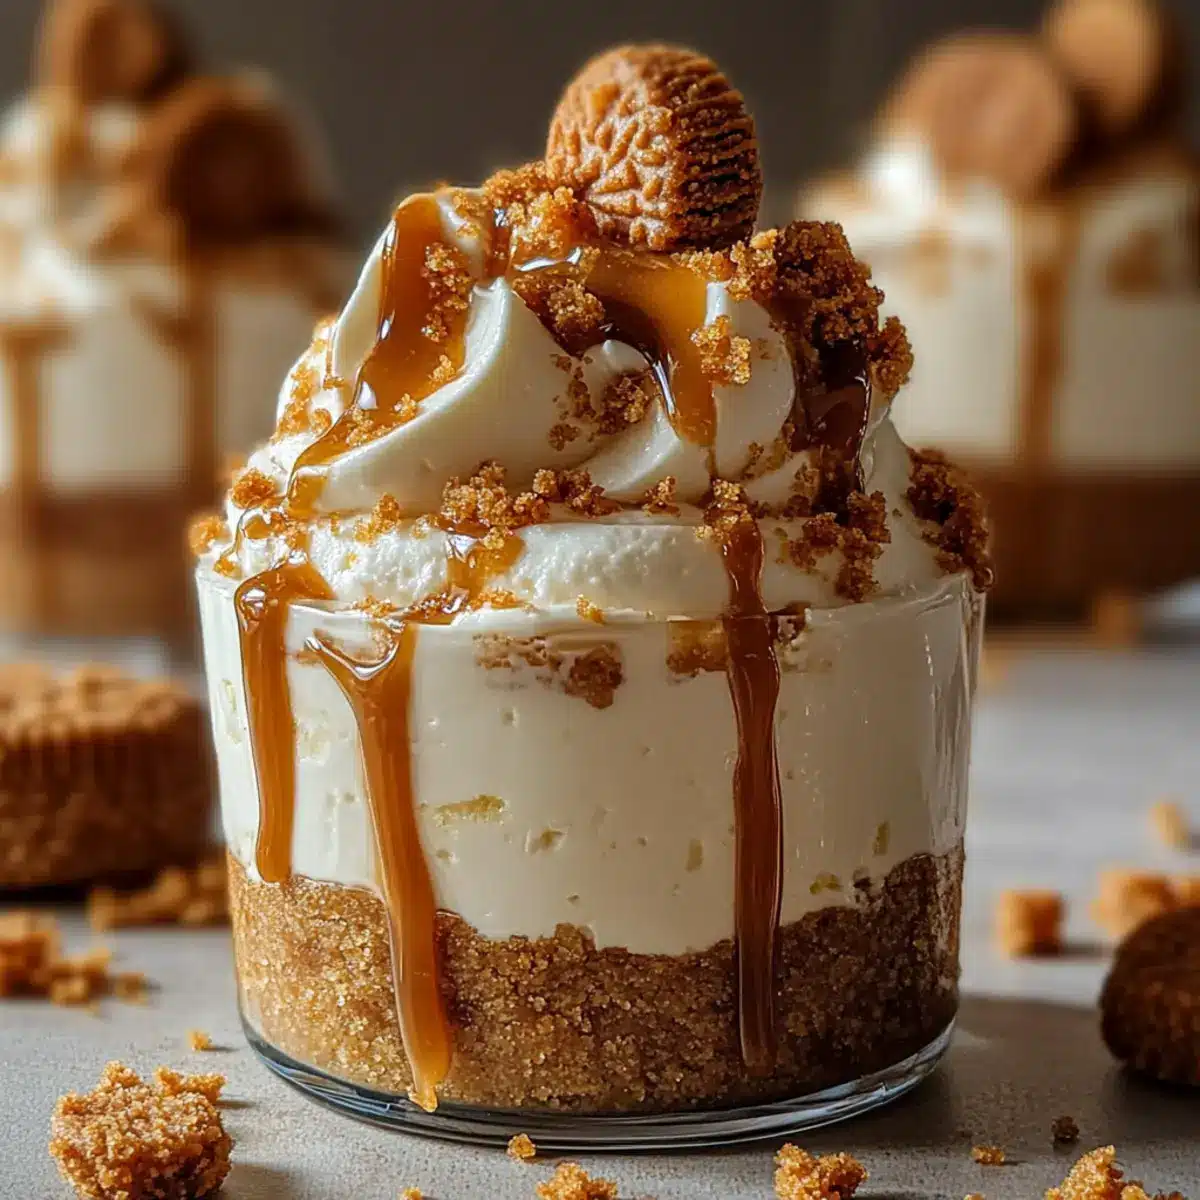
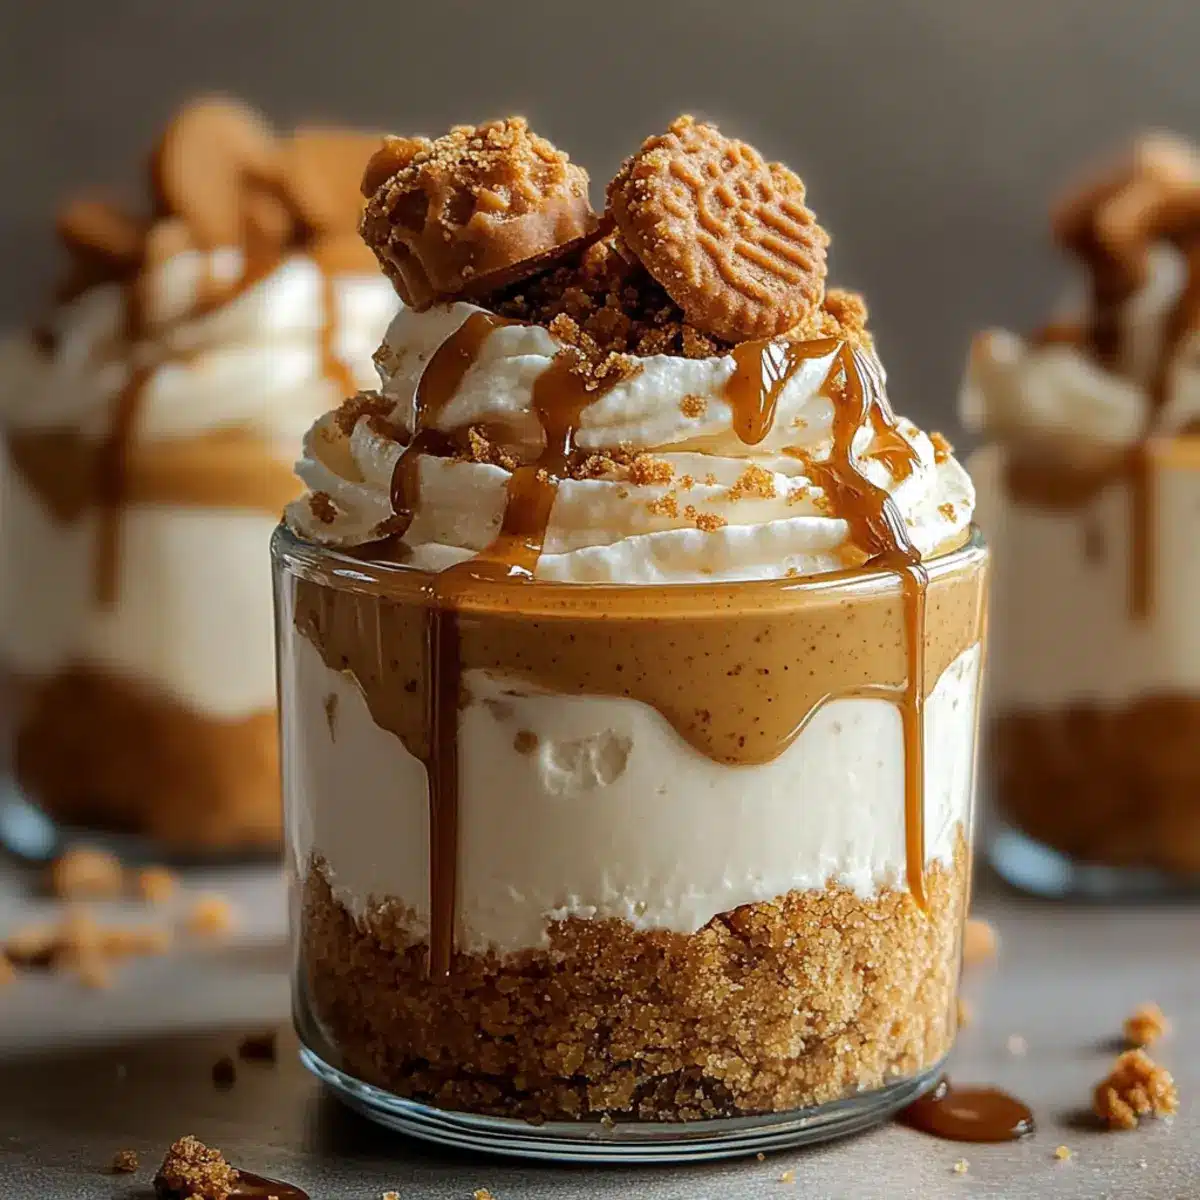
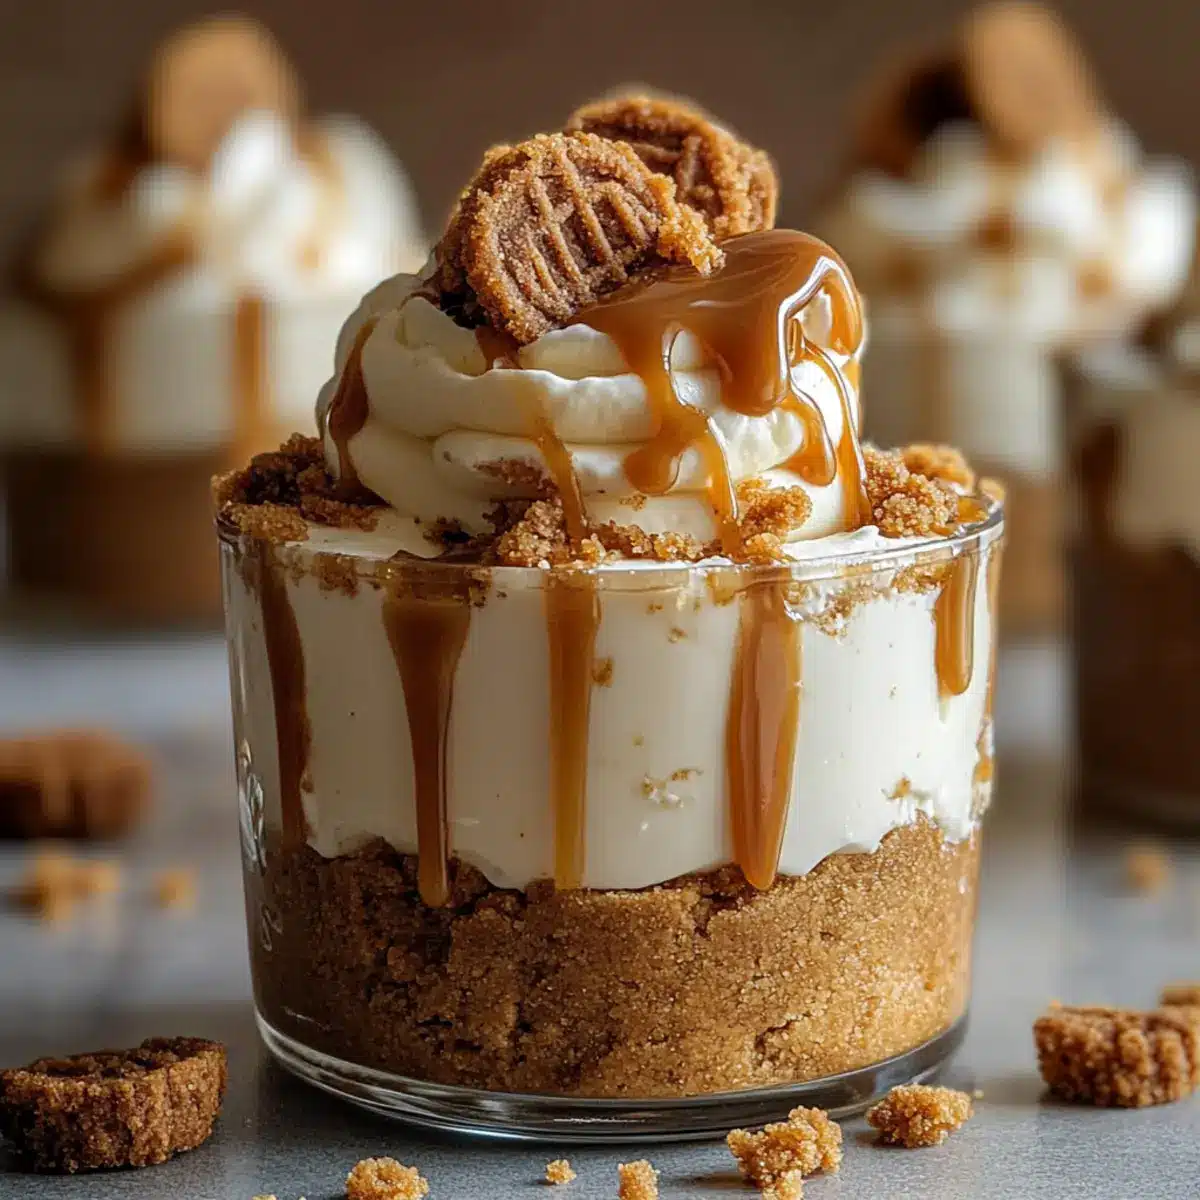
Start by crushing your Biscoff cookies into fine crumbs, using a food processor or a rolling pin. In a medium bowl, combine the crushed cookies with melted butter until well mixed. Press this mixture firmly into the bottom of individual serving cups or ramekins. Chill the crust in the refrigerator for about 10 minutes, allowing it to set and firm up.
Step 2: Filling Preparation
In a blender or food processor, combine cottage cheese, plain Greek yogurt, maple syrup, Biscoff cookie butter, and vanilla bean paste. Blend these ingredients until ultra-smooth, about 1-2 minutes, making sure all lumps are gone. The mixture should have a creamy, velvety texture, indicating it’s ready for the next step in making your Creamy Biscoff Cottage Cheesecake Cups.
Step 3: Assemble the Cups
Once your crust is set, carefully spoon or pipe the luscious cheesecake filling into the chilled cookie crusts. Use a spatula to smooth the tops for an even finish, making sure each cup is generously filled. This assembly is key to achieving that delightful, creamy layer of your Cheesecake Cups, ready for a delicious topping.
Step 4: Add the Topping
Drizzle the melted Biscoff cookie butter generously over the filled cheesecake cups. This adds a beautiful sheen and extra indulgence to your dessert, truly elevating the flavor profile. Once drizzled, place the cups back in the refrigerator to chill for at least 2 hours. This will help solidify the filling and enhance the flavors, making your Creamy Biscoff Cottage Cheesecake Cups irresistibly delicious.
What to Serve with Creamy Biscoff Cottage Cheesecake Cups
Prepare to elevate your dessert experience with delectable pairings that enhance the richness of your cheesecake cups!
-
Fresh Berries: Juicy strawberries, blueberries, or raspberries add a vibrant pop of color and a refreshing tartness that complements the sweetness.
-
Whipped Cream: Fluffy whipped cream offers a light, airy texture that balances the creamy density of cheesecake, making each bite even more delightful.
-
Chocolate Sauce: A drizzle of rich chocolate sauce creates a beautiful contrast and adds intense flavor, perfect for chocolate lovers.
-
Mint Leaves: A sprinkle of fresh mint not only garnishes the dessert beautifully but also infuses a refreshing note that brightens the overall flavor.
-
Coffee or Espresso: Pairing your cheesecake cups with a cup of robust coffee or espresso enhances the sweet and spiced flavors, making for a delightful end to the meal.
-
Crushed Biscoff Cookies: For an extra crunch, sprinkle crushed Biscoff cookies over the whipped cream. This adds delightful texture and intensifies the Biscoff flavor throughout!
Make Ahead Options
These Creamy Biscoff Cottage Cheesecake Cups are a fantastic choice for meal prep! You can prepare the crust—combining crushed Biscoff cookies with melted butter—up to 24 hours in advance and keep it chilled in the refrigerator. Additionally, the cheesecake filling can also be made ahead of time and stored separately for up to 3 days. Just blend all the filling ingredients, transfer it to an airtight container, and refrigerate. To maintain the desserts’ quality, avoid assembling them until shortly before serving. When ready to impress your guests, simply fill the chilled crusts with the prepared filling, drizzle with melted Biscoff cookie butter, and allow them to chill for a couple of hours. Enjoy the convenience and delight of these make-ahead cheesecake cups!
Creamy Biscoff Cottage Cheesecake Cups Variations
Explore delightful twists on these Creamy Biscoff Cottage Cheesecake Cups that will delight your taste buds and impress your guests!
- Nutty Bliss: Swap Biscoff cookie butter for almond or hazelnut butter for a different yet deliciously nutty flavor.
- Fruit Fusion: Top with fresh berries or slices of banana to add a burst of natural sweetness and vibrant color.
- Spiced Pumpkin: Incorporate a hint of pumpkin puree and pumpkin spice into the filling for a seasonal twist that’s undeniably cozy.
- Chocolate Decadence: Mix in cocoa powder for a chocolatey filling, creating a rich, indulgent dessert that’s perfect for chocolate lovers.
- Vegan Option: Substitute cottage cheese and yogurt for silken tofu and coconut cream for a creamy vegan delight that everyone can enjoy.
- Crispy Crust: Use crushed graham crackers or digestive biscuits in place of Biscoff cookies for a classic cheesecake flavor with a different crunch.
- Enhanced Sweetness: Drizzle with caramel sauce or chocolate syrup for extra indulgence that turns each bite into an experience.
- Fiery Kick: Stir in a pinch of cayenne or chili powder into the filling for a surprising heat that complements the sweetness beautifully.
Each of these variations offers something special, making it easy to cater to your guests’ preferences or simply indulge in new flavors. For a comforting meal to serve alongside, consider the irresistible harmony of these cups with a rich One Pot Garlic or a hearty Creamy Mushroom Orzo Pan.
Expert Tips for Creamy Biscoff Cottage Cheesecake Cups
-
Blend Well: Ensure your cottage cheese is blended for at least 1-2 minutes until completely smooth, so your creamy filling is free of lumps.
-
Chill for Perfection: Don’t skip chilling the crust for 10 minutes; it helps the buttery crust hold its shape and gives you that satisfying crunch.
-
Moisture Control: If your filling seems runny, strain the yogurt to remove excess moisture before blending. This keeps your Creamy Biscoff Cottage Cheesecake Cups perfectly fluffy.
-
Piping Technique: Use a piping bag for a clean assembly of the filling into cups, making it easy to achieve an even, professional-looking finish.
-
Flavor Variations: Experiment with swapping Biscoff cookie butter for Nutella or peanut butter for a fun twist on flavor, adapting it to your personal taste.
How to Store and Freeze Creamy Biscoff Cottage Cheesecake Cups
Fridge: Store covered in the refrigerator for up to 5 days to maintain freshness. After day 3, the crust may soften slightly but will still be delicious.
Freezer: These cheesecake cups can be frozen for up to 2 months. Wrap each cup tightly in plastic wrap, then place in an airtight container for optimal results.
Thawing: To enjoy frozen Creamy Biscoff Cottage Cheesecake Cups, transfer them to the fridge and let them thaw overnight for the best texture.
Reheating: Since these are no-bake cups, there’s no need to reheat. Serve chilled and enjoy the creamy goodness straight from the fridge!
Creamy Biscoff Cottage Cheesecake Cups Recipe FAQs
What type of cottage cheese should I use for the cheesecake cups?
Absolutely! For the best flavor and texture in your Creamy Biscoff Cottage Cheesecake Cups, I recommend using 2% Good Culture cottage cheese. Its creaminess and richness will elevate your dessert. If you can’t find this specific brand, any full-fat version works nicely as well.
How can I store these cheesecake cups?
Store your Creamy Biscoff Cottage Cheesecake Cups covered in the refrigerator for up to 5 days. They will stay fresh and delicious, but note that the crust may soften a bit after the third day. To keep them at their tastiest, make sure they’re in an airtight container or well-wrapped.
Can I freeze the cheesecake cups?
Yes, you can freeze these delightful cheesecake cups! Wrap each cup tightly in plastic wrap, then place them in an airtight container to prevent freezer burn. They’ll be good for up to 2 months in the freezer. When you’re ready to enjoy them, simply transfer the cups to the fridge and let them thaw overnight.
What should I do if my filling is too runny?
Very! If your filling appears runny, it’s likely due to excess moisture in the Greek yogurt. To fix this, strain the yogurt using a fine mesh sieve for about 30 minutes to remove any excess liquid before blending it into your filling this will help you achieve the perfect creamy texture. If it’s already blended, try chilling the cups in the refrigerator for a bit longer to help firm them up.
Can I give these cheesecake cups to my pet?
While the ingredients in your Creamy Biscoff Cottage Cheesecake Cups are generally safe for humans, it’s important to keep in mind that animals, especially dogs, can have adverse reactions to dairy and sweeteners. The cottage cheese and maple syrup might not be suitable for pets; therefore, I recommend saving these indulgent treats for human enjoyment only!
Are there any allergy considerations?
Certainly! If you or your guests have allergies, it’s crucial to consider that these cheesecake cups contain dairy and potential allergens such as gluten from the Biscoff cookies and specific nuts in some cookie butters. I suggest checking ingredient labels, especially if using alternatives, to avoid any mishaps. For a gluten-free version, look for gluten-free Biscoff options!

Creamy Biscoff Cottage Cheesecake Cups for Effortless Indulgence
Ingredients
Equipment
Method
- Crush Biscoff cookies into fine crumbs. Combine with melted butter and press into the bottom of serving cups. Chill for 10 minutes.
- Blend cottage cheese, Greek yogurt, maple syrup, Biscoff cookie butter, and vanilla bean paste until ultra-smooth.
- Spoon or pipe cheesecake filling into chilled crusts, smoothing the tops.
- Drizzle melted Biscoff cookie butter over the filled cups and place back in the refrigerator to chill for at least 2 hours.
Leave a Reply