
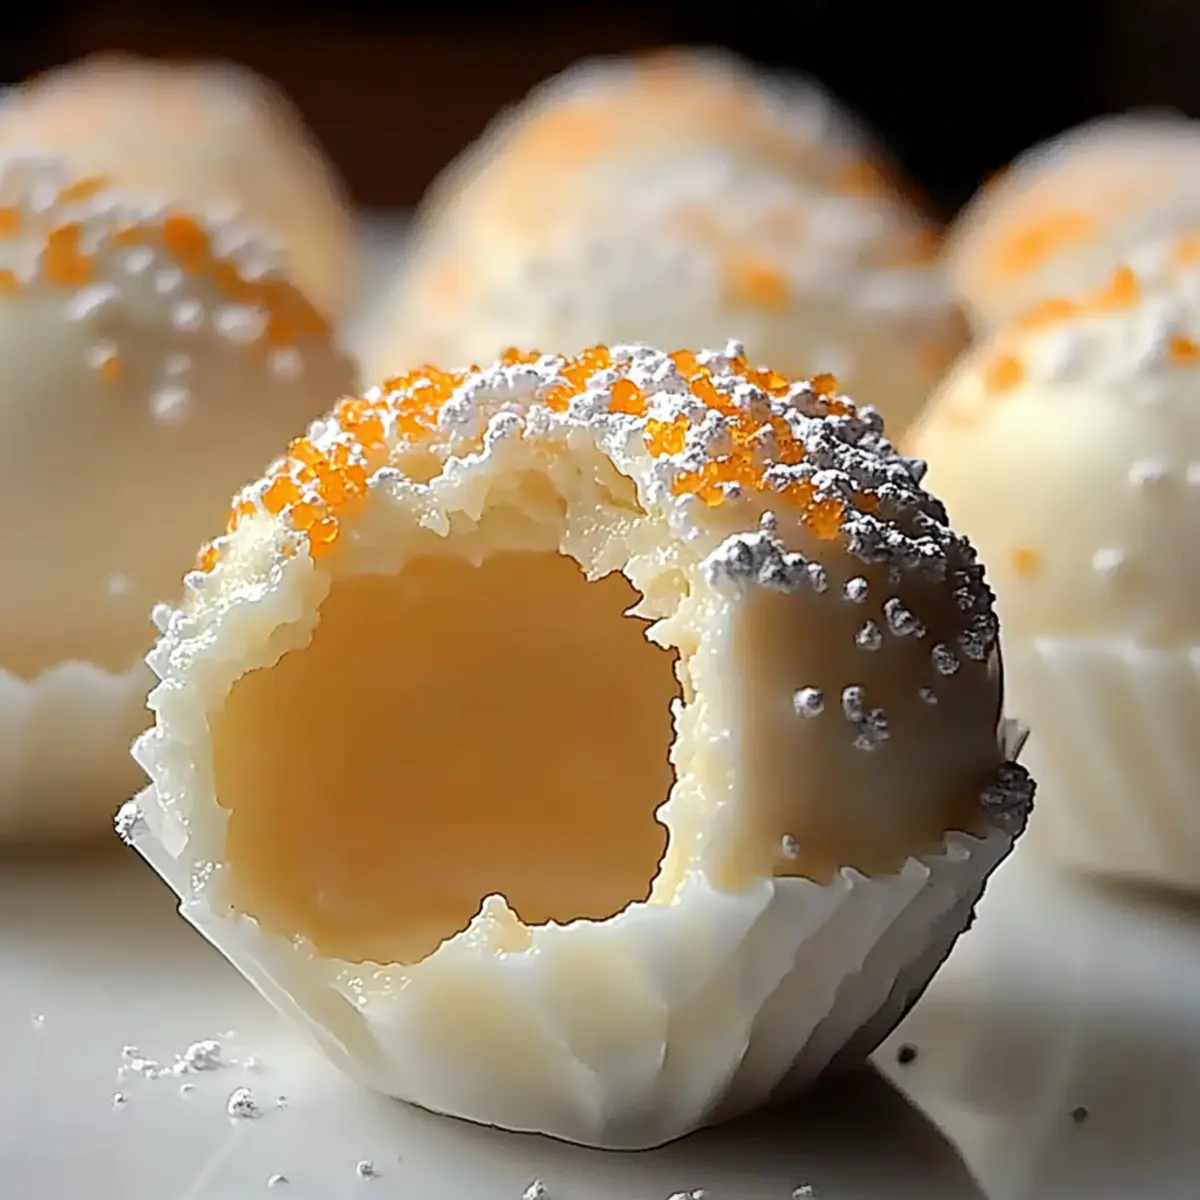
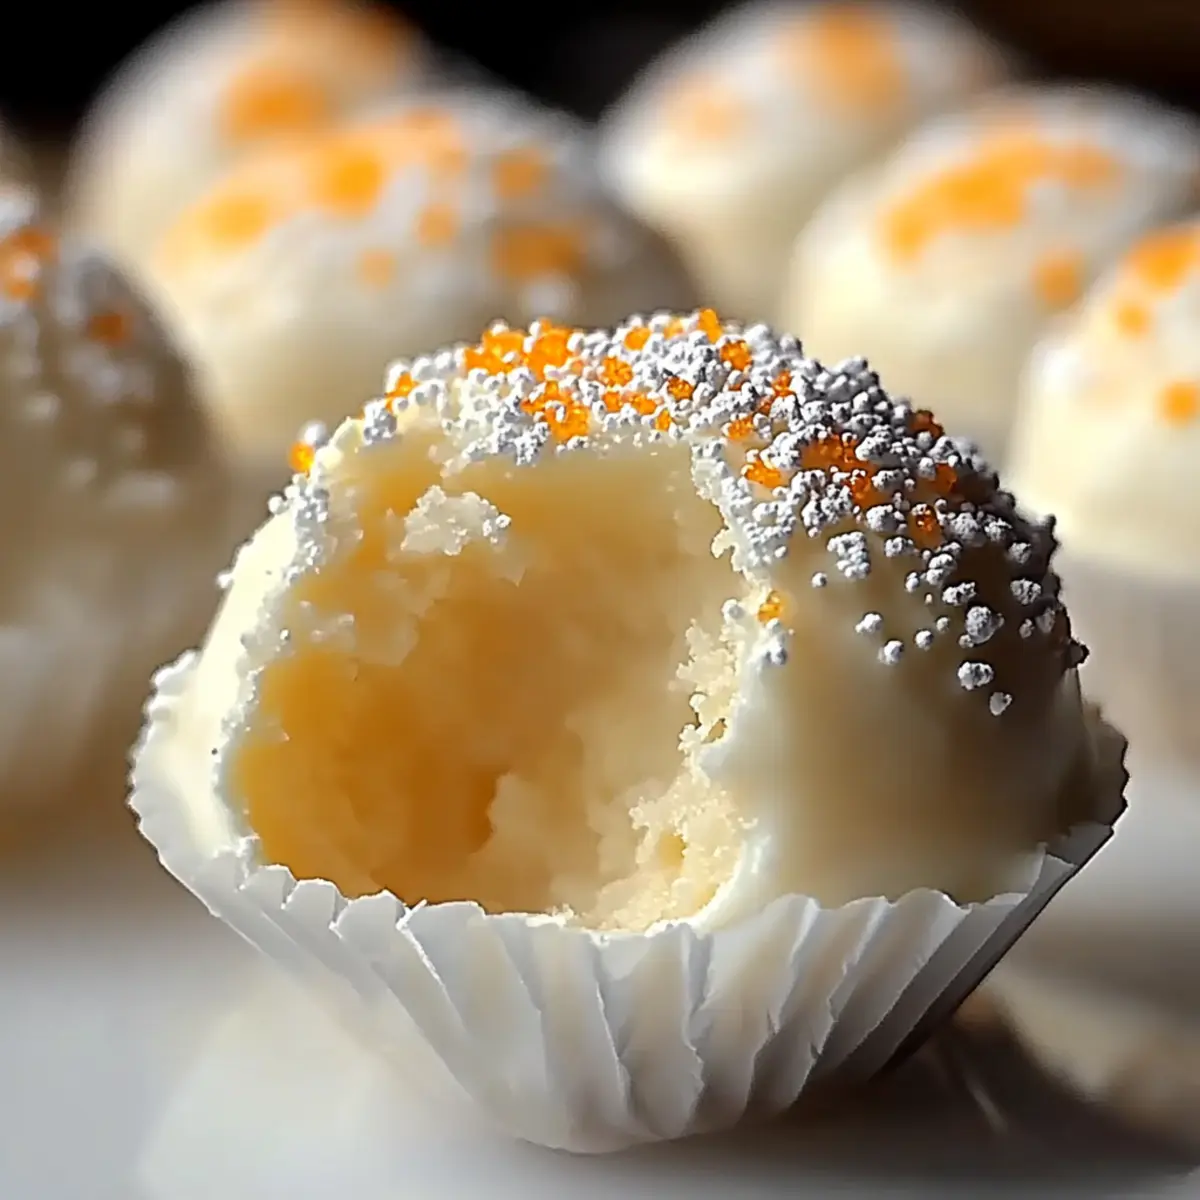
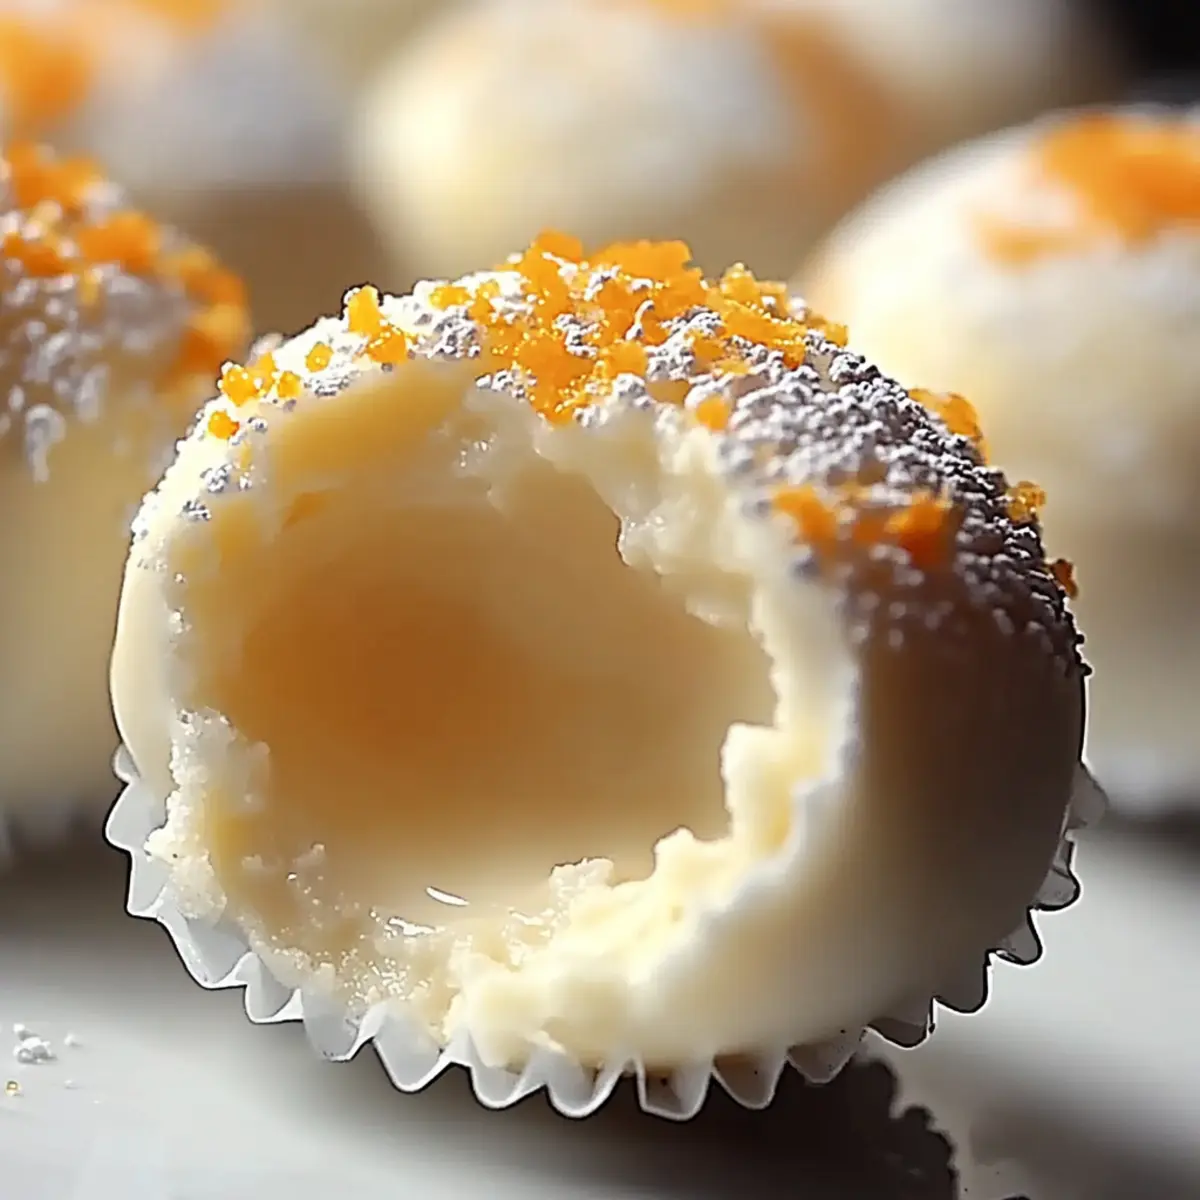
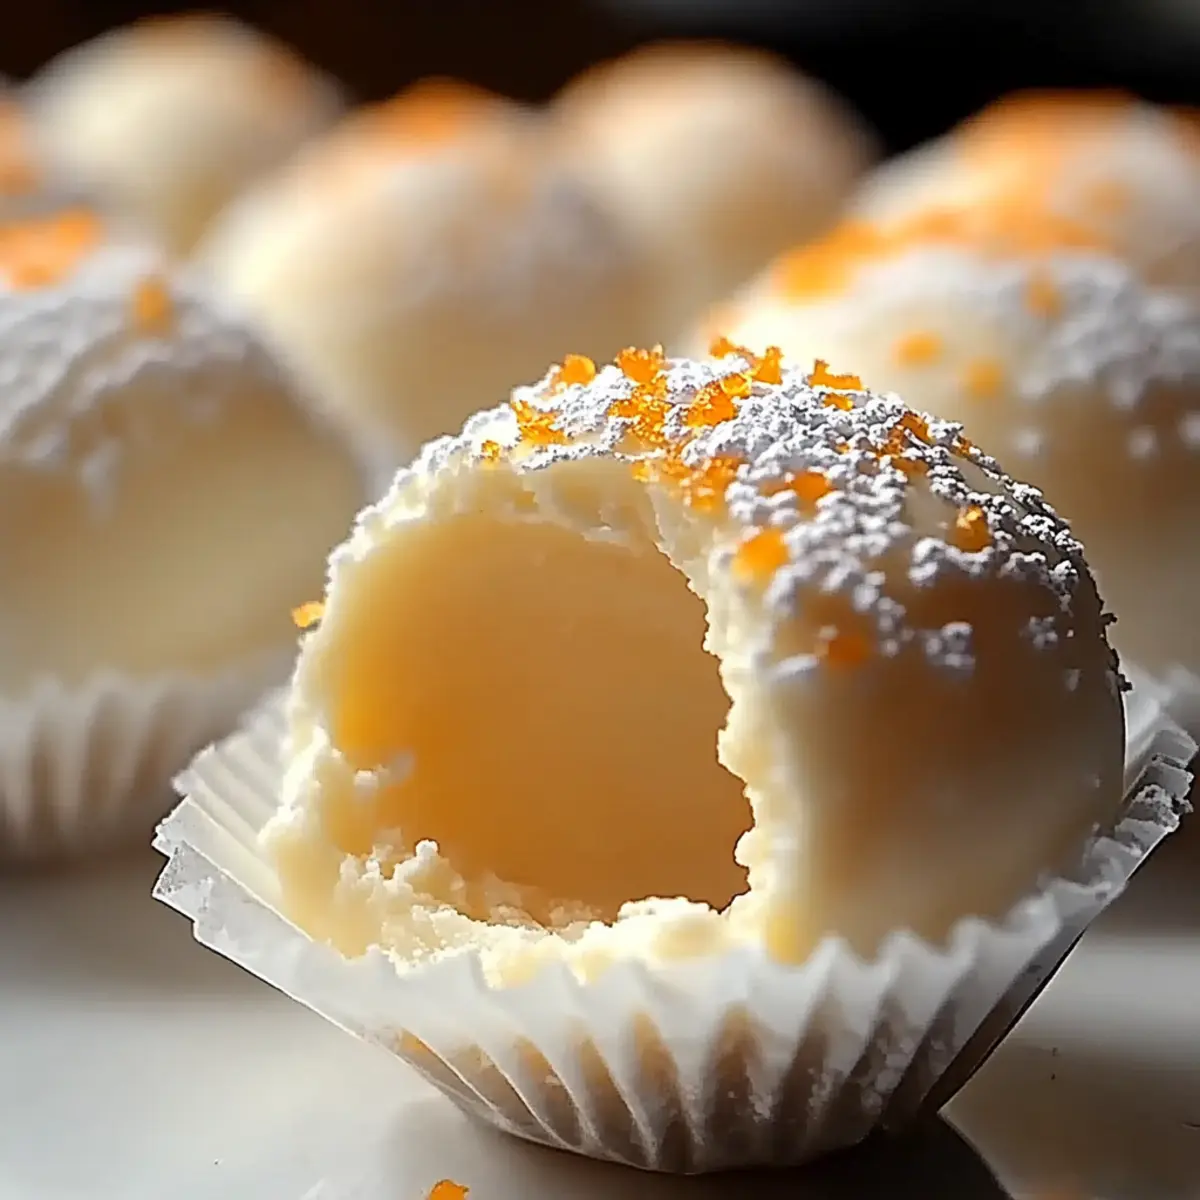
In a whirlwind of flavors, I’ve discovered a delicious escape that can brighten even the dullest afternoons: Creamy No-Bake Orange Truffles are a must-try delight! These delightful bites merge the vibrant zest of fresh oranges with the dreamy richness of cream cheese, creating a treat that’s not just a dessert but an experience. The best part? They’re ready in just 30 minutes, making them a stunning addition to any gathering or an easy way to satisfy a sweet craving without the fuss of baking. Plus, their adaptable nature means you can switch up flavors or cater to dietary needs without sacrificing taste. Are you ready to dive into a world of creamy, orange bliss? Let’s get started!
Why Make Creamy No-Bake Orange Truffles?
Irresistible Flavor Fusion: These truffles combine rich creaminess and zesty orange, delivering a flavor explosion with every bite.
Quick and Easy: Ready in just 30 minutes, this recipe eliminates the stress of long prep times, perfect for busy schedules.
Diet-Friendly Options: Swap ingredients like using vegan cream cheese or dark chocolate to create a treat everyone can enjoy!
Versatile Treats: Change flavors to lemon or raspberry to keep your dessert game fresh and exciting.
Party Pleasers: These truffles are ideal for gatherings and guaranteed to impress your friends, much like delicious Southern Spaghetti Bake.
Make Ahead Convenience: Prepare these delectable bites one to two days in advance to save time and enhance flavors!
Creamy No-Bake Orange Truffles Ingredients
For the Truffle Base
- Vanilla Wafer Crumbs – Provides structure and sweetness; substitute with graham cracker crumbs for a different flavor.
- Cream Cheese – Gives creaminess and richness; use vegan cream cheese for a dairy-free option.
- Powdered Sugar – Adds sweetness and a smooth texture; can be reduced for a less sweet treat.
- Orange Juice – Infuses the truffles with fresh citrus flavor; substitute with lemon juice for a tangy variation.
- Orange Zest – Enhances the orange flavor with aromatic oils; adjust to taste based on preference.
- Vanilla Extract – Offers additional depth of flavor; optional, but recommended.
For Coating
- White Chocolate Chips – Coats the truffles, adding a sweet finish; replace with dark chocolate for a richer taste.
- Coconut Oil – Helps in melting the chocolate smoothly; can be omitted if using a chocolate that melts easily.
For Dusting
- Extra Powdered Sugar – For dusting; can be replaced with crushed nuts or shredded coconut for texture.
These Creamy No-Bake Orange Truffles are a must-try delight, perfect for satisfying sweet cravings in no time!
Step‑by‑Step Instructions for Creamy No-Bake Orange Truffles are a must-try delight!
Step 1: Mix Base
In a large mixing bowl, combine 1 ½ cups of vanilla wafer crumbs, 8 ounces of softened cream cheese, 1 cup of powdered sugar, ¼ cup of freshly squeezed orange juice, 1 tablespoon of orange zest, and 1 teaspoon of vanilla extract. Use a hand mixer on medium speed for about 2-3 minutes until the mixture is smooth and well-blended, with a lovely orange hue, ensuring no lumps remain.
Step 2: Chill Mixture
Cover the bowl with plastic wrap and refrigerate the mixture for at least 30 minutes. This step is crucial as it allows the mixture to firm up, making it easier to handle. You’ll know it’s ready when it holds its shape during the next step, becoming more manageable for rolling into truffles.
Step 3: Form Truffles
Once chilled, use a small cookie scoop or tablespoon to scoop out the mixture and roll it into 1-inch balls. Place each ball on a parchment-lined baking sheet for easier cleanup. Aim for uniformity in size for even coating later. Continue until all the mixture is shaped into delightful little spheres, about 24 in total.
Step 4: Melt Chocolate
In a microwave-safe bowl, combine 1 cup of white chocolate chips with 1 tablespoon of coconut oil. Melt the mixture in the microwave in 30-second intervals, stirring between each until smooth. This process should take about 1-2 minutes—be careful not to overheat; the chocolate should be glossy and pourable.
Step 5: Coat Truffles
Dip each chilled truffle into the melted chocolate, using a fork to allow excess chocolate to drip back into the bowl. Carefully place the coated truffles back onto the parchment-lined sheet. You’ll want a thick, even coating for a luscious finish. Repeat until all truffles are beautifully coated in chocolate.
Step 6: Dust and Chill
Before the chocolate sets, sprinkle each truffle with powdered sugar or your choice of topping, such as crushed nuts or shredded coconut. Refrigerate for at least 1 hour to allow the chocolate to fully harden. Once set, your Creamy No-Bake Orange Truffles are ready to be enjoyed as a sweet, indulgent treat!
Storage Tips for Creamy No-Bake Orange Truffles
Fridge: Store truffles in an airtight container in the refrigerator for up to 1 week. This will help maintain their creamy texture and flavor.
Freezer: For longer storage, place truffles in a single layer on a baking sheet to freeze, then transfer to an airtight container for up to 3 months. Thaw in the fridge before enjoying.
Room Temperature: For the best taste, let the truffles sit at room temperature for about 15-20 minutes before serving, allowing their flavors to fully emerge.
Reheating: There’s no need to reheat; these Creamy No-Bake Orange Truffles are best enjoyed chilled and ready to savor right from the fridge or after thawing!
What to Serve with Creamy No-Bake Orange Truffles?
Elevate your dessert experience by pairing these delightful truffles with complementary flavors and textures that balance the creamy sweetness.
- Zesty Fruit Salad: A refreshing combination of fresh fruits like berries and citrus enhances the truffles’ orange flavor while adding lightness.
- Rich Chocolate Cake: A slice of chocolate cake provides a decadent contrast to the light and creamy truffles, creating a beautifully indulgent dessert plate.
- Vanilla Ice Cream: A scoop of creamy vanilla ice cream offers a cool counterpoint that highlights the truffles’ orange zest, making every bite a celebration.
- Coffee or Espresso: The bold flavors of a coffee drink work perfectly to cut through the sweetness, offering a rich pairing that enhances the truffles’ indulgence.
- Cheesecake Bites: Mini cheesecake bites bring another layer of creaminess, tying in beautifully with the truffles while balancing flavors with a different texture.
- Almond Biscotti: Crunchy almond biscotti offers a delightful contrast, inviting a satisfying crunch that complements the soft truffles and adds a nutty touch.
- Sparkling Lemonade: This refreshing drink provides a citrusy zing that mirrors the truffles’ flavor, keeping the dessert experience light and effervescent.
- Chocolate-Covered Strawberries: Nestled alongside the truffles, these bring an elegant touch to the dessert spread, combining texture and flavor beautifully.
- Whipped Cream: A dollop of freshly whipped cream adds an airy quality and pairs well with the tangy truffles, creating a dreamy dessert harmony.
Creamy No-Bake Orange Truffles Variations & Substitutions
Embrace creativity in your kitchen and customize these delectable truffles to suit your taste preferences!
- Dairy-Free: Use vegan cream cheese and dark chocolate to make these truffles completely dairy-free without losing the indulgent flavor.
- Citrus Switch: Replace orange juice and zest with freshly squeezed lemon for a bright and tangy twist that’s irresistibly refreshing. The citrus burst will awaken your taste buds!
- Berry Bliss: Substitute the orange juice with raspberry puree for a fruity delight that’s perfect for summer gatherings. The vibrant color adds a pop of fun to every bite!
- Nuts for Texture: Roll the truffles in crushed nuts, graham cracker crumbs, or shredded coconut instead of powdered sugar for a delightful crunch. It’s a tasty way to add another layer of flavor!
- Flavor Fusion: Experiment with other flavor extracts like almond or coconut to add a unique flair to your truffles, creating a taste adventure with every bite.
- Chilly Delights: For a refreshing twist, integrate mini chocolate chips or chopped fruit into the truffle base before chilling. Each bite will be a delightful surprise!
- Elegant Finish: Drizzle melted chocolate on top instead of coating each truffle for a stylish presentation. This drizzle adds sophistication to your dessert table, reminiscent of festive Orange Maple Glazed Brussels Sprouts.
- Spicy Kick: Add a pinch of cayenne or chili powder to the melted chocolate for a subtly spicy contrast to the sweet and creamy flavor, creating a flavor profile that surprises and delights.
Your truffle journey is all about exploration—happy experimenting!
Make Ahead Options
These Creamy No-Bake Orange Truffles are perfect for meal prep enthusiasts! You can mix the base and form the truffles up to 24 hours in advance, storing them in an airtight container in the refrigerator. The mixture should be chilled for at least 30 minutes to firm it up, making it easy to handle. When you’re ready to serve, simply coat the chilled truffles in melted chocolate and let them set in the fridge for at least 1 hour. This method not only saves you precious time on busy days but also enhances flavors, ensuring your Creamy No-Bake Orange Truffles are just as delicious when you finally enjoy them!
Expert Tips for Creamy No-Bake Orange Truffles
- Softened Cheese: Make sure your cream cheese is at room temperature for easy mixing. Cold cream cheese can lead to lumpy truffles.
- Avoid Overheating: When melting chocolate, do it in short intervals to prevent seizing. Stir gently for a smooth coating.
- Uniform Size: Use a cookie scoop for even truffles. This helps with consistent baking and a pleasing appearance.
- Chill Thoroughly: Don’t skip the chilling step after mixing. A firm mixture makes rolling and dipping much easier!
- Creative Coating: Experiment with different toppings like crushed nuts or coconut for added texture on your Creamy No-Bake Orange Truffles.
Creamy No-Bake Orange Truffles Recipe FAQs
What is the best way to select ripe oranges for this recipe?
Absolutely! When selecting oranges, look for fruit that is firm, heavy for its size, and has a vibrant color. Avoid any with dark spots or shriveled skin, as these indicate over-ripeness or decay. Fresh oranges should feel slightly heavy, indicating juiciness, and have a fragrant citrus aroma.
How should I store leftover Creamy No-Bake Orange Truffles?
To keep your truffles fresh, store them in an airtight container in the refrigerator for up to 1 week. Make sure each layer is separated with parchment paper to prevent them from sticking together. This helps maintain their creamy texture and delightful flavor throughout the week!
Can I freeze Creamy No-Bake Orange Truffles?
Yes! To freeze your truffles, first place them in a single layer on a baking sheet and freeze until solid. Then, transfer them to an airtight container or freezer bag for up to 3 months. When you’re ready to enjoy, simply thaw them in the refrigerator for a few hours before serving.
What if my chocolate coating seizes while melting?
If your chocolate seizes, don’t panic! You can try adding a tiny splash of coconut oil or vegetable oil to the bowl and stir vigorously. This might help restore the smooth consistency. For future attempts, melt chocolate at a lower power in the microwave and heat in shorter intervals to avoid overheating.
Are these truffles safe for pets or individuals with allergies?
Great question! The ingredients in Creamy No-Bake Orange Truffles (particularly chocolate) can be harmful to pets, so keep these treats out of their reach! Additionally, always check for possible allergies—most notably to dairy or gluten—before serving to guests. Opt for vegan cream cheese and gluten-free wafers to make them more inclusive if there are dietary restrictions.
Creamy No-Bake Orange Truffles are a Must-Try Delight!
Ingredients
Equipment
Method
- In a large mixing bowl, combine 1 ½ cups of vanilla wafer crumbs, 8 ounces of softened cream cheese, 1 cup of powdered sugar, ¼ cup of freshly squeezed orange juice, 1 tablespoon of orange zest, and 1 teaspoon of vanilla extract. Use a hand mixer on medium speed for about 2-3 minutes until the mixture is smooth and well-blended, with a lovely orange hue, ensuring no lumps remain.
- Cover the bowl with plastic wrap and refrigerate the mixture for at least 30 minutes. This step is crucial as it allows the mixture to firm up, making it easier to handle.
- Once chilled, use a small cookie scoop or tablespoon to scoop out the mixture and roll it into 1-inch balls. Place each ball on a parchment-lined baking sheet.
- In a microwave-safe bowl, combine 1 cup of white chocolate chips with 1 tablespoon of coconut oil. Melt the mixture in the microwave in 30-second intervals, stirring between each until smooth.
- Dip each chilled truffle into the melted chocolate, using a fork to allow excess chocolate to drip back into the bowl. Carefully place the coated truffles back onto the parchment-lined sheet.
- Before the chocolate sets, sprinkle each truffle with powdered sugar or your choice of topping. Refrigerate for at least 1 hour to allow the chocolate to fully harden.
Leave a Reply