
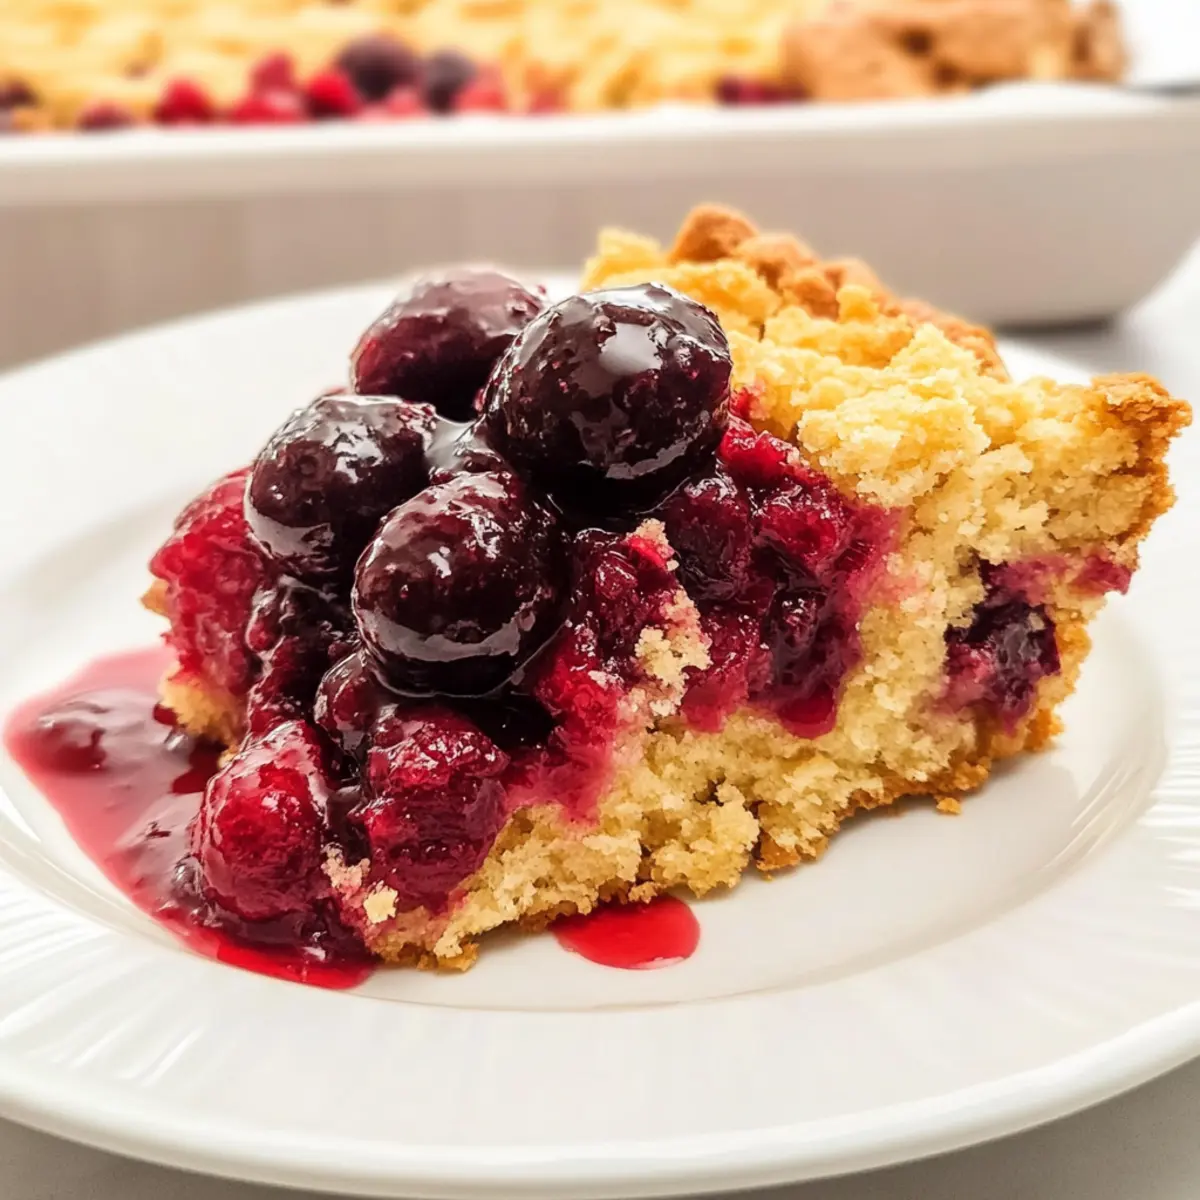
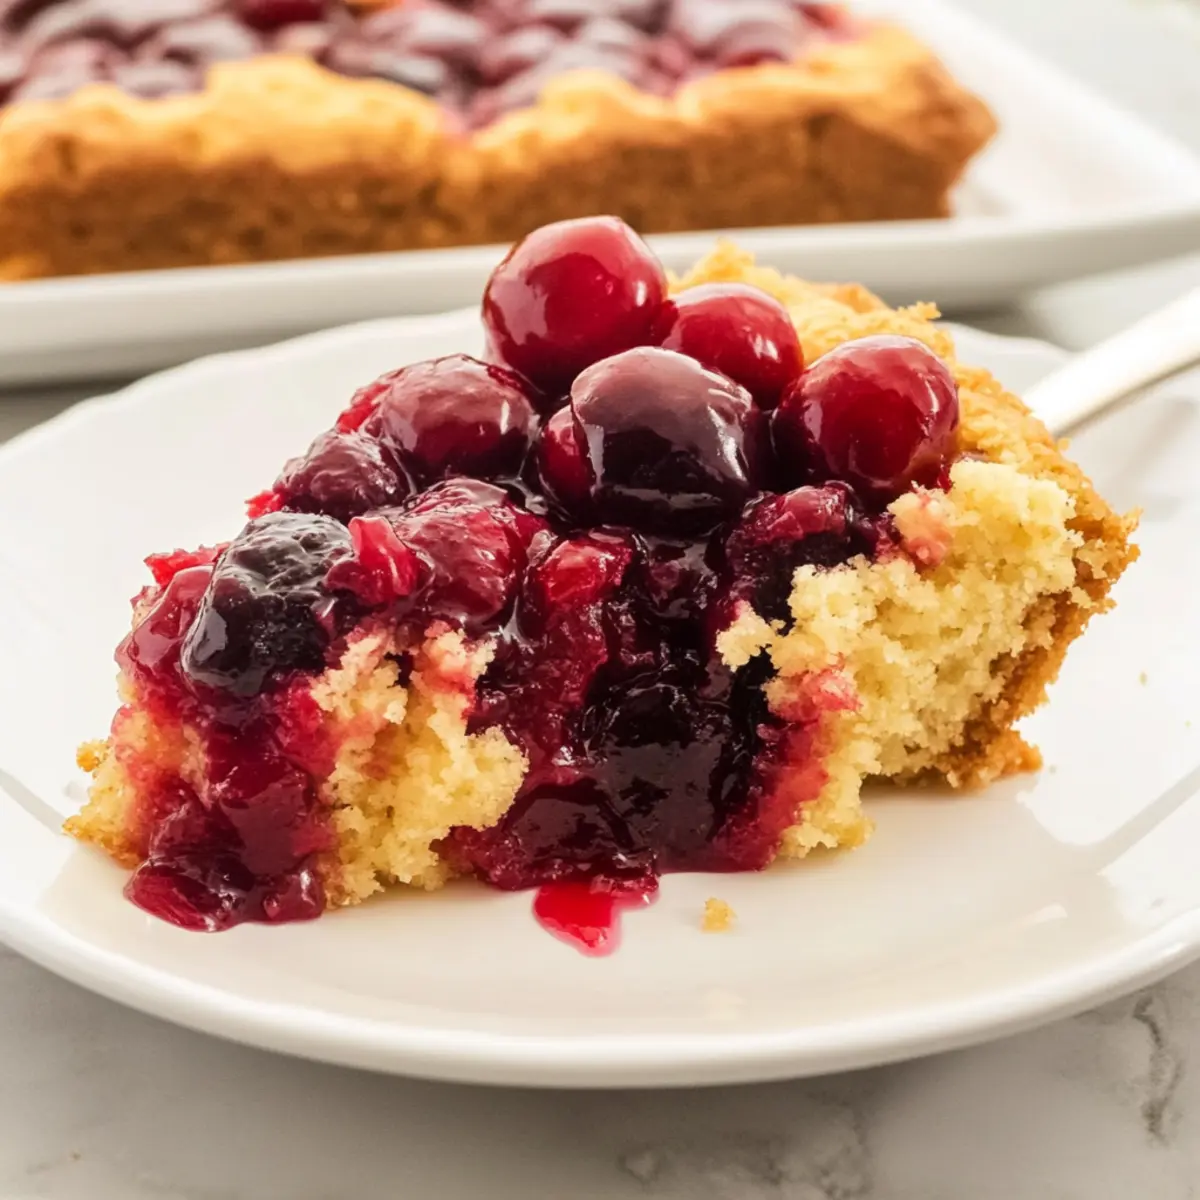
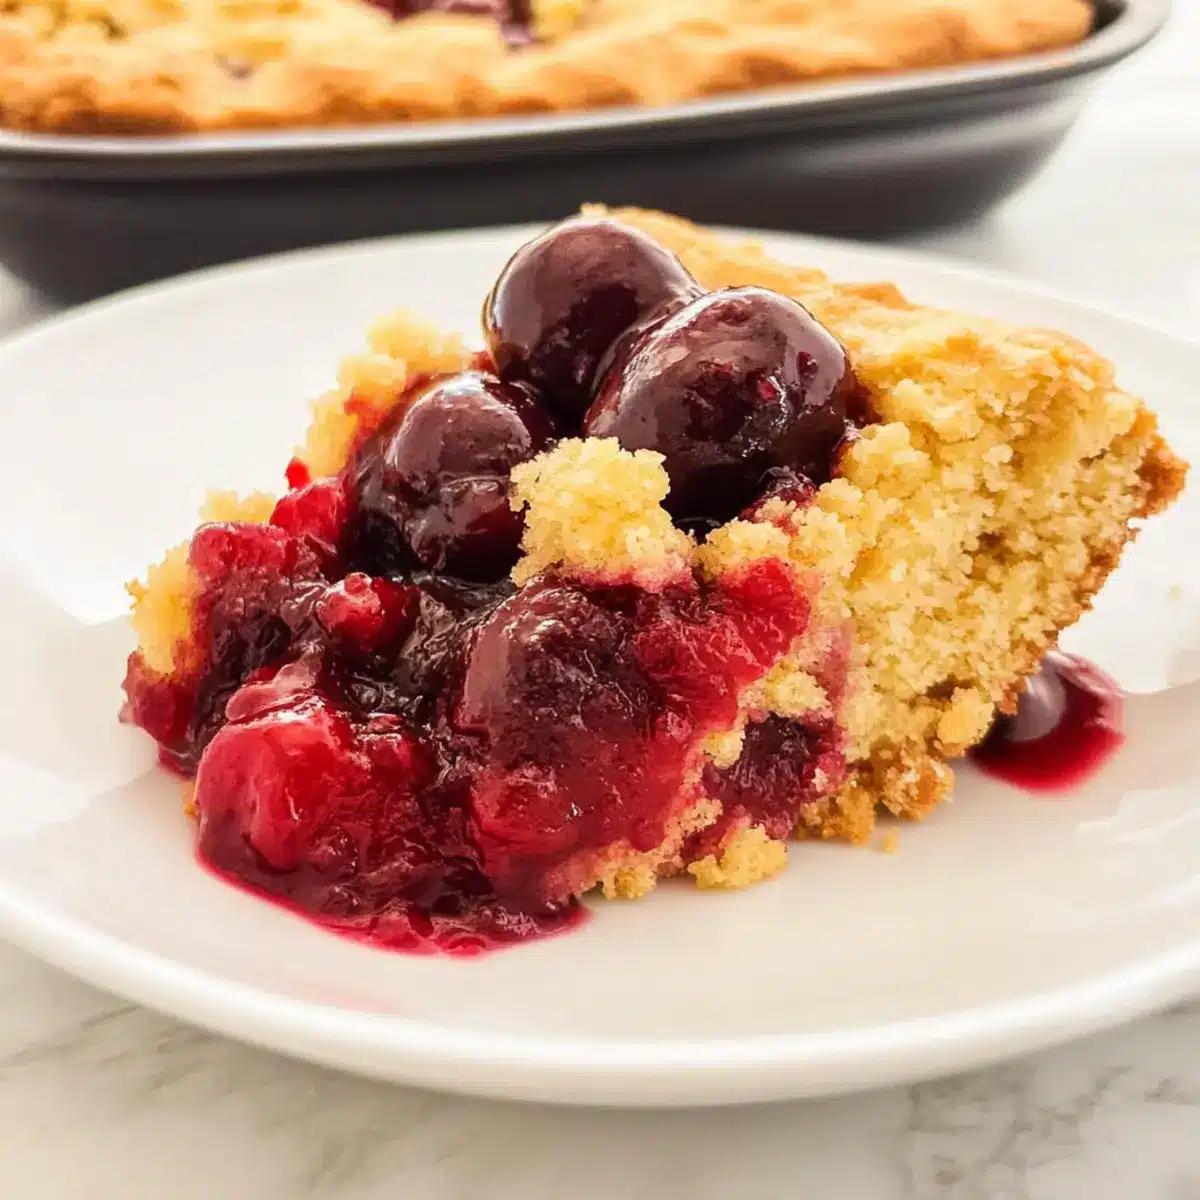
As I stood in my kitchen, the rich scent of melting butter began to fill the air, instantly reminding me of my grandmother’s comforting desserts. Today, we’re diving into the warmth of The Best Ever Cherry Dump Cake, a delightful treat that’s as easy as it is delicious. With just three simple ingredients, this dessert not only delivers on taste but also takes minimal time to prepare—perfect for those busy weeknights or family gatherings where you crave something sweet without the fuss. Just imagine a warm, cobbler-like cake that pairs beautifully with a scoop of vanilla ice cream or a dollop of whipped cream. Are you ready to create a dessert that will impress everyone at the table? Let’s get baking!
Why is This Cherry Dump Cake a Must-Try?
Simplicity at Its Best: With just three ingredients, you’ll whip this up in record time, even on the busiest of nights.
Endless Variations: Feel free to experiment with different fruit fillings! From peaches to blueberries, the options are limitless.
Irresistible Warmth: Serve it warm with a scoop of vanilla ice cream, and watch as everyone reaches for seconds. It’s a dessert that brings smiles!
Perfect for Gatherings: This Cherry Dump Cake is a crowd-pleaser at family reunions or potlucks—it’s as appealing to the eyes as it is to the palate.
Nostalgia in Every Bite: Enjoying this cake is like taking a comforting walk down memory lane, reminding many of cherished family moments over delicious homemade treats.
Try it alongside our Coconut Poke Cake for an unforgettable dessert spread!
The Best Ever Cherry Dump Cake Ingredients
• With just three ingredients, creating this delightful dessert is a breeze!
For the Cake
- Yellow Cake Mix – Provides structure and sweetness; feel free to swap it out for White or Chocolate Cake Mix if you’re feeling adventurous!
- Dark Sweet Cherry Fruit Filling – Adds moisture and rich flavor; regular cherry filling works too for a slightly different taste.
- Butter (Sweet Cream, Salted) – Enhances richness and creates a crispy top; don’t skip on using melted butter for the best results.
Step‑by‑Step Instructions for The Best Ever Cherry Dump Cake
Step 1: Preheat Your Oven
Begin by preheating your oven to 350°F (175°C). This temperature is ideal for creating that beautiful, golden crust you’ll love. While the oven heats, gather your tools: a 9×13-inch baking pan and cooking spray to ensure easy removal later. The warmth from the oven will make your kitchen smell delightful as you prepare this delicious Cherry Dump Cake.
Step 2: Prepare the Baking Pan
Lightly spray the bottom and sides of the 9×13-inch baking pan with cooking spray, ensuring it’s well-coated to prevent sticking. This step is crucial for achieving that perfect slice later on. As the pan is prepped, take a moment to admire your workspace and get excited for the easy baking ahead!
Step 3: Add the Cherry Filling
Carefully open both cans of dark sweet cherry fruit filling and pour them into the bottom of your prepared baking pan. Use a spatula to spread the cherries evenly across the surface. The vibrant cherries will create a lovely layer and add moisture to your The Best Ever Cherry Dump Cake, forming a luscious base for the cake mix.
Step 4: Mix the Cake Layer
In a mixing bowl, combine half of the melted butter with the yellow cake mix until the mixture appears crumbly but well combined. Don’t worry if there are a few lumps; this texture is perfect for creating that yummy buttery topping! The fragrant, sweet butter will complement the cherry filling beautifully as you sprinkle this mixture over the fruit.
Step 5: Add the Crumbly Cake Mix
Evenly sprinkle the cake mix mixture over the layer of cherries in the baking pan. Use your fingers to distribute it gently, ensuring the cherries peek through in spots. This layer will bake into a buttery, crisp texture that contrasts wonderfully with the cherry filling, making your Cherry Dump Cake irresistibly delicious.
Step 6: Drizzle the Remaining Butter
Drizzle the remaining melted butter over the top of the cake mix layer. Make sure to cover as much of the mix as possible, as this will help create a crispy, golden-brown top as it bakes. The butter infuses the cake with flavor while mixing with the cherry juices below, contributing to that amazing cobbler-like quality.
Step 7: Bake to Perfection
Place the prepared pan in your preheated oven and bake for 30-35 minutes. Keep an eye on it, as you want the top to be set and slightly golden brown. The aroma that fills your kitchen during this time will make your mouth water in anticipation of your delicious The Best Ever Cherry Dump Cake!
Step 8: Cool and Serve
Once baked, remove the pan from the oven and allow the cake to cool for a few minutes before serving. This cooling period helps the layers set up a bit more for easier slicing. Serve your warm Cherry Dump Cake with a generous scoop of vanilla ice cream or a dollop of whipped cream to elevate this comforting dessert experience.
The Best Ever Cherry Dump Cake Variations
Feel free to get creative and make this delightful cake your own! Customize your Cherry Dump Cake with these delicious twists.
-
Fruit Fillings: Switch up the cherry filling with peaches, blueberries, or mixed berries depending on your pantry and seasonal favorites.
-
Chocolate Delight: Mix in some chocolate chips or chunks with the cake layer for an irresistible sweet and fruity combination. Imagine enjoying the gooey melted chocolate alongside that sweet cherry goodness; it’s pure bliss!
-
Gluten-Free: Substitute the yellow cake mix with a gluten-free cake mix for a delightful gluten-free alternative that everyone can enjoy.
-
Zesty Flavor: Add the zest of a lemon or lime to the cherry filling for a bright, refreshing burst of citrus that will enhance the dessert’s flavors beautifully.
-
Nuts for Texture: Sprinkle chopped walnuts or almonds on top of the cake mix layer for a delightful crunch that pairs perfectly with the soft cake and juicy cherries.
-
Ice Cream Parfait: Layer the cooled Cherry Dump Cake with whipped cream and ice cream in a parfait glass for a stunning presentation at your next gathering.
-
Spicy Kick: For a hint of warmth, add a sprinkle of cinnamon or nutmeg to the cake mix before sprinkling it over the cherry filling. This subtle spice will elevate the flavor profile beautifully.
Consider serving your Cherry Dump Cake with a scoop of vanilla ice cream or a dollop of whipped cream, and for another delicious dessert, check out our Cheats Opera Cake or Grandmas Fruit Cake for an excellent dessert spread!
Expert Tips for The Best Ever Cherry Dump Cake
-
Butter Matters: Ensure your butter is fully melted before mixing to achieve that crispy, golden topping. Incomplete melting can lead to uneven baking.
-
Watch the Time: Keep an eye on your cake as it bakes. Since each oven is different, start checking for a golden top around 30 minutes to avoid overcooking.
-
Let It Rest: Allow your Cherry Dump Cake to cool slightly before serving. This helps the layers set and prevents burns when serving warm.
-
Creative Fillings: Don’t hesitate to try different fruit fillings, like blueberry or peach! Each variation brings a unique flavor twist to The Best Ever Cherry Dump Cake.
-
Perfect Storage: If you have leftovers, store your cake covered in the fridge for 2-3 days, or freeze for up to 3 months for a sweet treat later.
How to Store and Freeze The Best Ever Cherry Dump Cake
-
Room Temperature: Best enjoyed warm, but if left out, it can sit at room temperature for up to 2 hours before it should be covered and refrigerated.
-
Fridge: Store covered in the refrigerator for up to 2-3 days. Make sure it’s airtight to keep the flavors intact and the cake moist.
-
Freezer: This dessert can be frozen for up to 3 months in an airtight container. Slice beforehand for easy serving later!
-
Reheating: To enjoy leftovers, reheat slices in the microwave for 20-30 seconds or in the oven at 350°F until warmed through.
Make Ahead Options
These make-ahead tips for The Best Ever Cherry Dump Cake will save you time and make dessert a breeze! You can prepare the cherry filling and crumble topping up to 24 hours in advance—simply keep each component in separate airtight containers in the refrigerator. When ready to bake, spread the cherry filling in the pan, sprinkle the cake mix on top, and drizzle with the melted butter before popping it in the oven. If you need to store it for longer, you can freeze the assembled cake (before baking) for up to 3 months; just remember to let it thaw in the refrigerator overnight before baking. This way, you’ll have a delightful dessert ready with minimal effort on busy weeknights!
What to Serve with The Best Ever Cherry Dump Cake
Indulging in a warm slice of cherry cake is just the beginning; let’s create a meal that everyone will adore.
-
Vanilla Ice Cream: The classic pairing elevates the warm cherry flavors with creamy richness, creating a delightful contrast.
-
Whipped Cream: A fluffy dollop of whipped cream adds lightness and sweetness, perfect for balancing the tart cherries.
-
Fresh Mint Leaves: Garnishing with mint introduces a refreshing herbal note that enhances the dessert’s sweetness beautifully.
-
Chocolate Sauce Drizzle: For the chocolate lovers out there, a drizzle of warm chocolate sauce creates a decadent twist on this dessert.
-
Homemade Caramel: Caramel sauce drizzled over the cake adds an irresistible richness that pairs wonderfully with the cherry filling.
-
Berry Compote: A fresh berry compote combines tart and sweet notes while adding a vibrant, colorful touch to the presentation.
-
Coffee or Espresso: A cup of rich coffee or espresso provides a bold flavor contrast, enhancing every bite of the sweet cake.
-
Sparkling Water: Complement your dessert with a refreshing sparkling water, adding a bubbly crispness that cleanses the palate.
The Best Ever Cherry Dump Cake Recipe FAQs
How do I choose the best cherries for my dump cake?
Absolutely! Look for dark sweet cherry filling that is thick and glossy without any dark spots or separation. Check the label to ensure it’s made with real fruit for the best flavor. If you’re using fresh cherries, select ones that are firm and plump without blemishes.
What’s the best way to store leftovers of The Best Ever Cherry Dump Cake?
Very! Store your Cherry Dump Cake covered in the refrigerator for up to 2-3 days. Just place it in an airtight container or wrap it tightly with plastic wrap to keep it fresh and moist. If you have large pieces, a layer of foil over the top also works well.
Can I freeze my Cherry Dump Cake, and if so, how?
Of course! To freeze, ensure the cake has cooled completely, then slice it into portions for easier serving later. Wrap each piece tightly in plastic wrap, followed by aluminum foil, and place them in an airtight freezer-safe container. It can be frozen for up to 3 months! When you’re ready to enjoy it, simply thaw overnight in the fridge and reheat if desired.
What should I do if my dump cake is too soggy?
No worries! If you find your Cherry Dump Cake a bit soggy, it might be due to too much filling or not enough baking time. Next time, try draining the cherry filling slightly, or bake it a bit longer, checking for a golden brown color on top. If sogginess occurs after baking, allow the cake to cool slightly, which can help improve its texture.
Are there any dietary considerations to keep in mind for pets or allergies?
Definitely! Ensure no part of this cake is given to pets, especially dogs, due to the sugar and butter content. For allergies, be cautious about the cake mix and cherry filling, as they may contain gluten or allergens like eggs or dairy. Look for gluten-free options for cake mix or fruit fillings without common allergens if serving those with dietary restrictions.

The Best Ever Cherry Dump Cake for Effortless Dessert Bliss
Ingredients
Equipment
Method
- Preheat your oven to 350°F (175°C).
- Lightly spray the bottom and sides of the baking pan with cooking spray.
- Pour the dark sweet cherry fruit filling into the prepared baking pan and spread evenly.
- Combine half of the melted butter with the yellow cake mix until crumbly.
- Evenly sprinkle the cake mix mixture over the layer of cherries.
- Drizzle the remaining melted butter over the top of the cake mix layer.
- Bake for 30-35 minutes until the top is set and lightly golden.
- Allow the cake to cool for a few minutes before serving.
Leave a Reply